This post is intended to be complementary to my previous post on my ski team blog. For all the emotional aspects of this trip and more photos, see that post. Included in this post is the how-to with maps and links (and more photos).
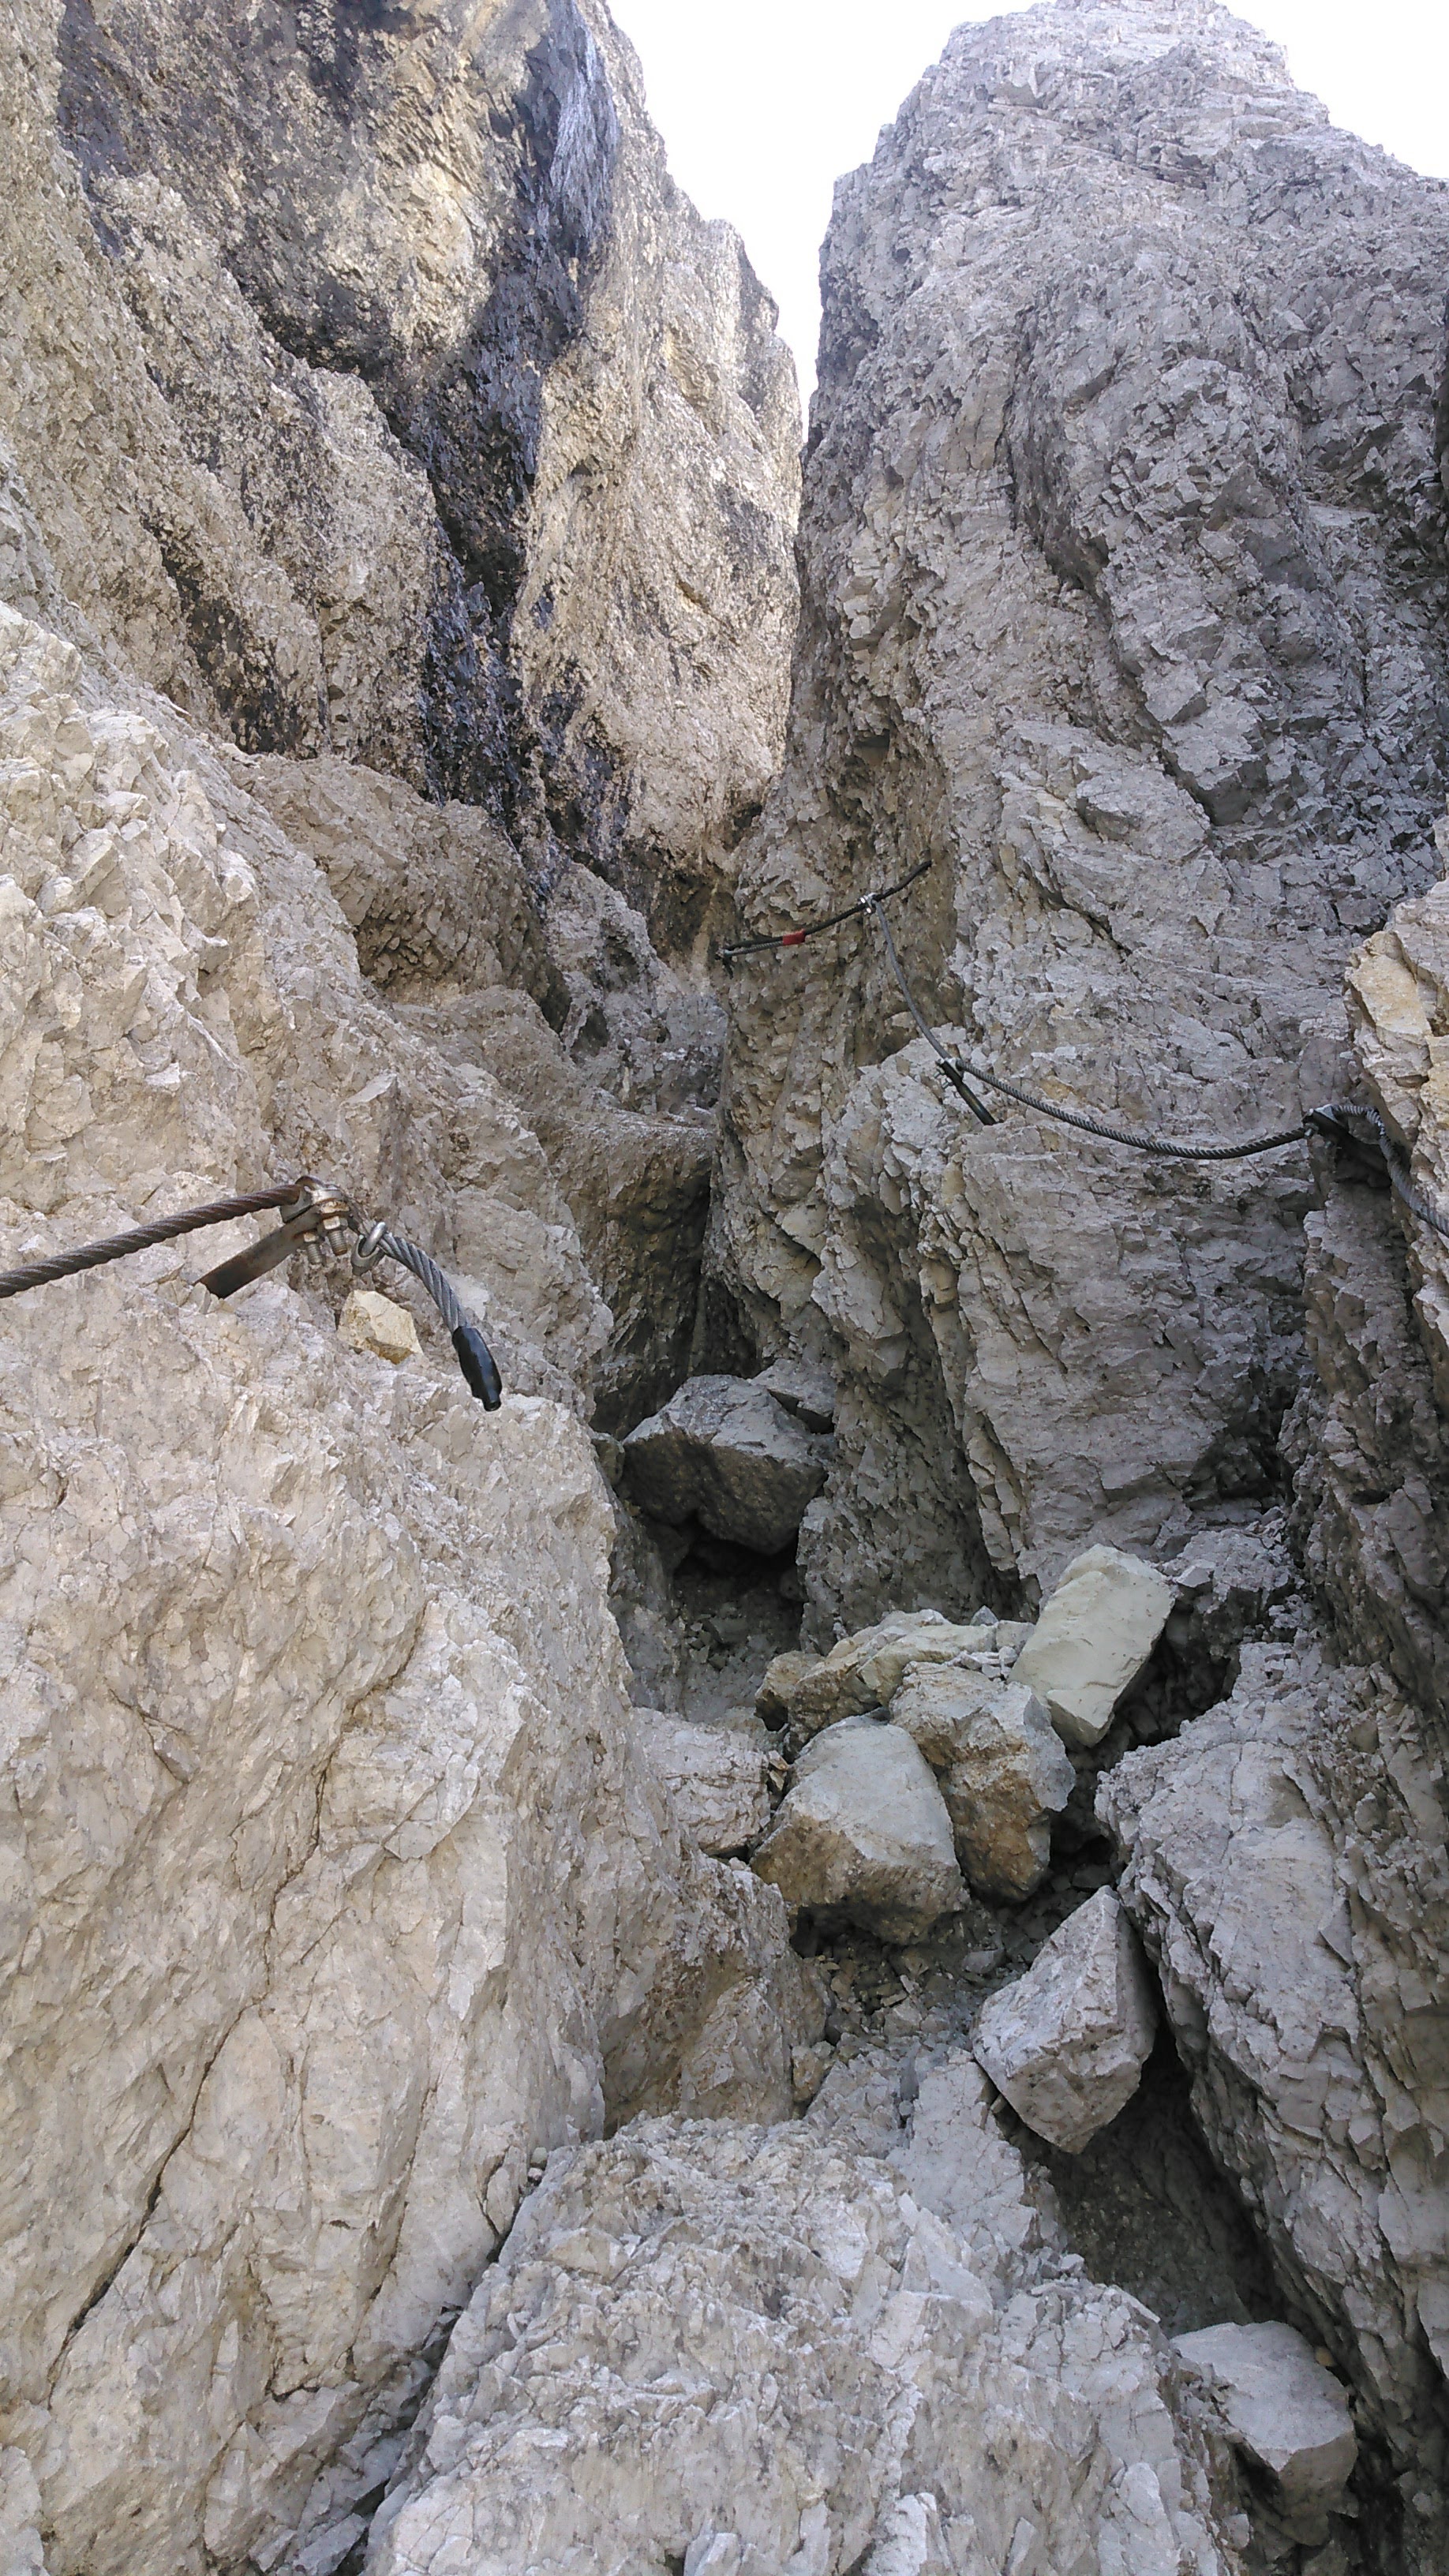
Via Ferrata is Italian and translates into English as “iron path.” It can be described as aid climbing but is essentially bouldering and rock climbing with the optional use of clipping into a cable with occasional ladders, pegs, and rungs on more difficult sections. Every few feet the cable is anchored to the rock with a pieton. One wears a climbing harness and attaches to the cable via two carabiners and a rope. Two carabiners are recommended so that one can be unclipped at a time to move past the pieton to the next section of cable. Many of these ferratas date back to WWI but have been updated throughout the years.
There are a few websites that have info on the Italian via ferrata, my favorite is here. Although this site has info about many many ferratas, it is by no means exhaustive. There are simply ferratas- at least short sections of ferratas- everywhere! The ferratas are rated in terms of difficulty. Different scales are used but in general rating scales use a number and a letter. The numbers are from 1 to 5 with 1 being a walking path, and 5 a rock climbing wall. The letters rank from A through C or F depending on the scale where A is the “least commitment” or exposure and C or F is the “most commitment” or exposure.
There are different ways to use the ferrata. If the ferrata is easy or your skill level good, you can forego using it at all. I’d say most people use the ferrata in the more vertical sections. While it seems like the idea is to boulder or rock climb the route while being clipped-in, in practice this doesn’t work out so well. There are at least four reasons for this. First, the cables often get in your way. Second, after you climb up, the cable is inevitably clipped several feet below you and is unreachable. Third, bouldering and rock climbing are slow going. Fourth, because these routes are popular, it often results in the rock becoming more polished. Hence, most people use, at least to some extent, the pietons, pegs, rungs, and even cable as tools to get them up the mountain. I tend to like to use the cable, at least with one hand to keep my carabiners moving up the cable to the next pieton.
Unlike the mountains in the United States, the Alps are heavily developed with towns, roads, cable cars, chair lifts, and rifugios. It’s pretty much impossible to find true wilderness. This makes for a different experience and almost infinite options in terms of transport.
We bought and used the KOMPASS 617 map, Cortina d’Ampezzo Dolomiti Ampezzane 1:25000. In addition, we used GAIA map on our phone. This trip started on July 19, 2019 and ended on July 27, 2019.
Day 1: Day hike. Ferratas: Ra Gusela, Nuvolau, and Averau
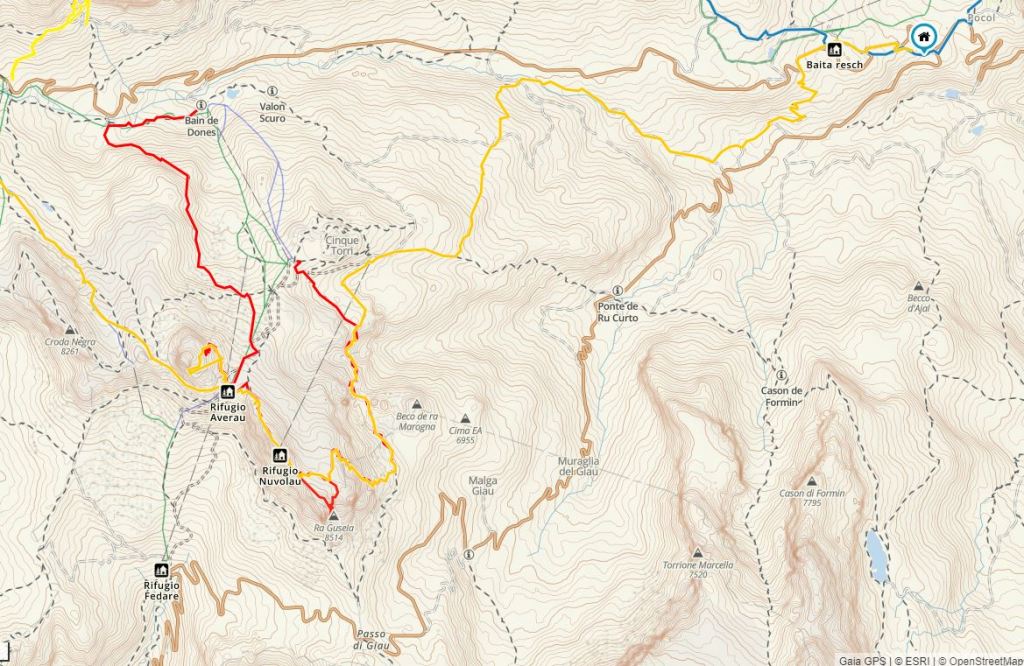
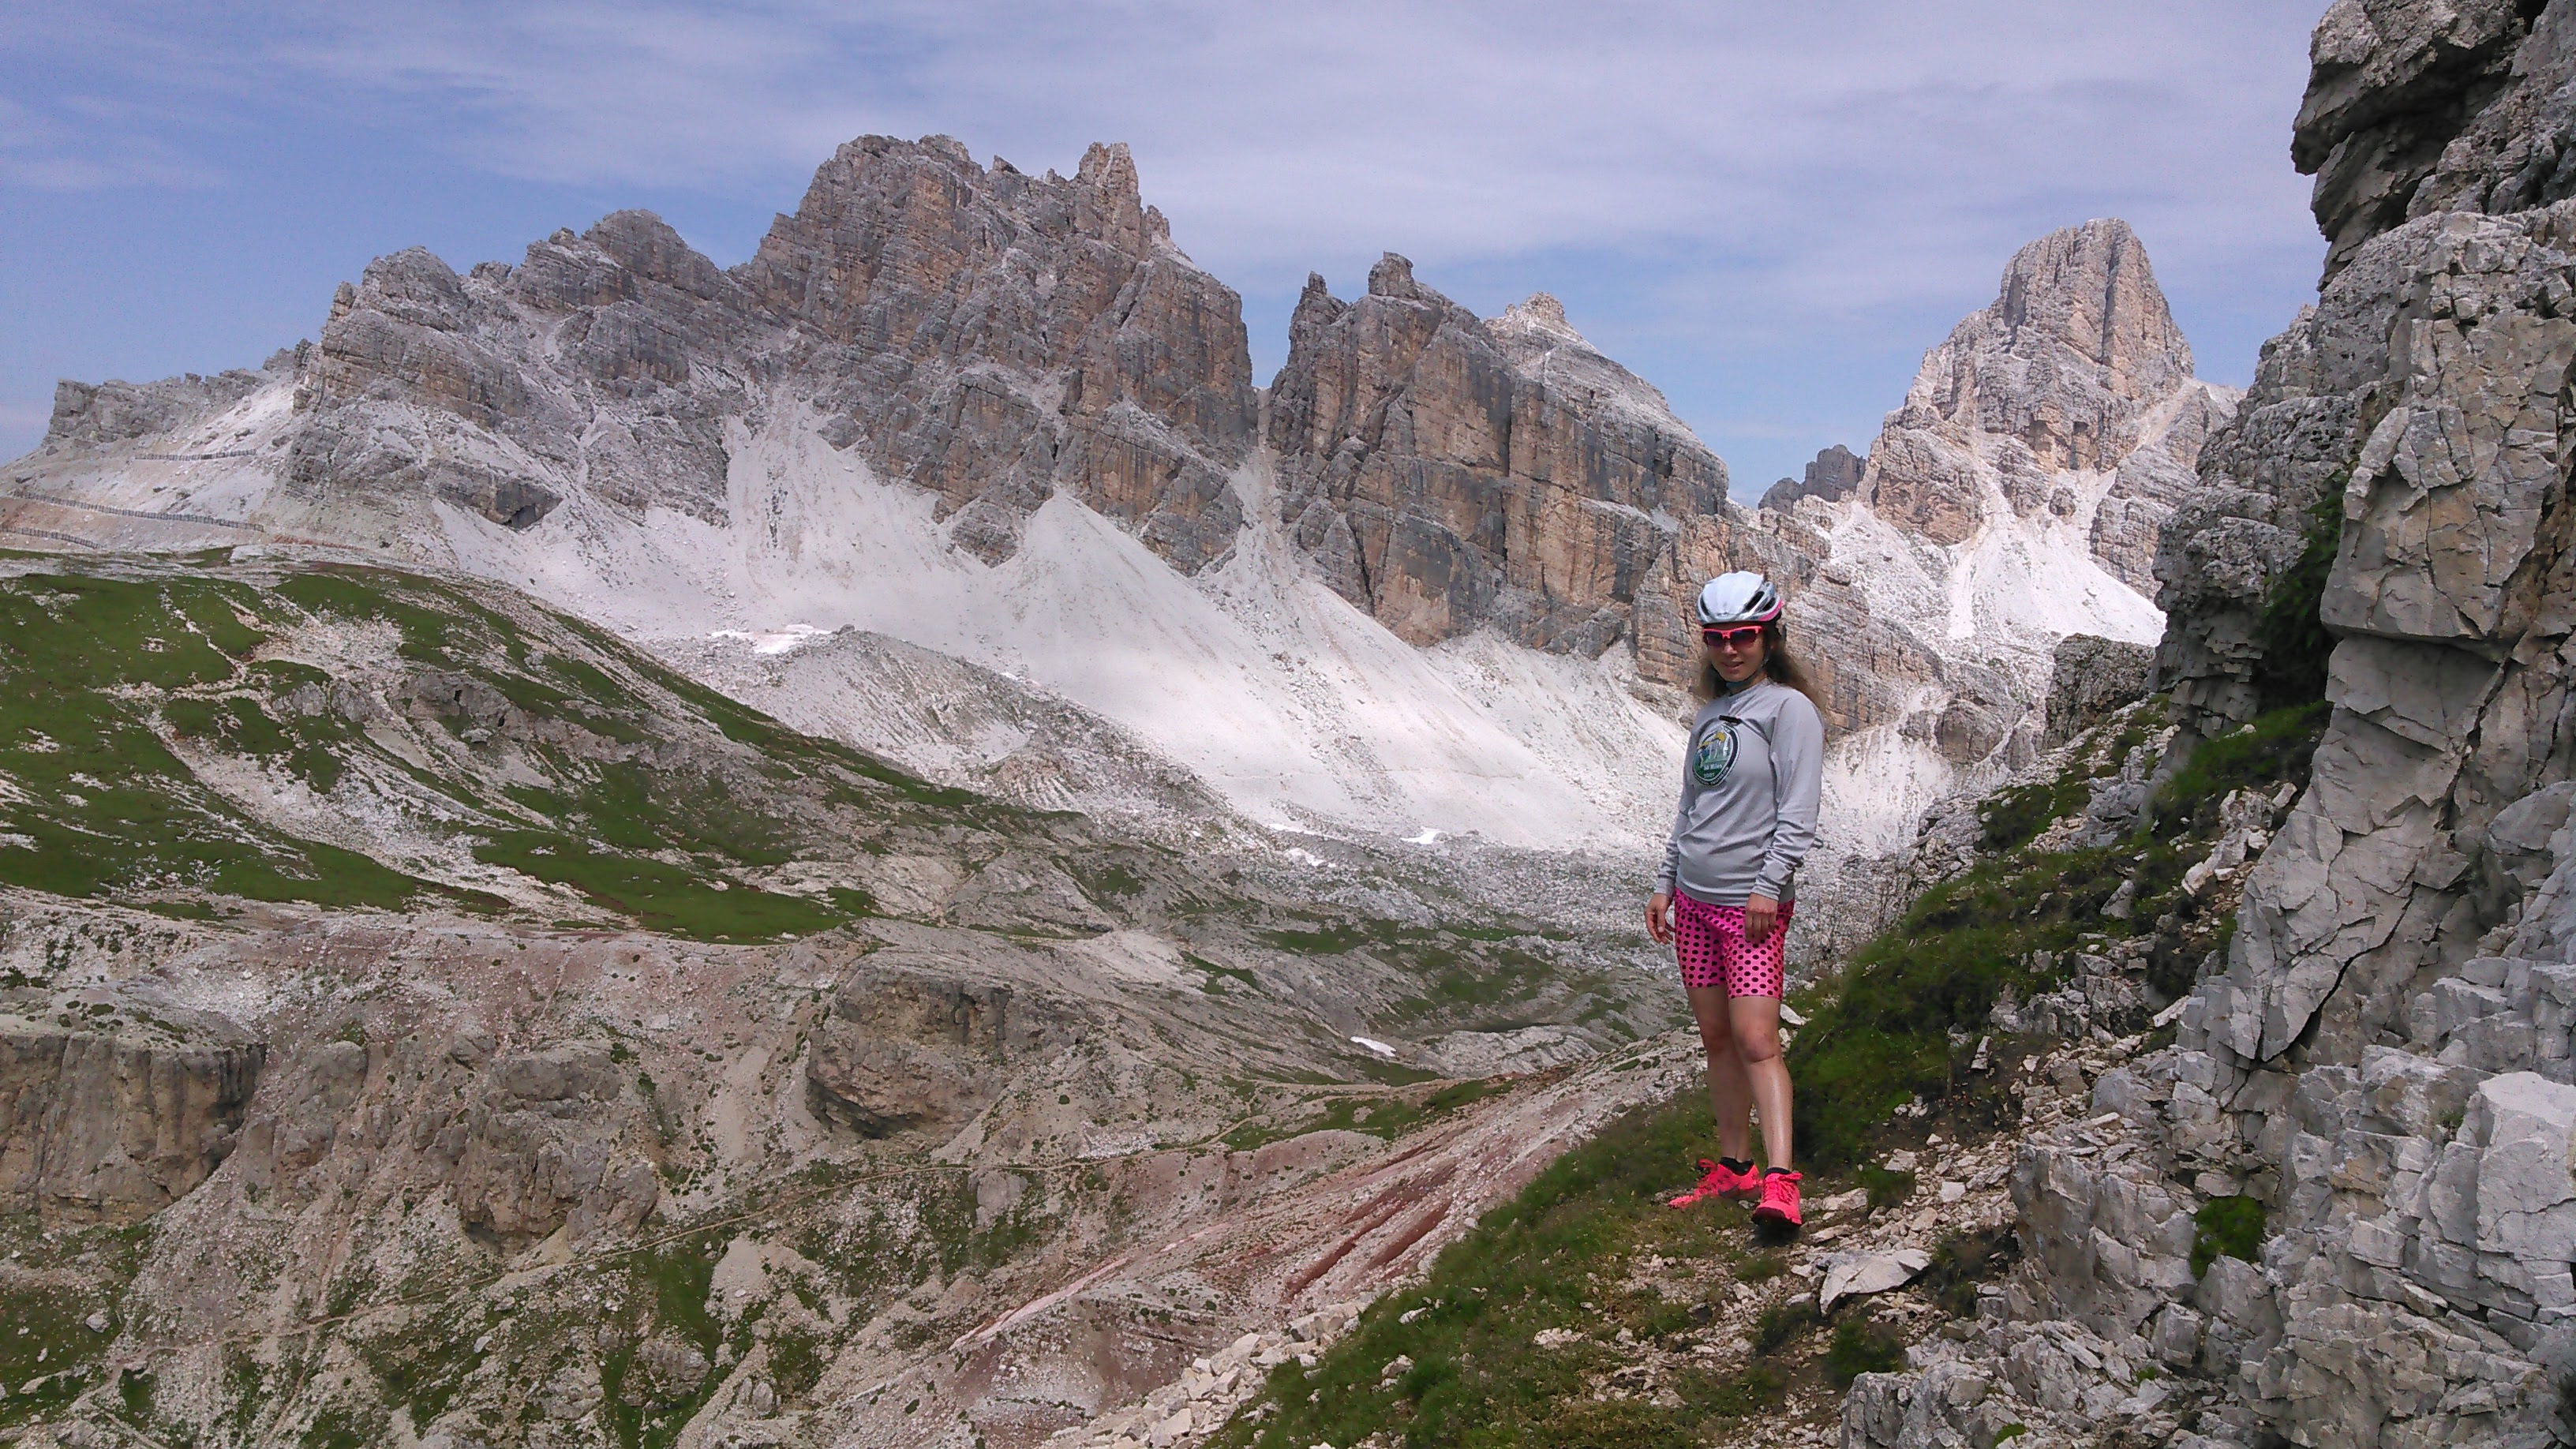
We started out with a bang in terms of mileage, but not necessarily via ferrata difficulty, hiking a big 15 mile route from our hotel. This route included 3 short via ferratas: Ray Gusela, Nuvolau, and Averau.
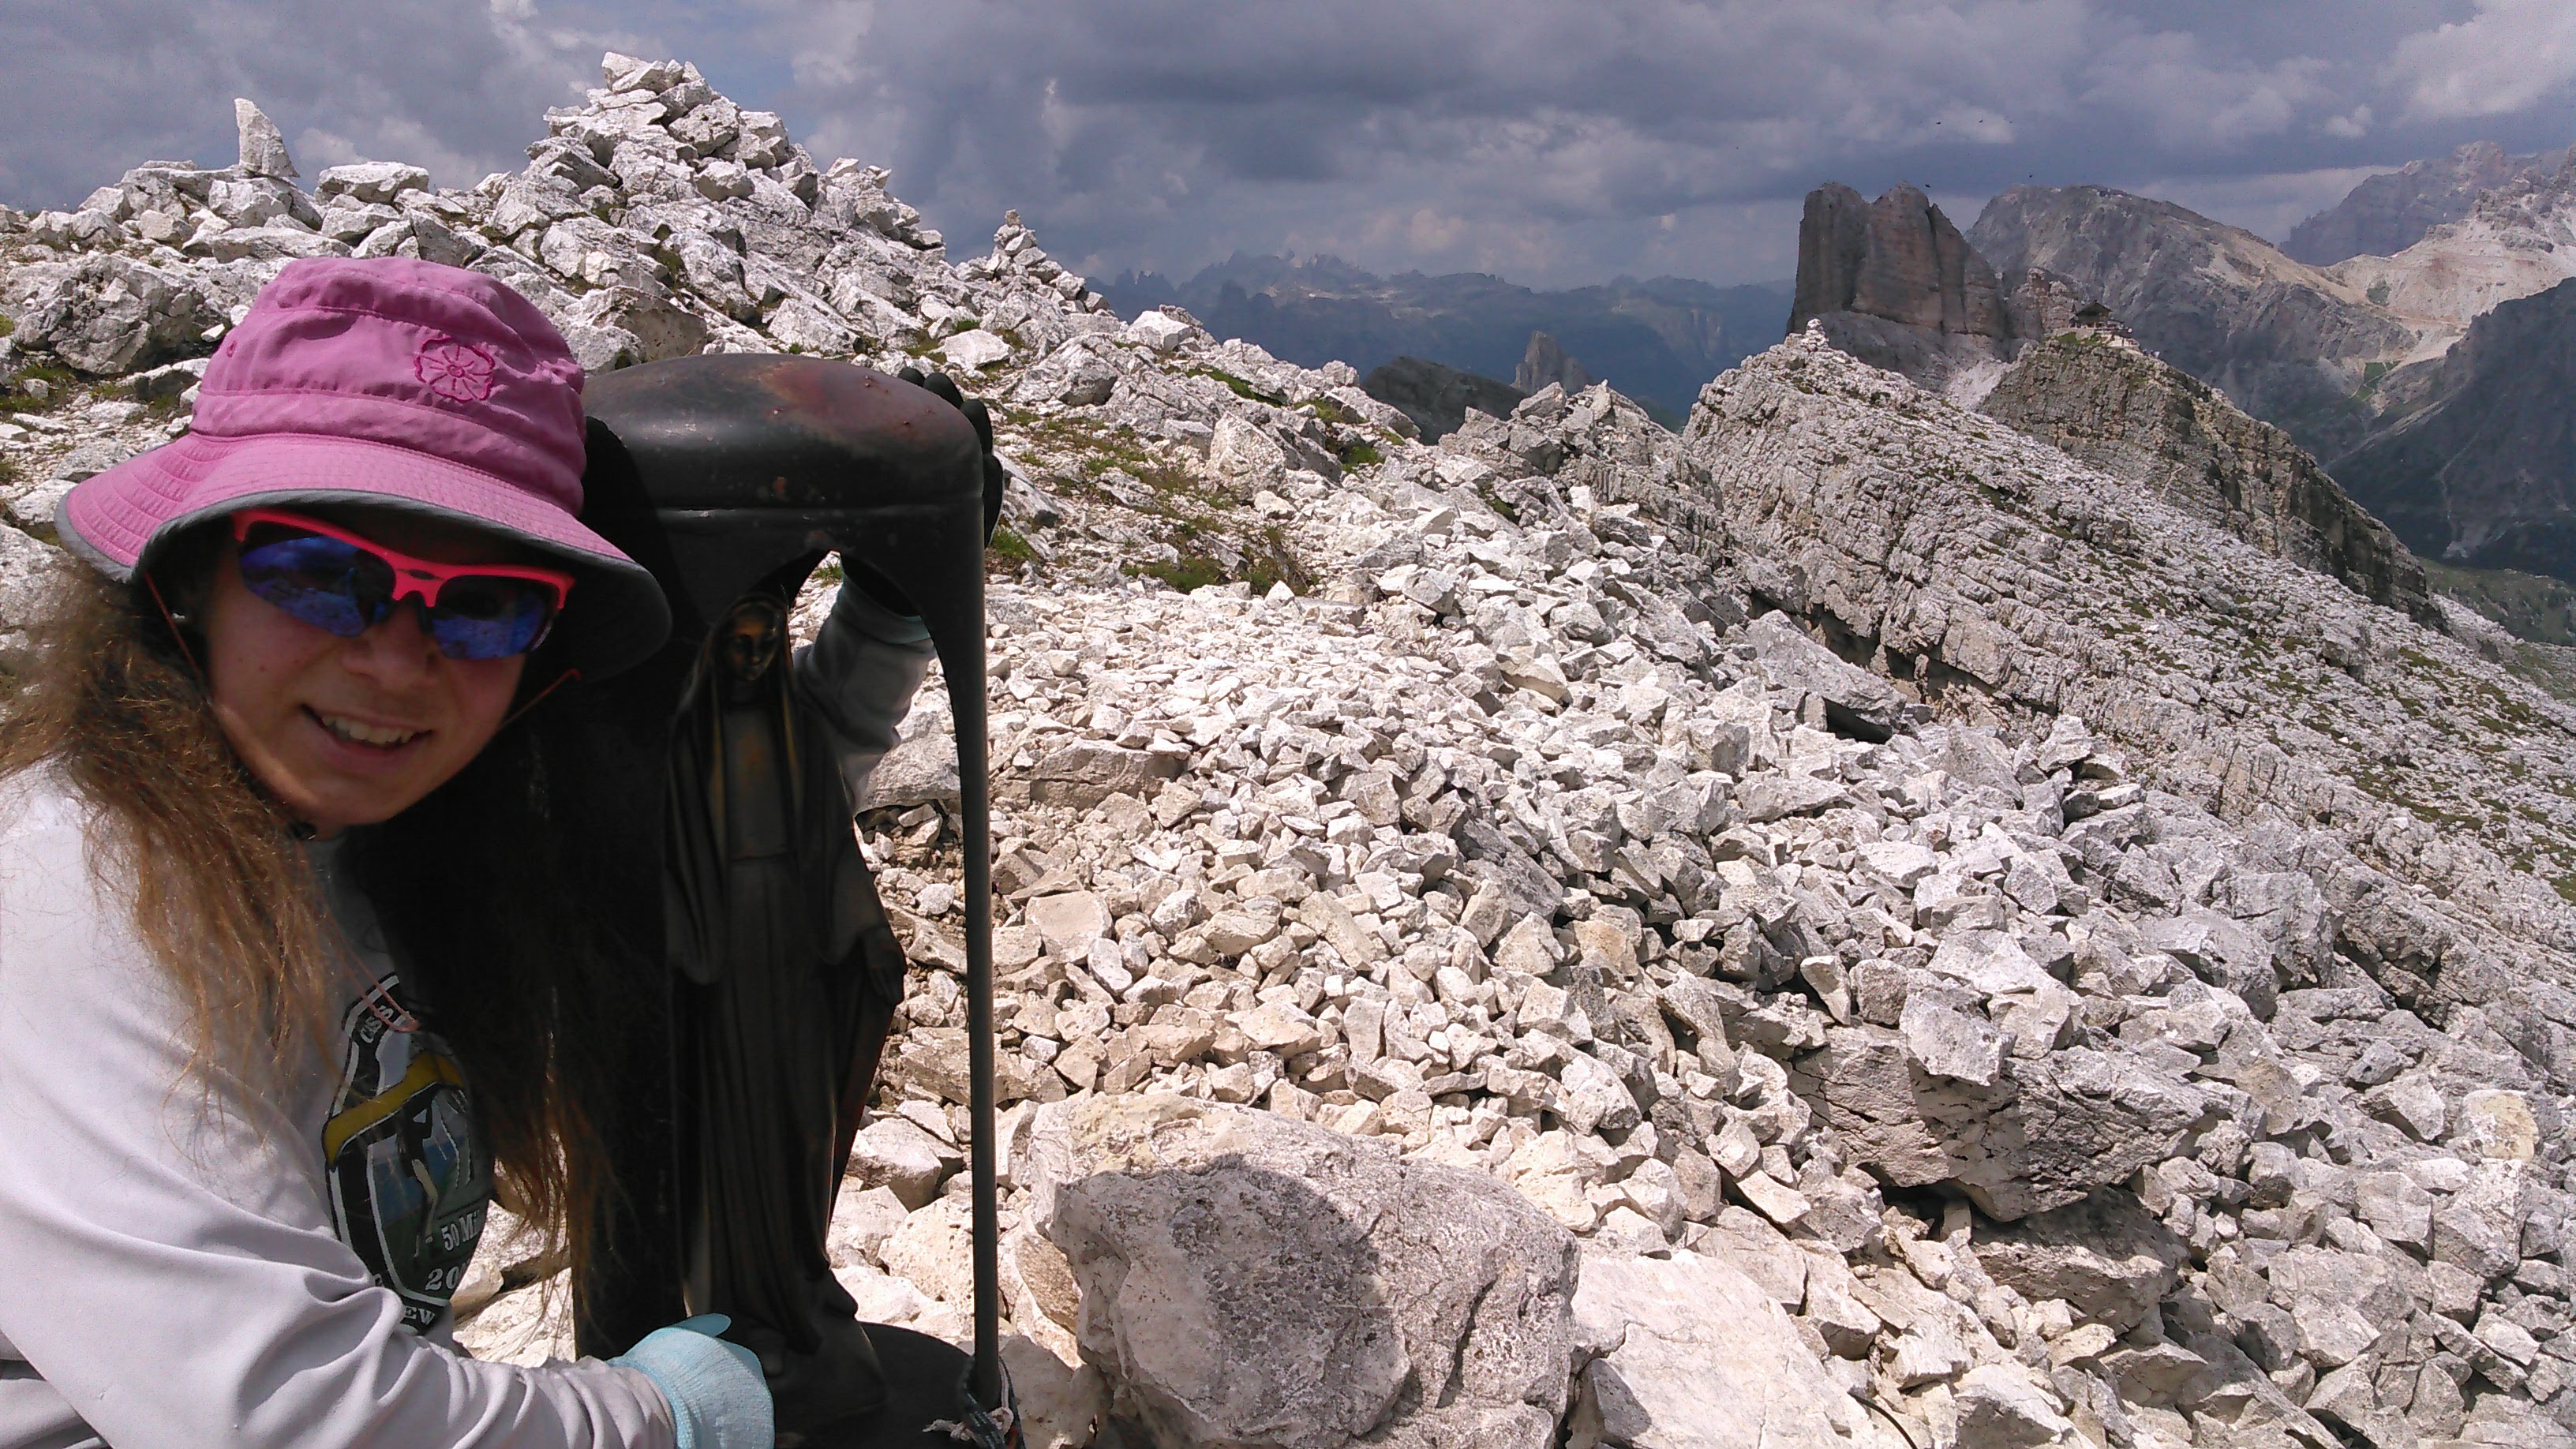
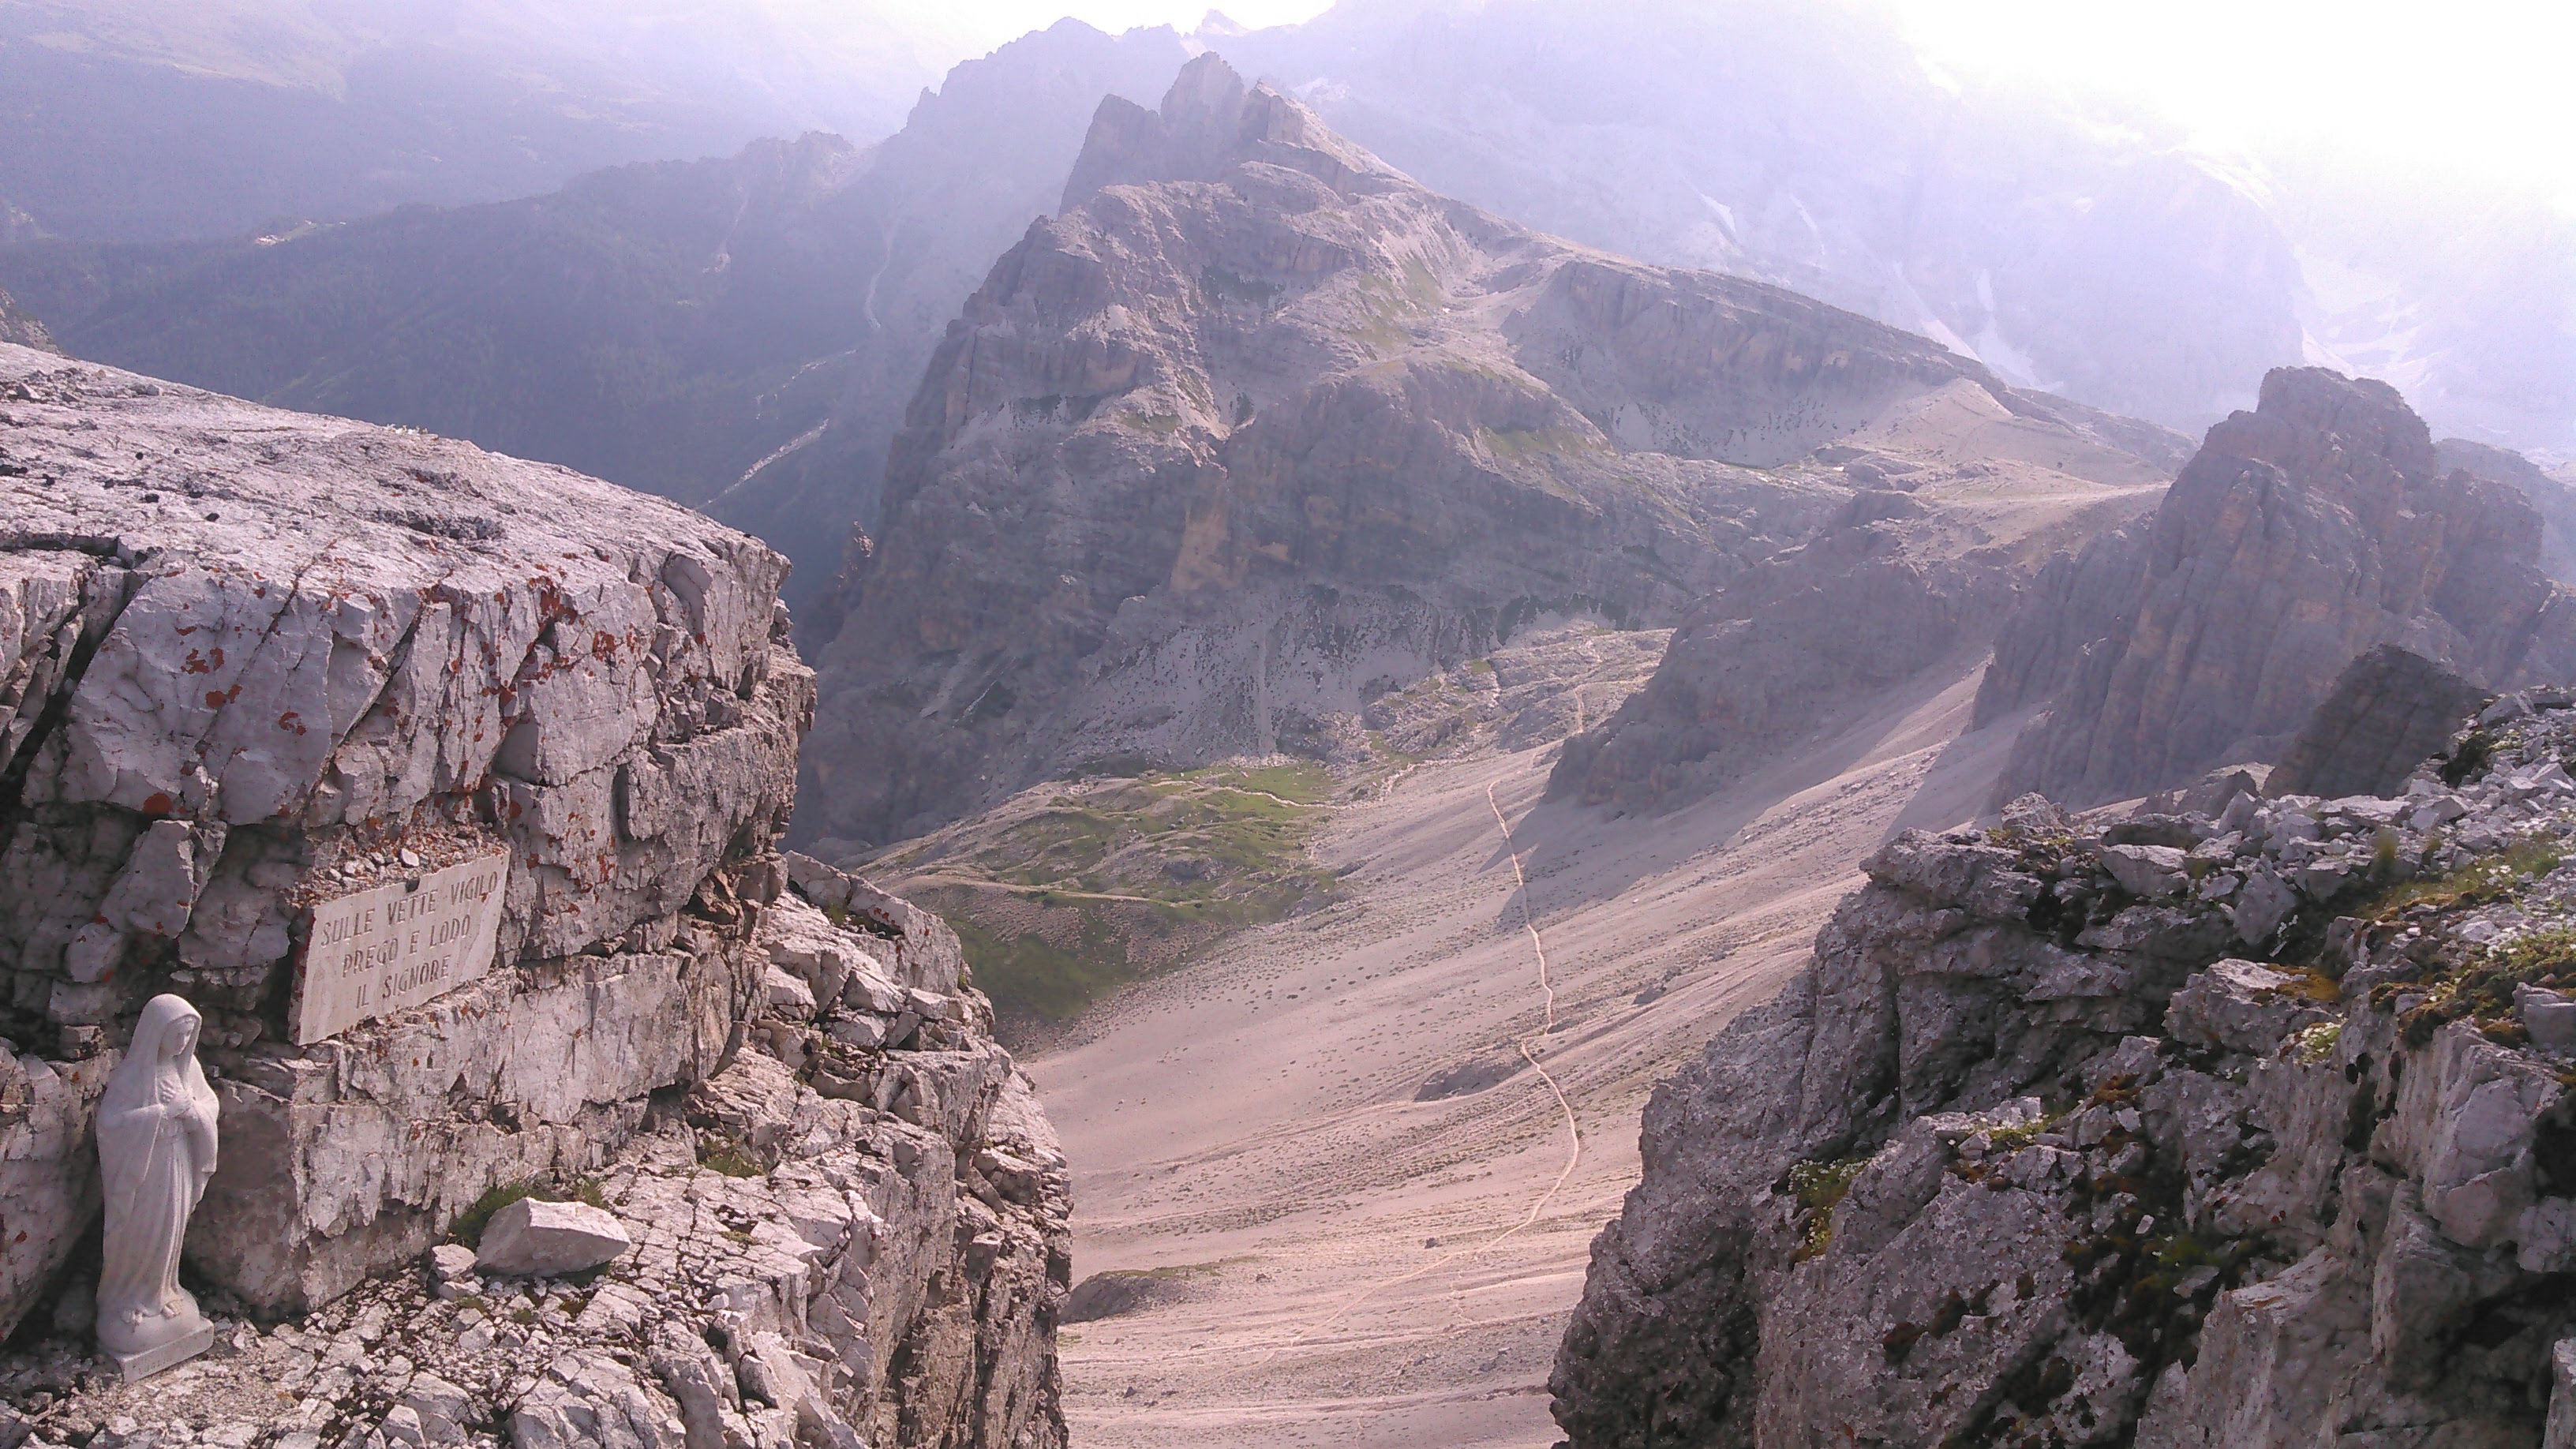
After hiking for 3 hours and 6 miles, we got to the first ferrata, Ray Gusela, located along the east side of Nuvolau which has two prominent summits. This was hardly ferrata-worthy. I put on my climbing harness before we started up this ferrata but never clipped in. It was so easy I would have brought along my 2-year-old niece. This was really a Class III climb and incredibly well protected in a gully. Once done with the ferrata, we detoured to the east summit where of course there was a virgin Mary. This is Italy after all!
From here we headed towards Rifugio Nuvolau. This destination was a late itinerary addition, but once I saw how crazy that Rifugio looked perched up on a cliff, I had to go see it. There was mostly hiking up to the Rifugio with a very small section of ferrata along the south face. I didn’t clip in for this one either.
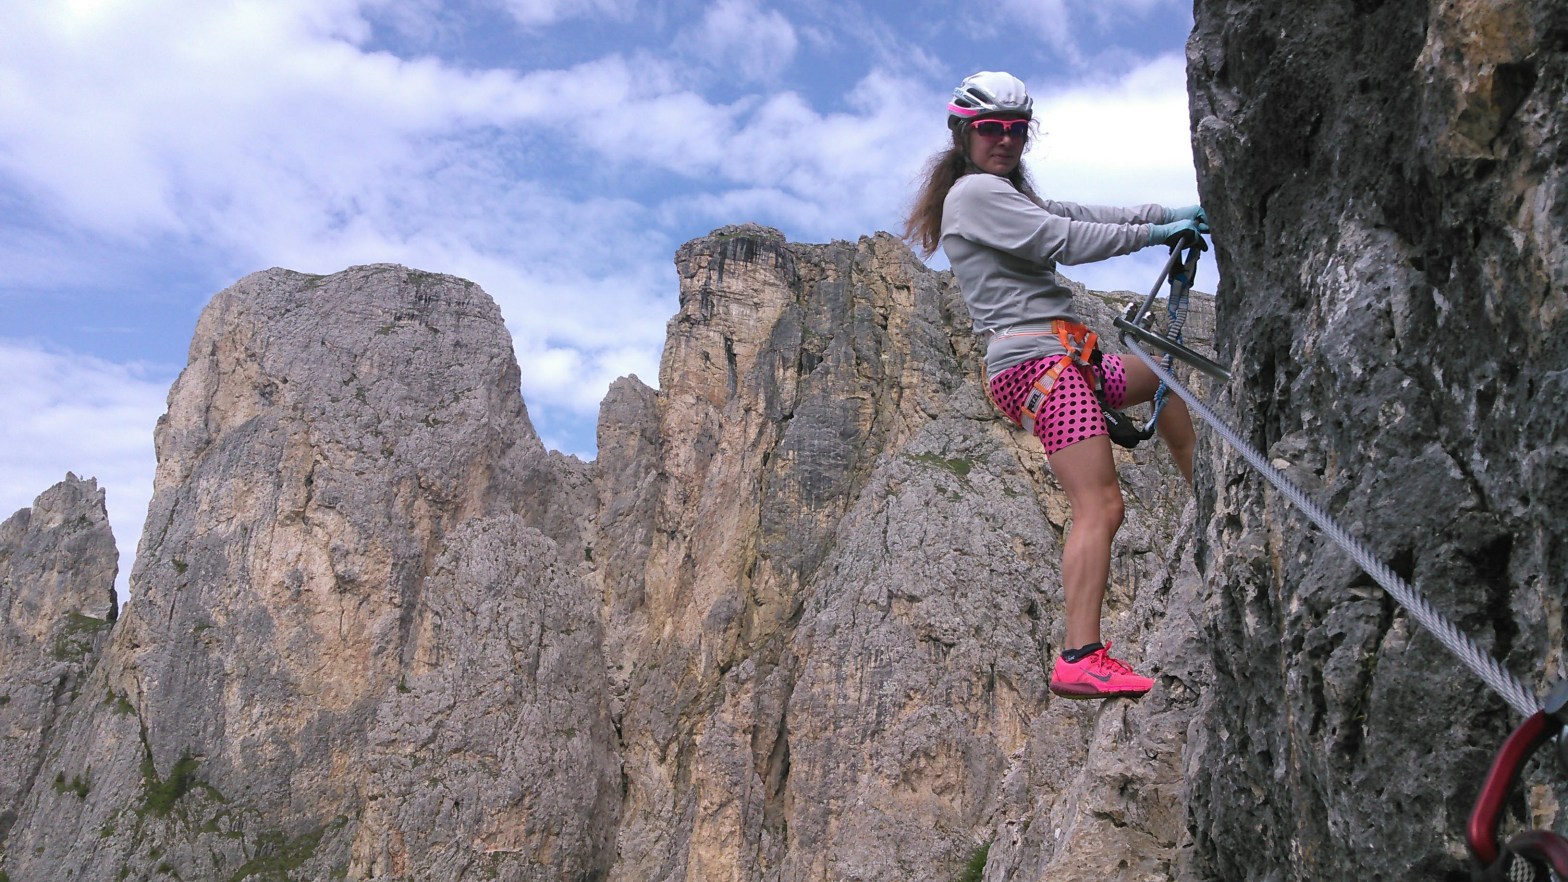
Next we headed to Averau Peak and ferrata, first descending to the col (pass) where Rifugio Averau is located. From here we followed the trail that wraps around the northeast side of the mountain to begin the ferrata which started a bit steep. This ferrata was a bit confusing as the middle section has a separate up and down. Overall this was a popular route and there were lots of people. We went up on the left side that ended up being through a crack! Then we joined up with the combined up and down ferrata route again for a few bouldering moves. I elected not to clip in. Then we arrived on the broad plateau characteristic of this set of mountains and hiked up to the top, even crossing a short section of snow.

The ferrata was a bit trickier on the way down and the “down” route was more exposed. I definitely clipped in for this section, but again, it was quite short.
Now we still had a long way back to our hotel. Erik had wanted to take a chair lift and then the bus back, but we both accidentally left our money in the hotel, so we hiked. This obviously got super long but it was rewarding to complete the hike and once back to our hotel we could see how far we’d gone from our balcony.
Day 2: Day hike. Ferratas: Punta Anna and Oliveri
It was now time to get serious in terms of via ferrata as we set out to do the Punta Anna and Oliveri. The Punta Anna is one of the more difficult ferratas with a rating of 5C. Given I like to get as much exercise as possible, we hiked up to this ferrata from our hotel- a hike of 3.5 miles before we even got to the ferrata. The Punta Anna was a mix of easy and hard, or more like exposed. The exposed sections were always super short, but dramatic!
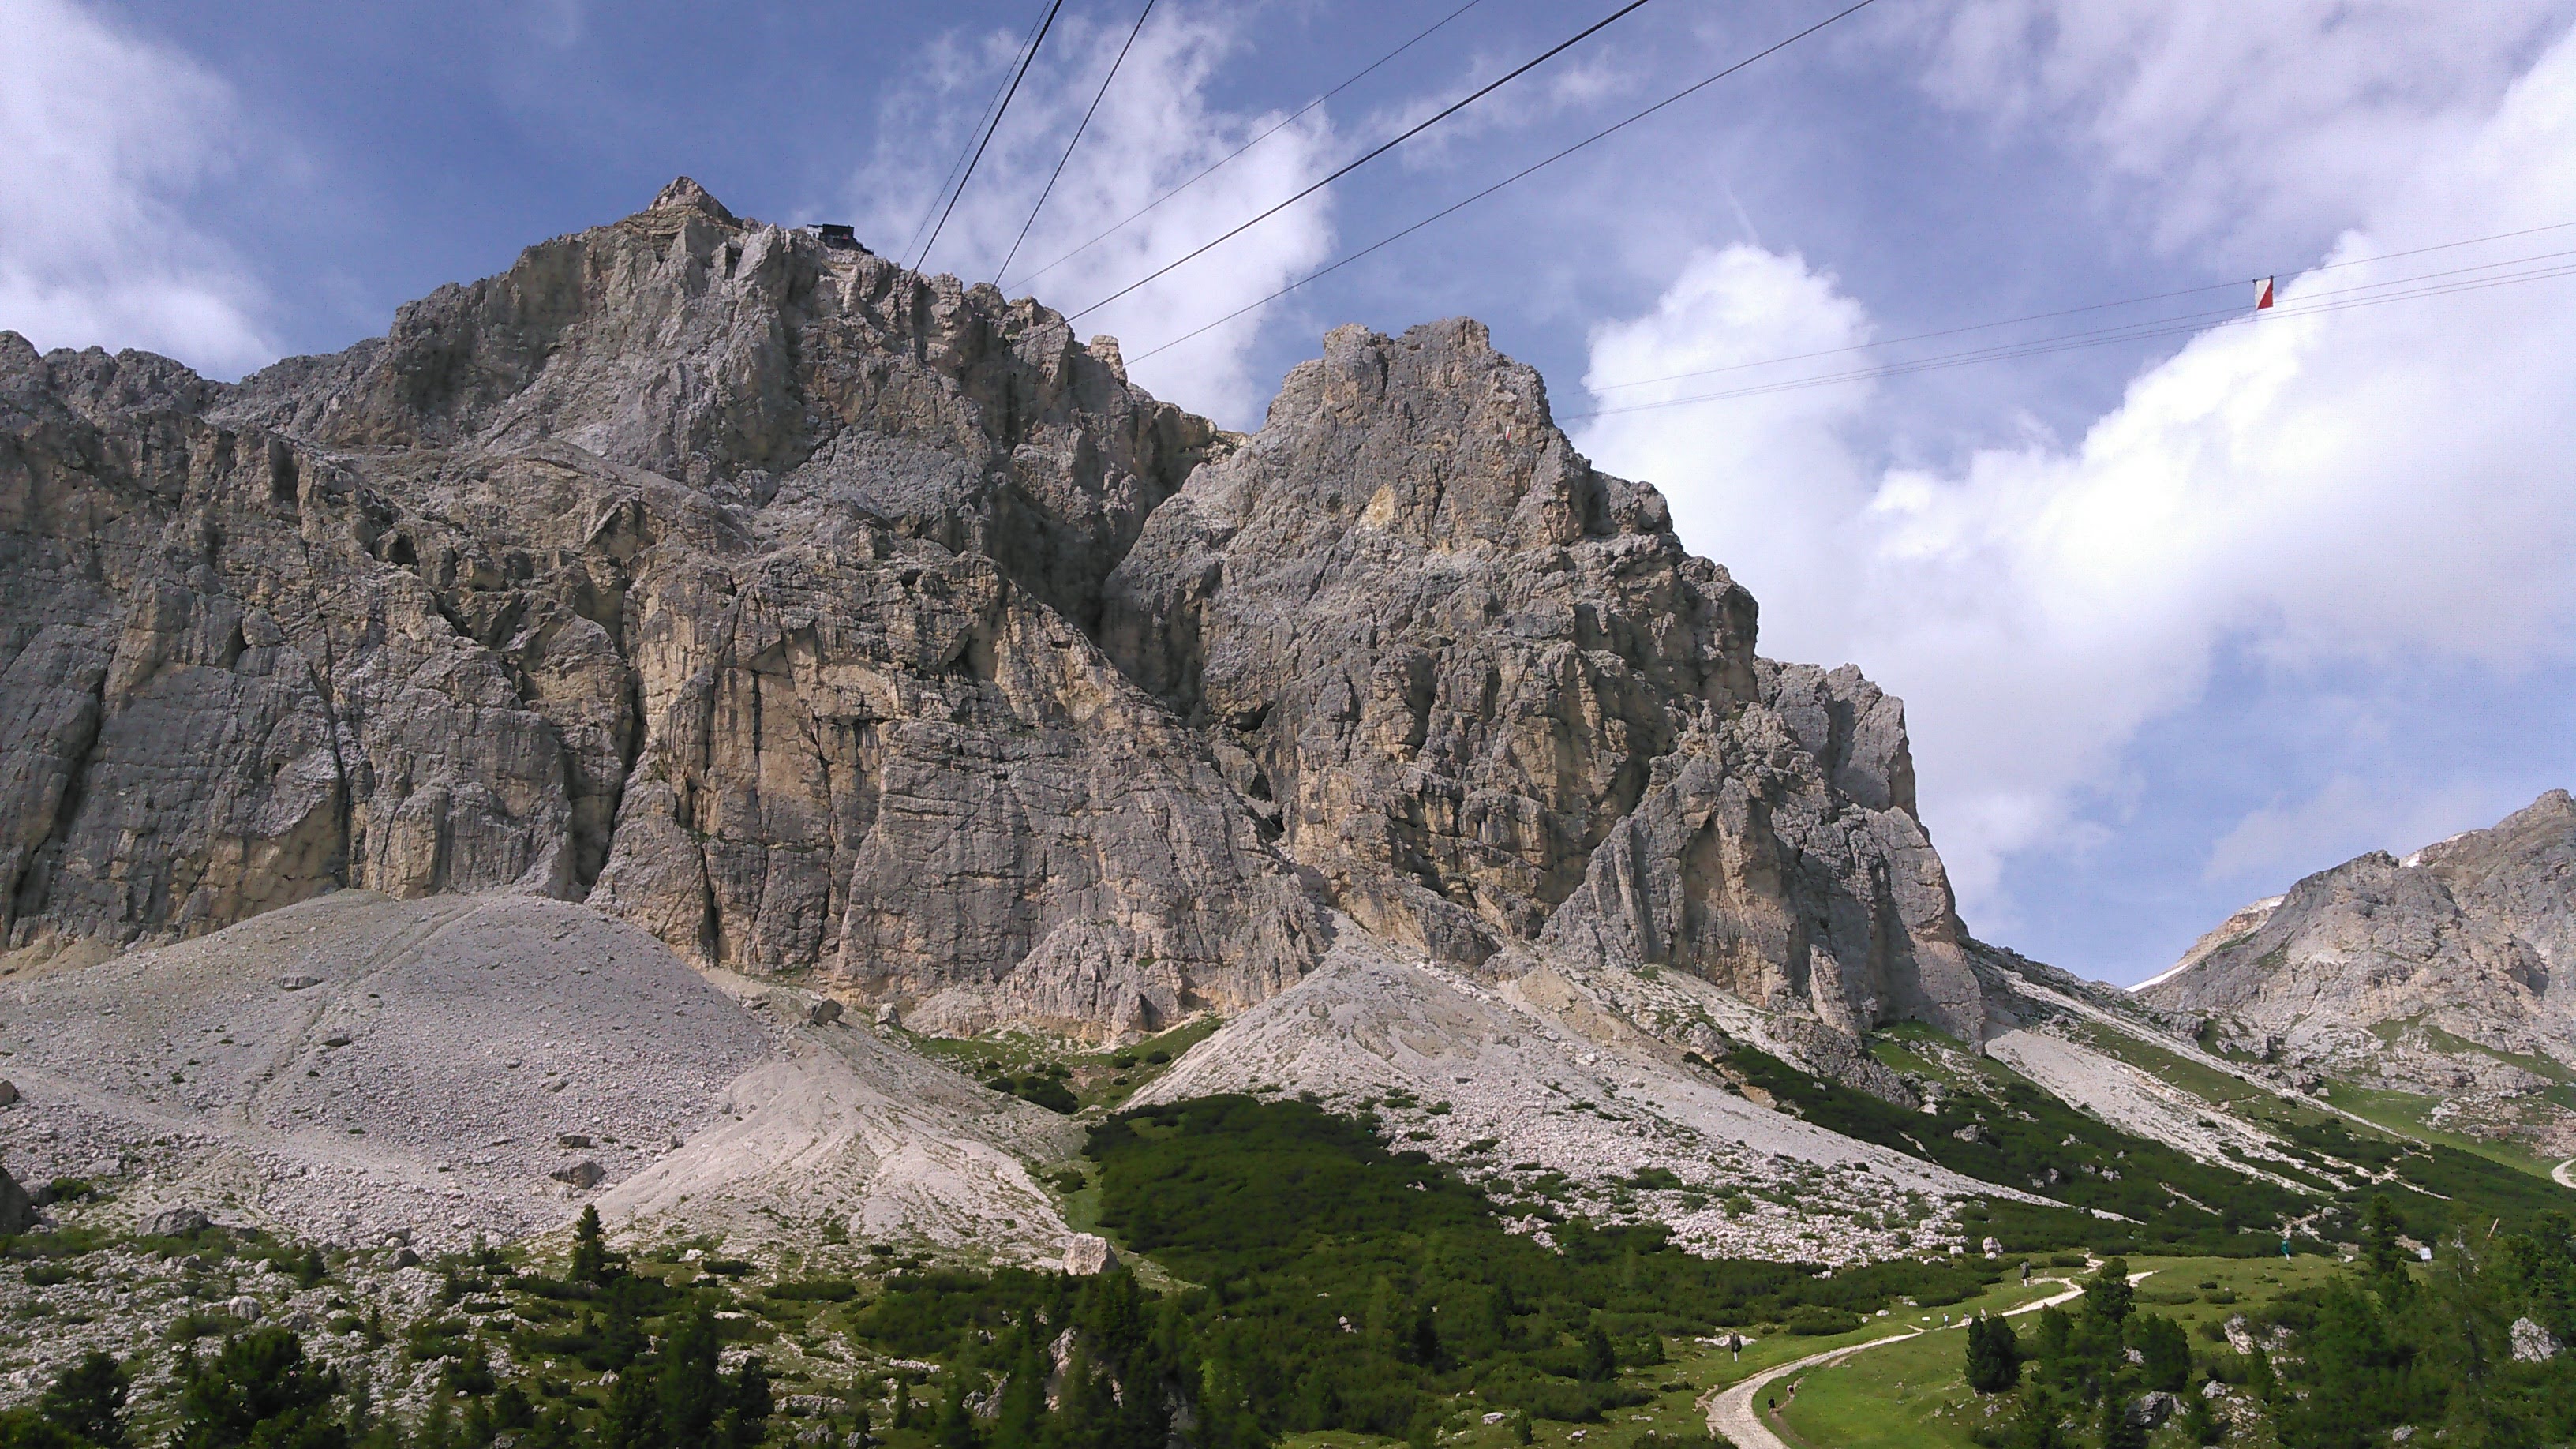
We weren’t sure if we could make it all the way to the top as this was a long ferrata and the weather forecast was less than ideal. The top of the mountain was in the clouds almost the whole day and the best way down was via a cable car that closed around 4 pm. Hence, we took a bailout loop route down the Ferrata Oliveri. This was quite a straight forward ferrata, even for going down. After getting off the ferrata, we were headed into the town of Cortina, some 3,000 feet below us. It was a long walk down that we broke up with one pricey chairlift. Seems they know how to work the tourist dollar!


Had the weather been better and had we gotten a bit earlier start, perhaps we could have made it to the top, but we really needed to get up there earlier. It’s also worth noting that many Italians do not speak English. I ended up speaking to an Italian in broken French, regarding our option of continuing versus going down early, as that was the only language we had in common.

Day 3: Day hike. Ferratas: Alpini and Lagazuoi
This was our “easy” day that I described well in my previous blog post. We did 2 ferratas: Alpini and Lagazuoi.


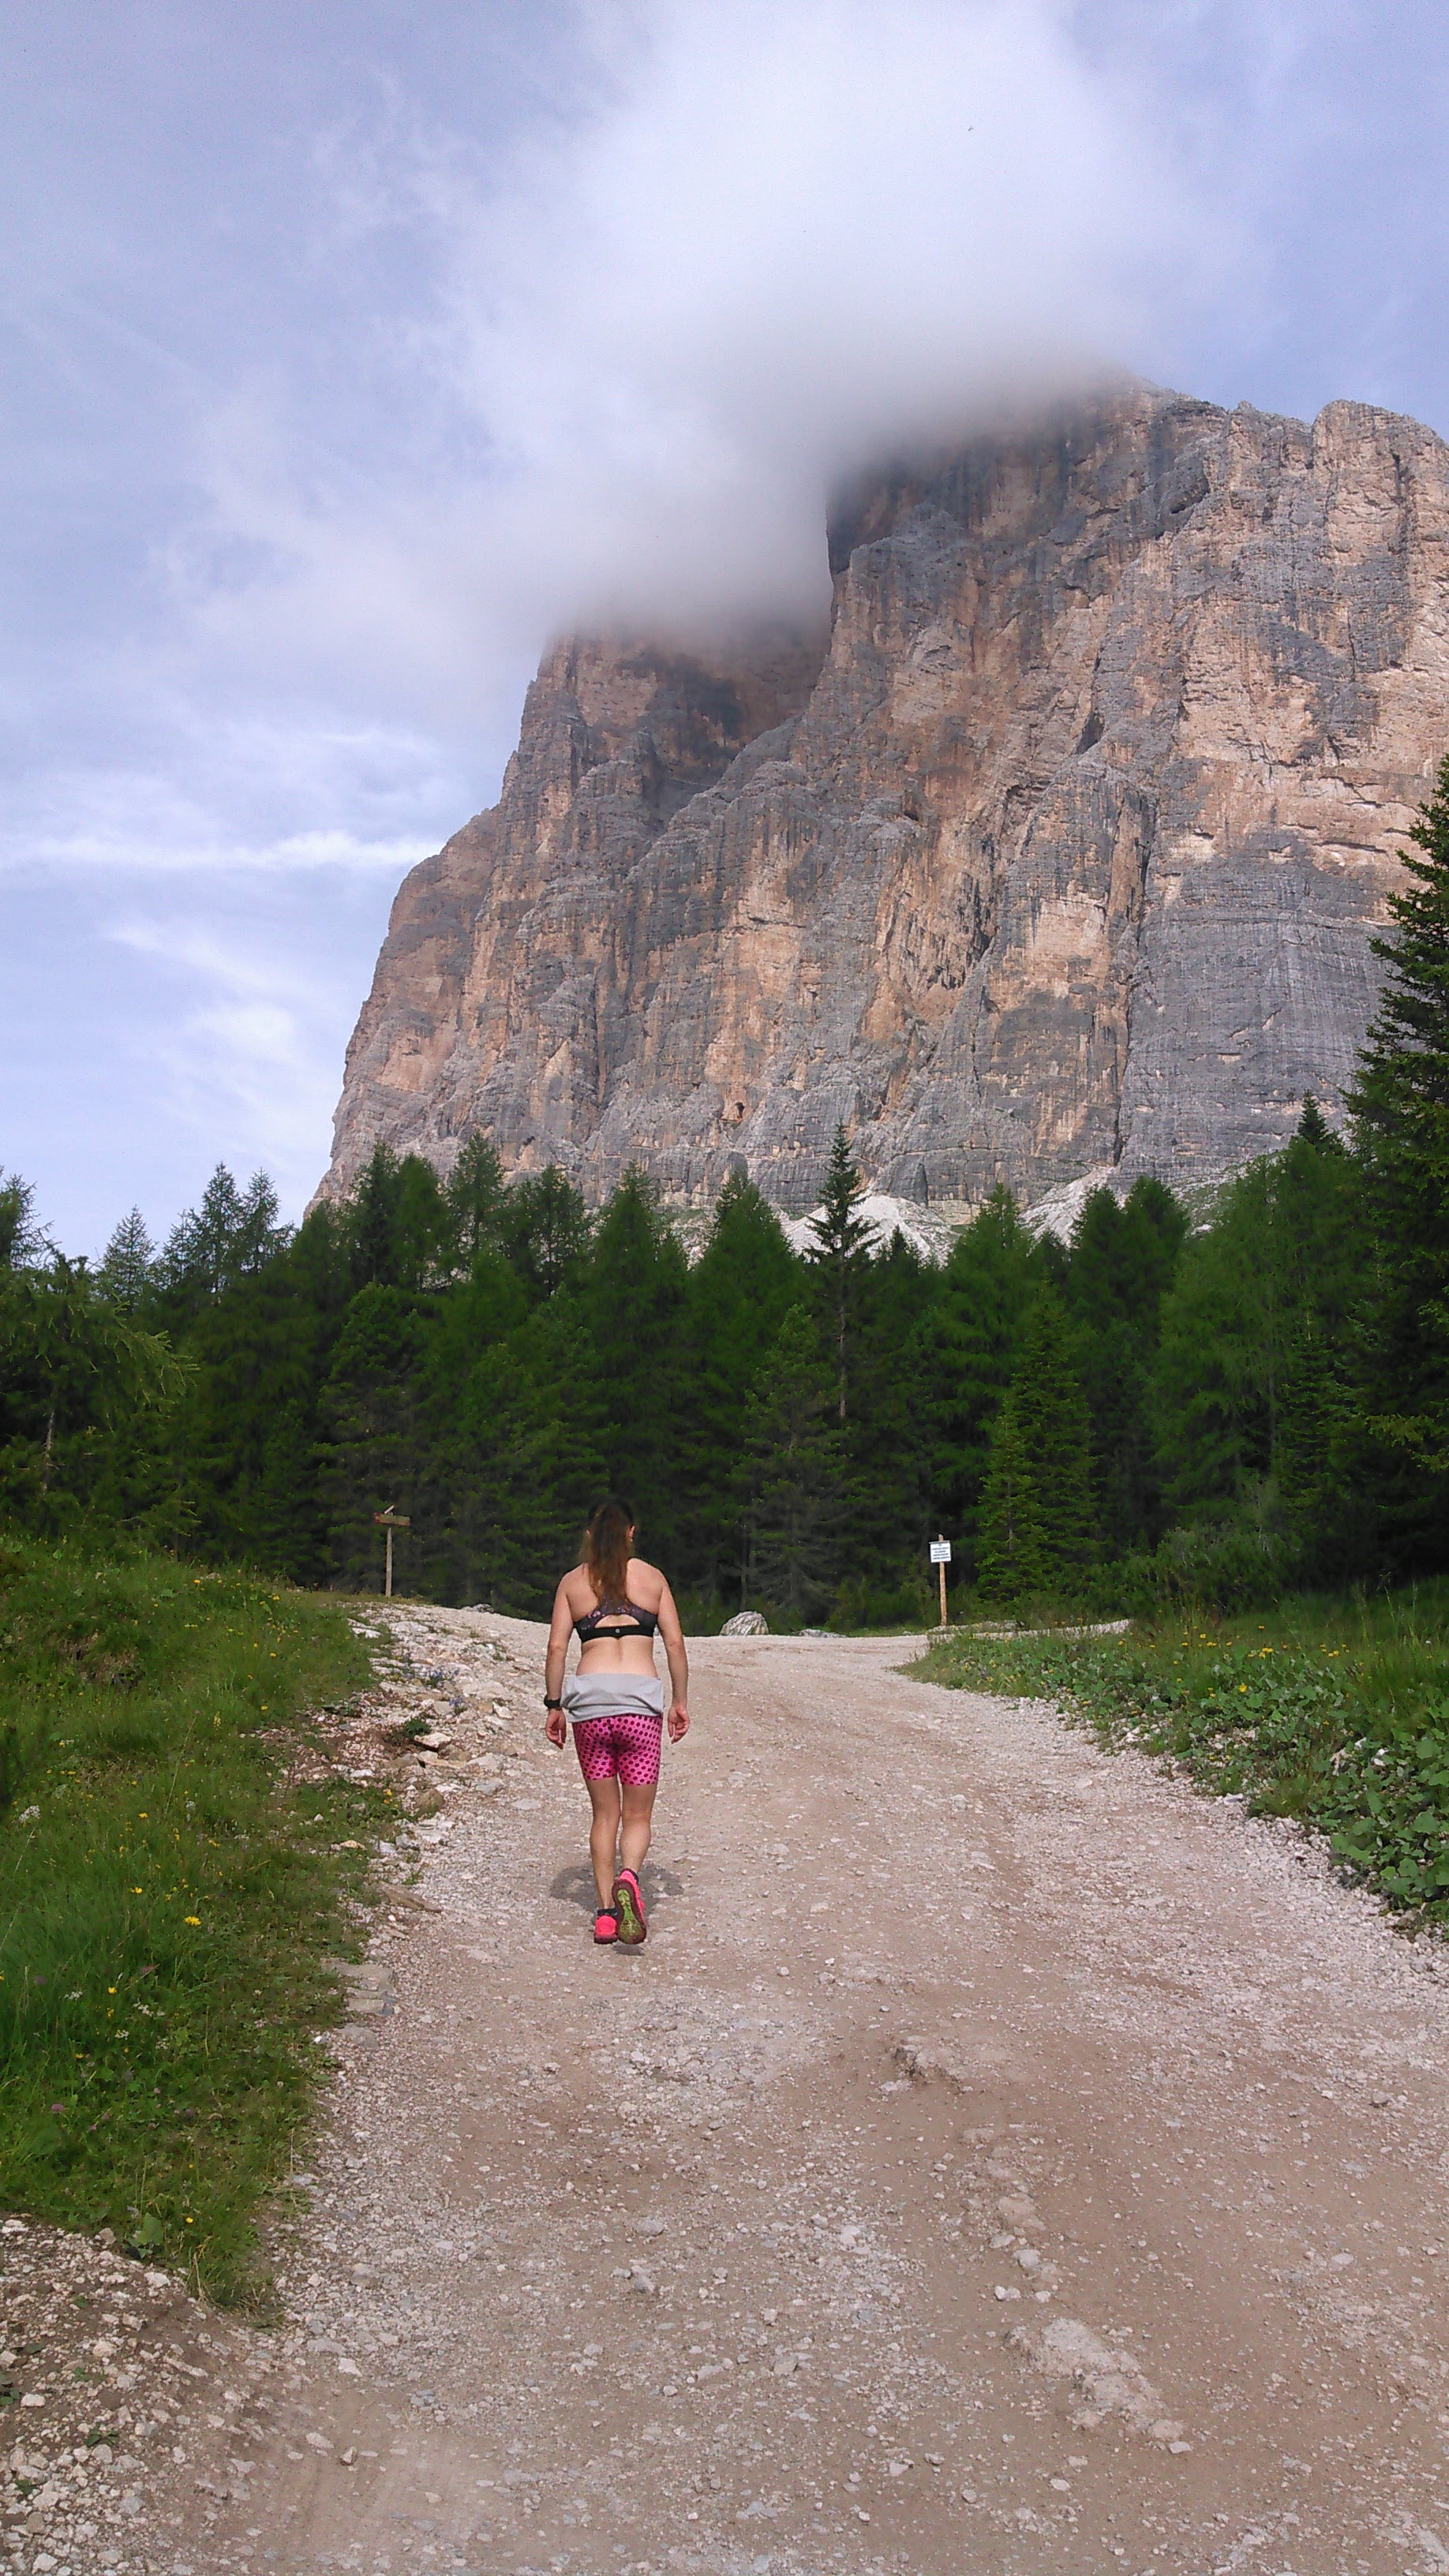
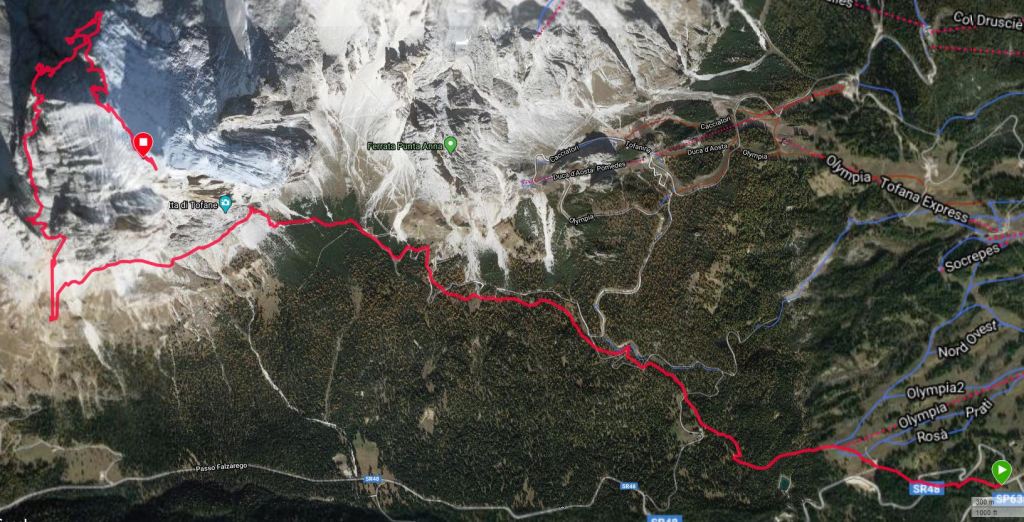
Day 4: Day hike. Ferrata Lipelli up the Tofana di Rozes

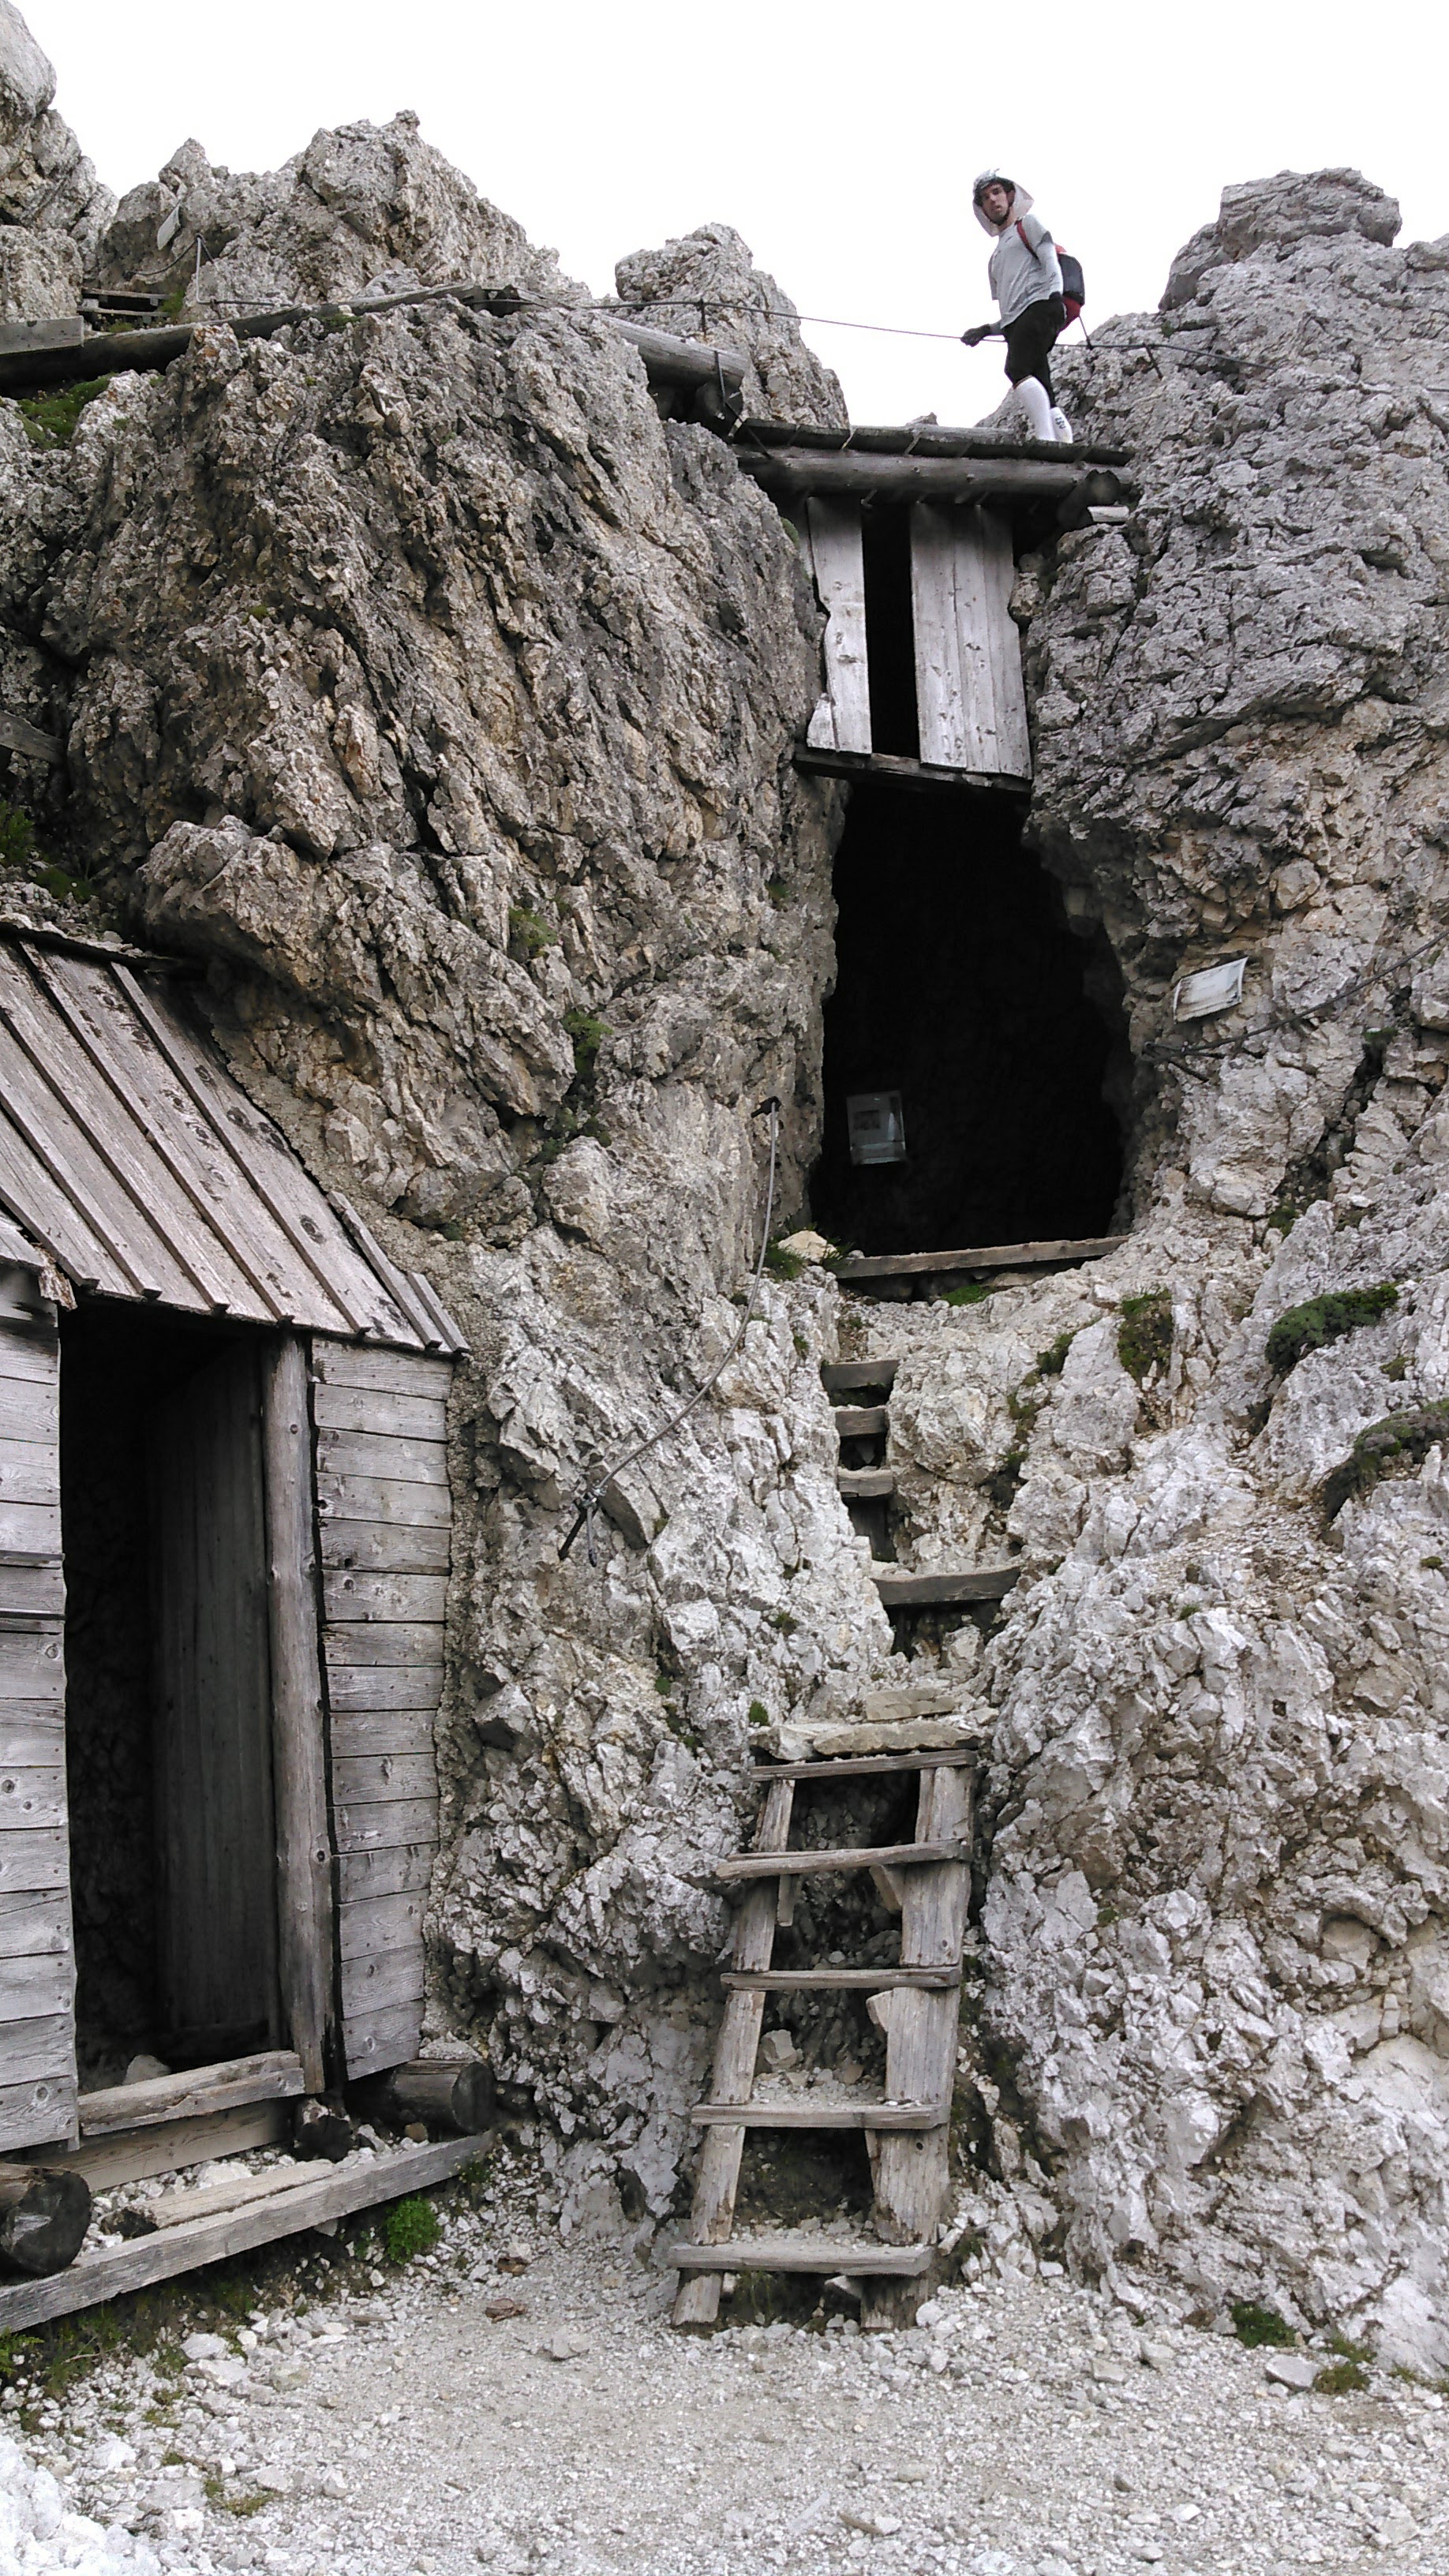
We hiked up to the start of and then did the Ferrata Lipelli, as previously described. After the tunnel we had to cross a couple snowfields. These were a bit scary as it looked like if we slipped out and started sliding down them we’d fall off a cliff! Fortunately it was easy to kick in steps in the snow and they felt relatively safe. The ferrata was quite exposed but not too challenging. There were short sections where I had to figure out how to get up the mountain, but mostly it was easy, although, constantly exposed. These might be called “problems” by the bouldering crowd. While these can be fun, after doing them for hours they become quite tedious.
This is likely to be a really really long day unless you don’t clip in very much or go super fast. Erik and I mostly maintained a decent pace, but it still took us hours. In general, if I feel safe in a particular area and the bouldering is good, I don’t clip in but this route was pretty exposed and so I spent most of my time clipped in.
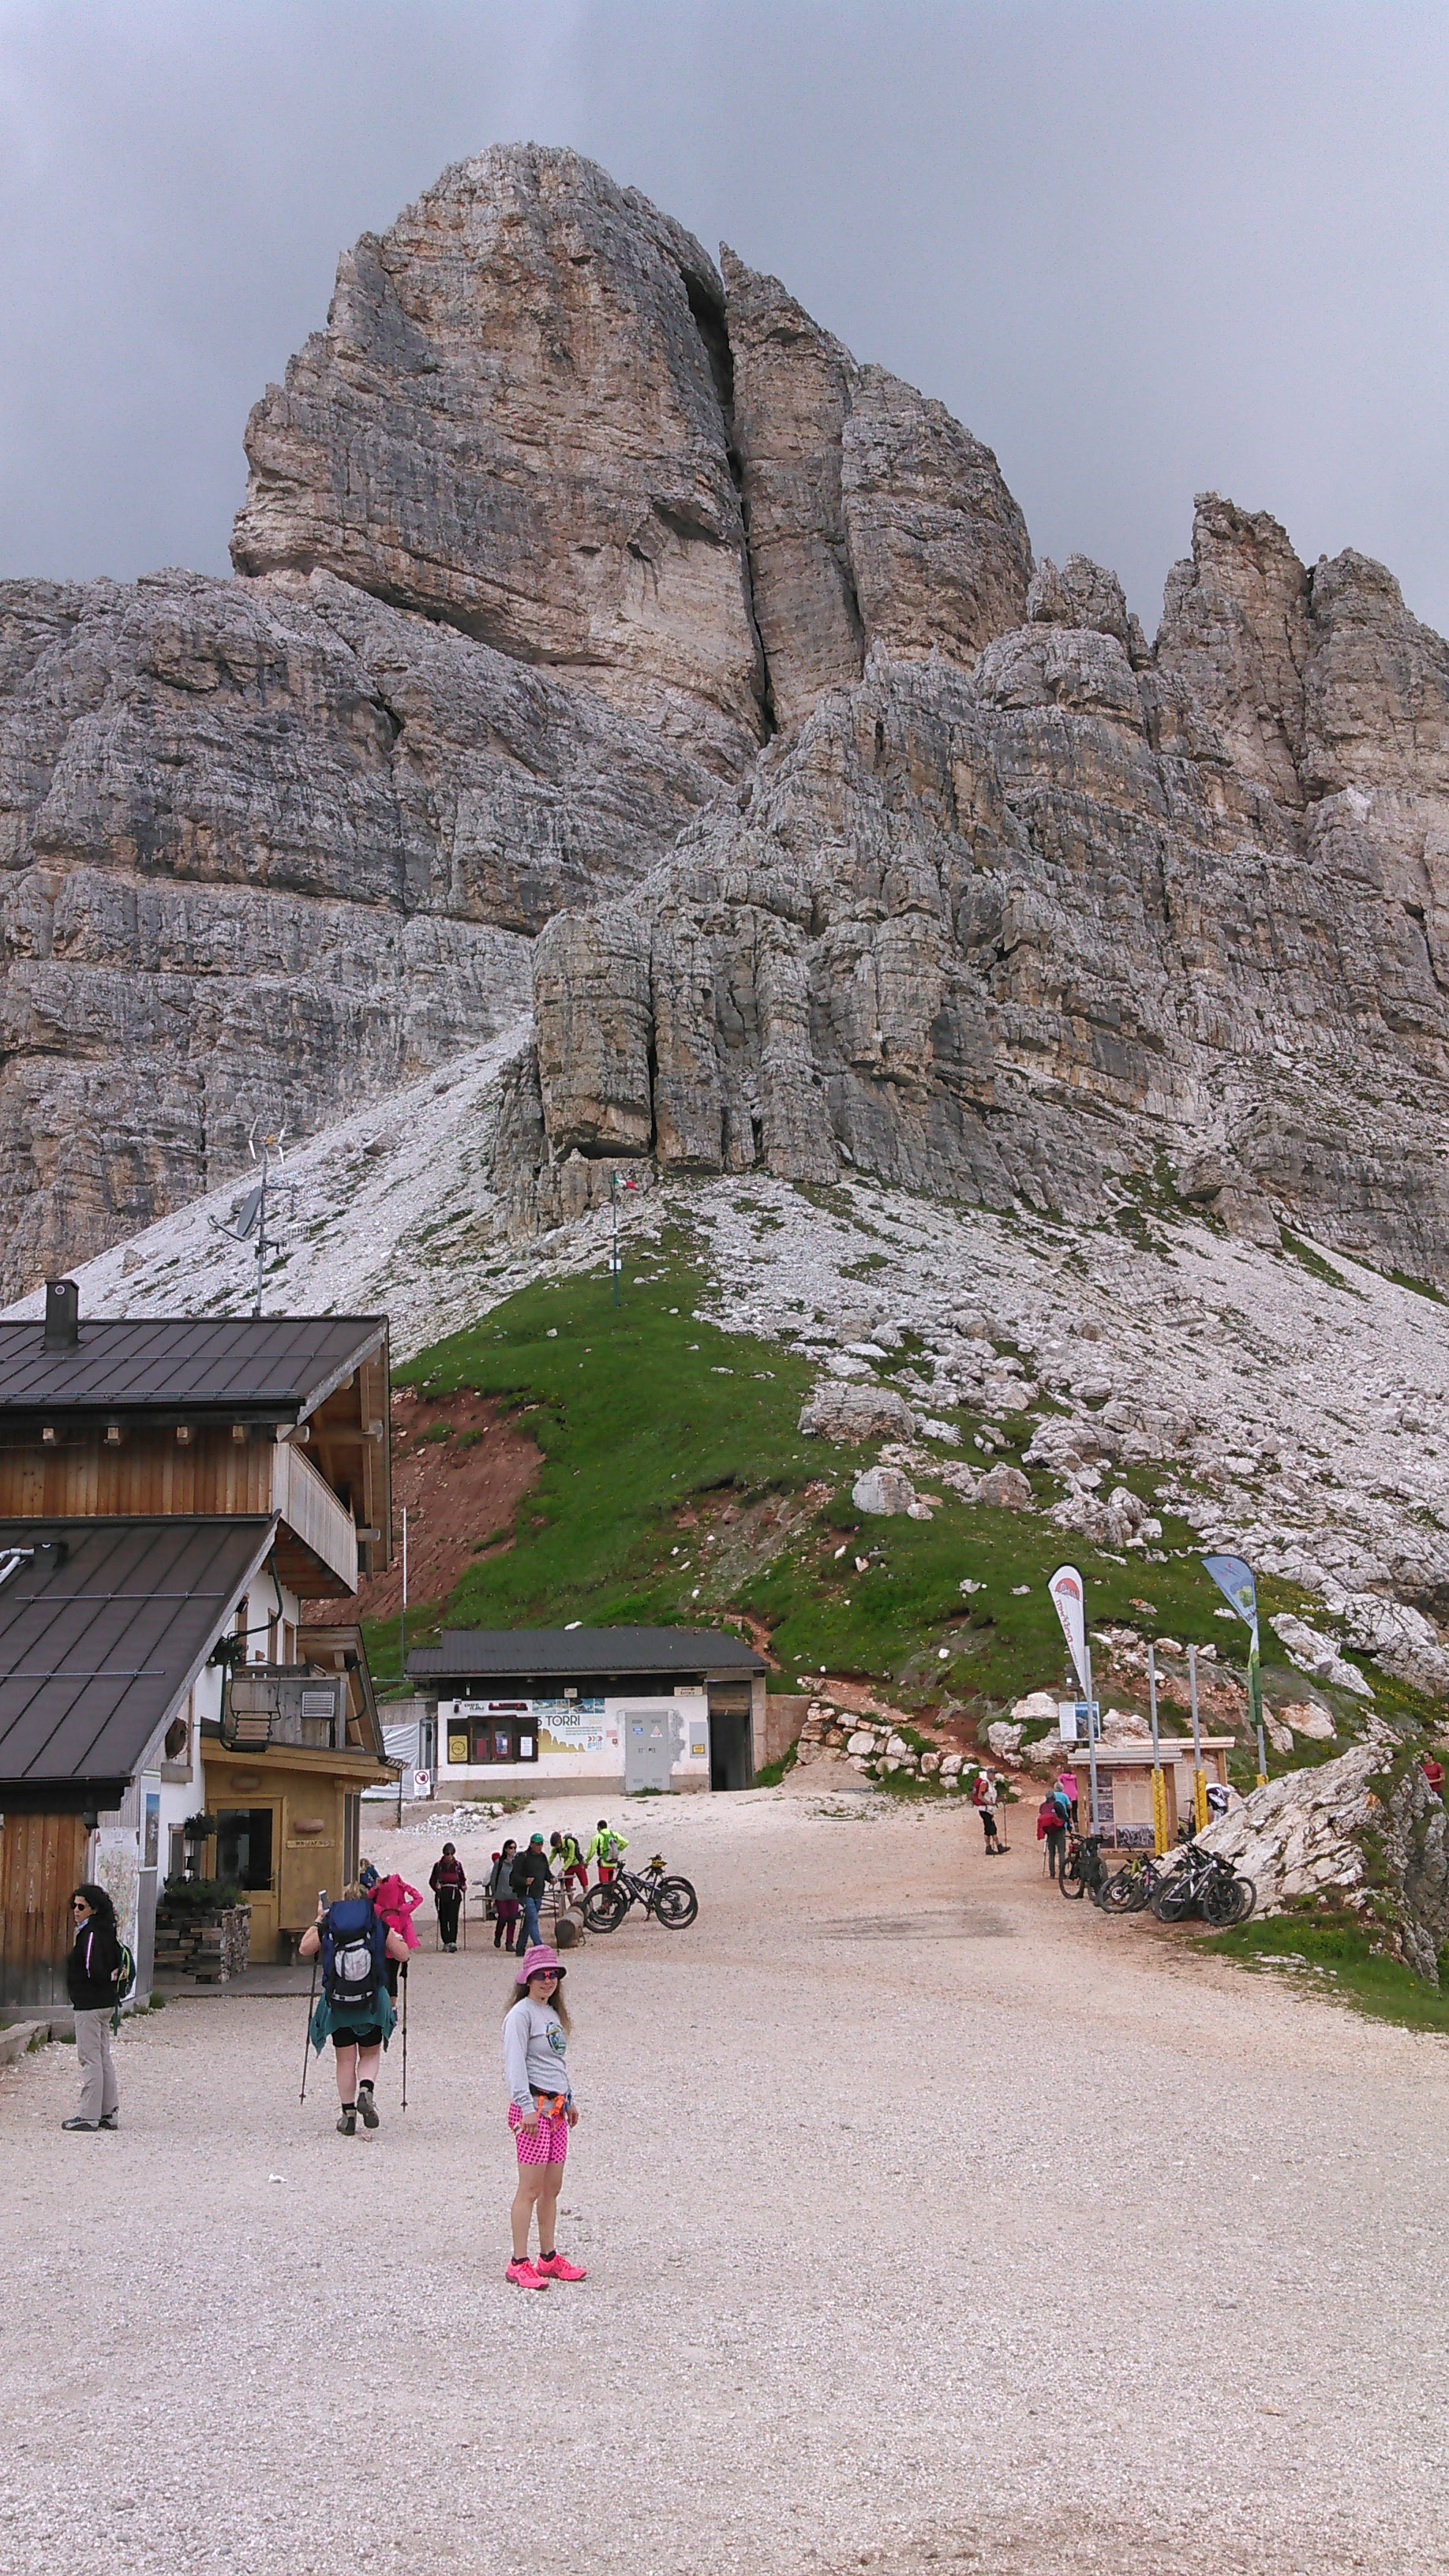
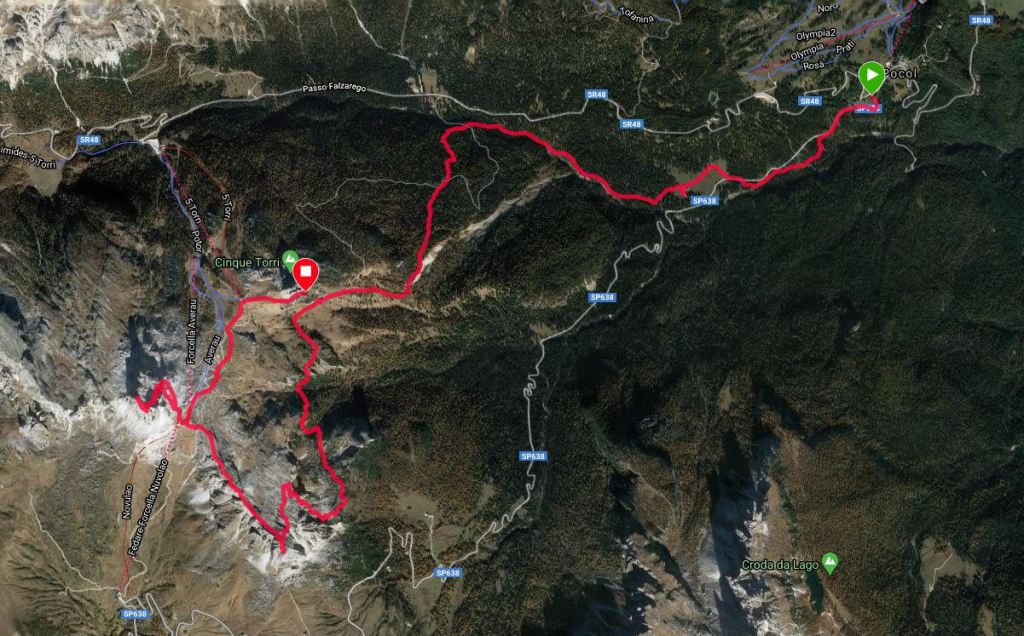
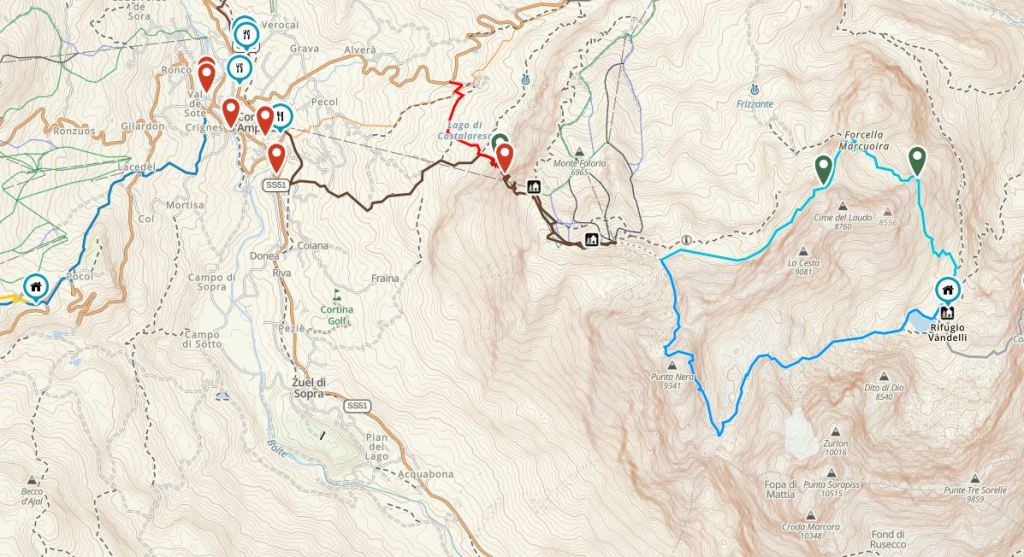
Day 5: Hike from our hotel above Cortina to Rifugio Vandelli with Ferrata Sci Club 18
Our previous four hikes were all day hikes based out of the Hotel Piccolo Pocol. We enjoyed our time at this hotel as it was above the town of Cortina, had amazing views, a private balcony, and buffet breakfast! I’d stay there again. The only downside was that it was 5 km and 1,000 vertical feet above Cortina. There was, however, decent bus service.
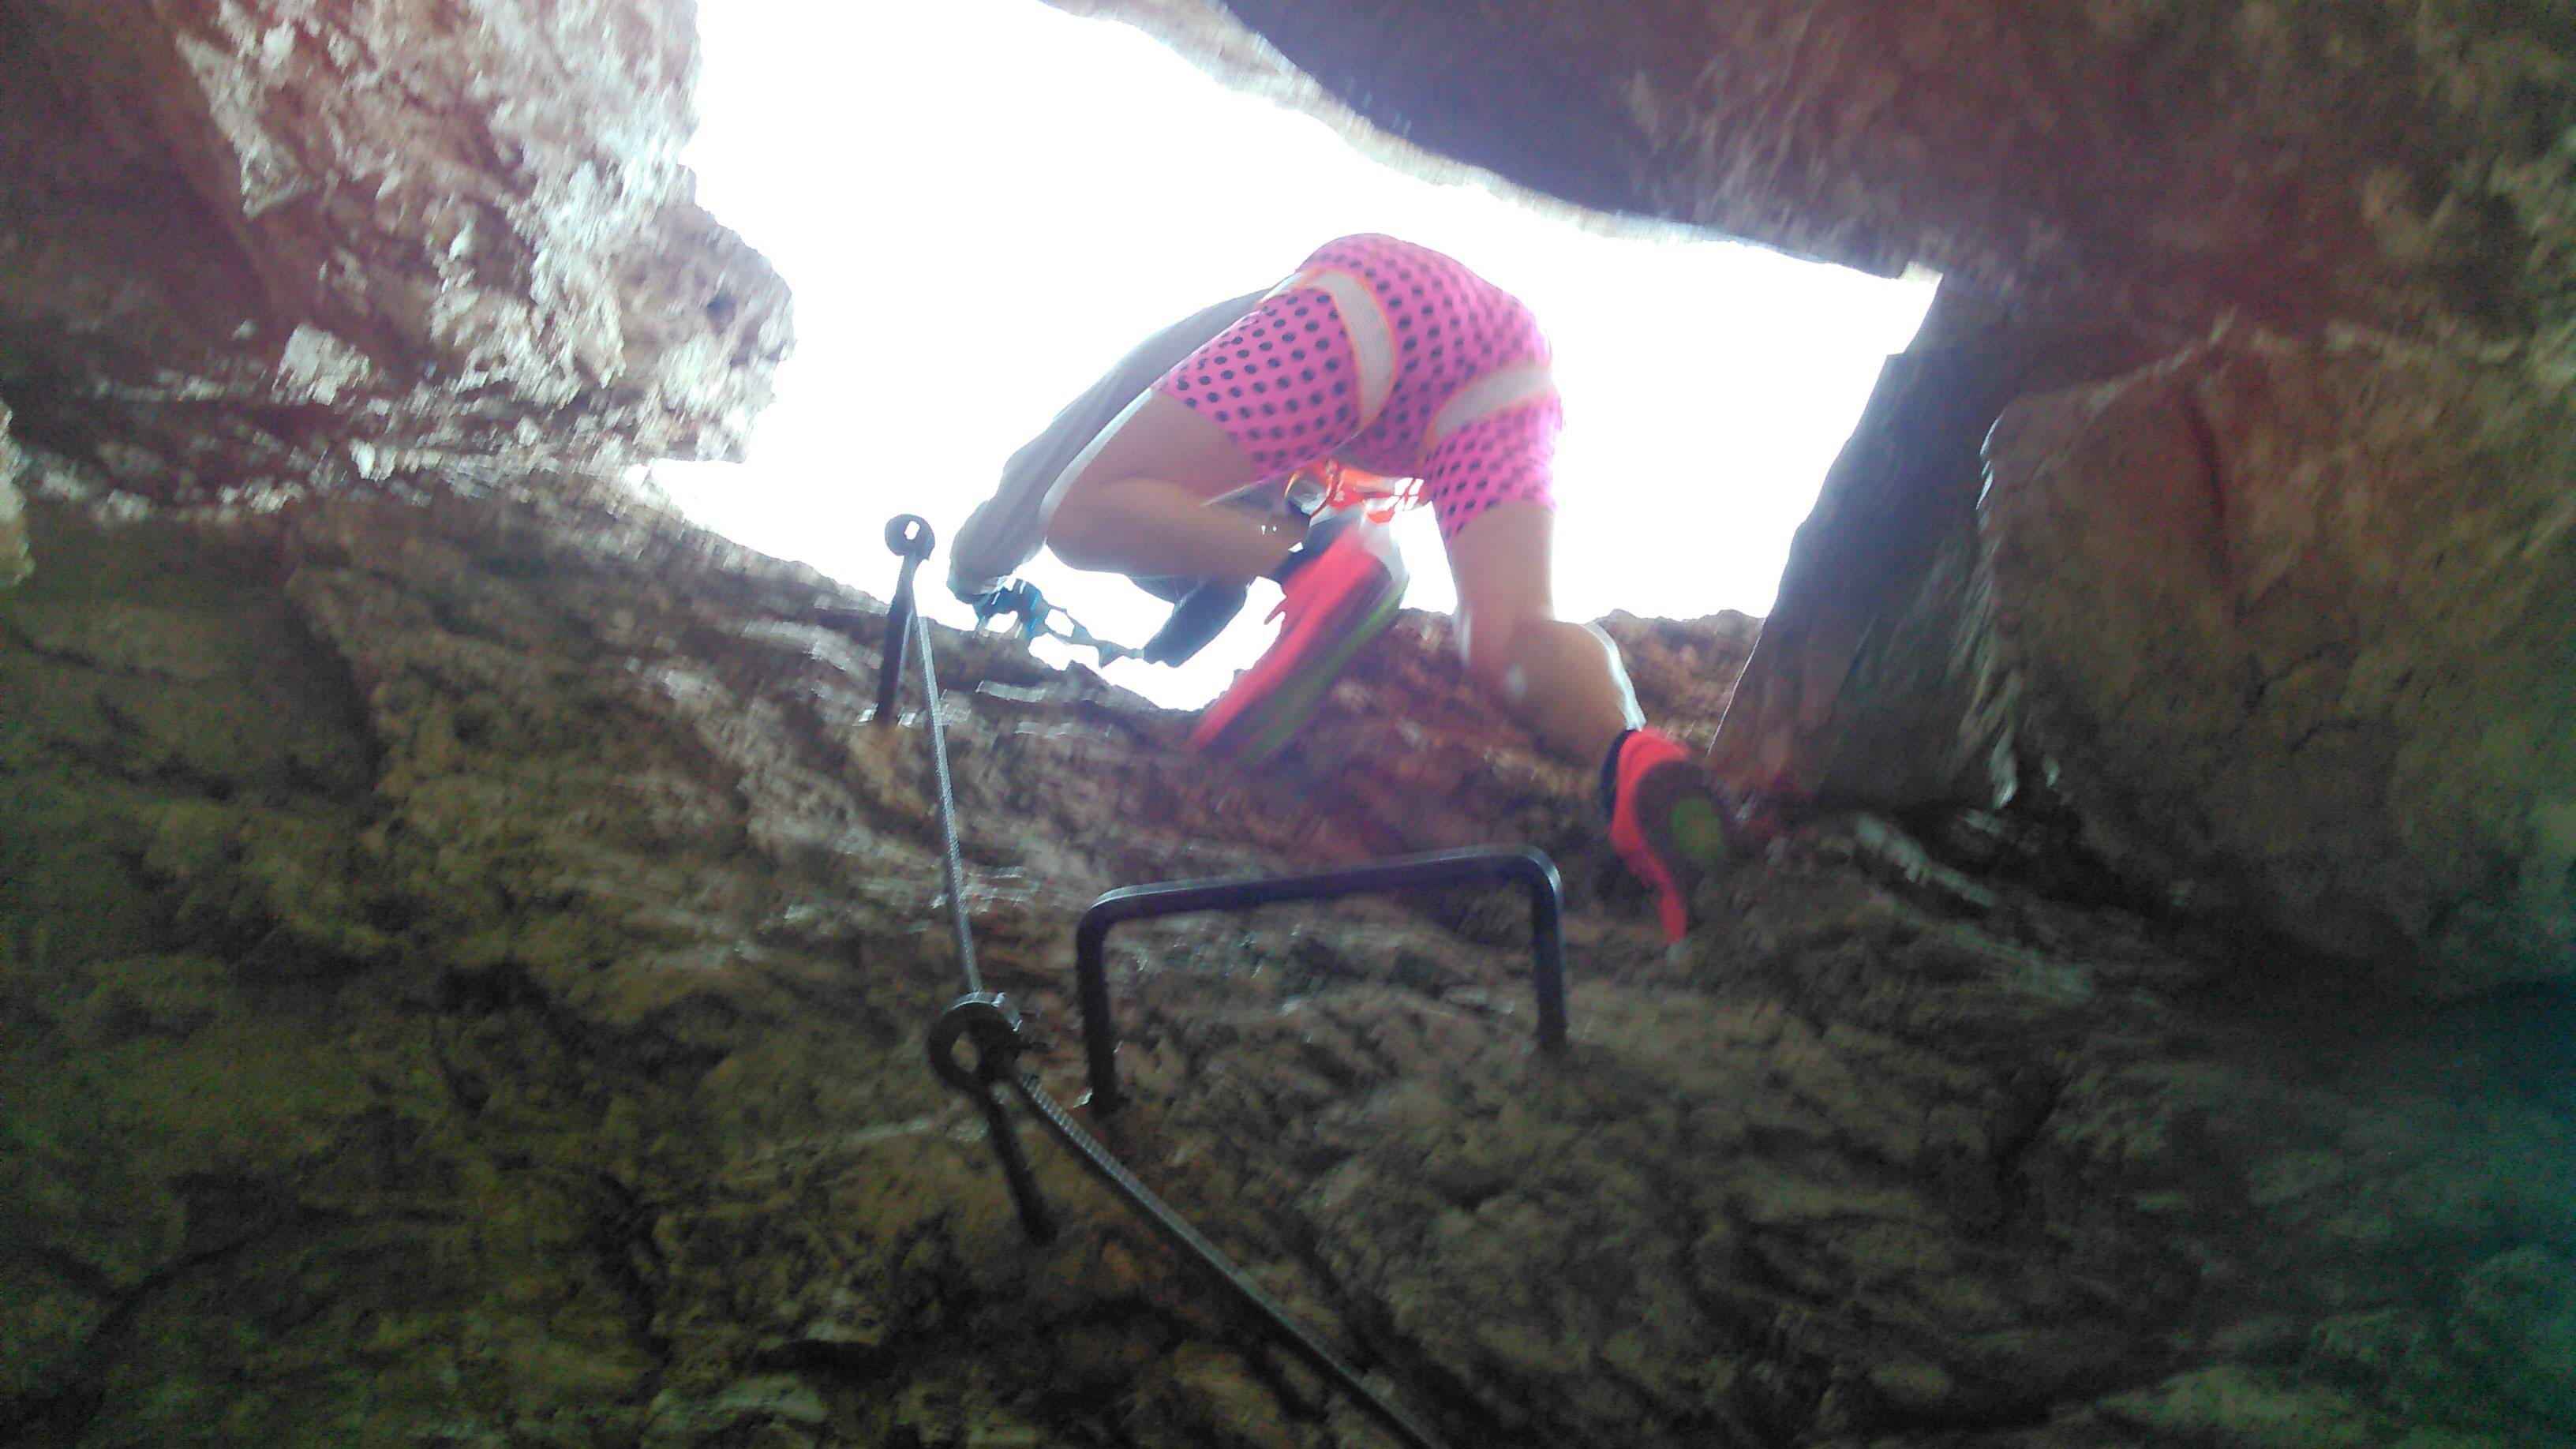
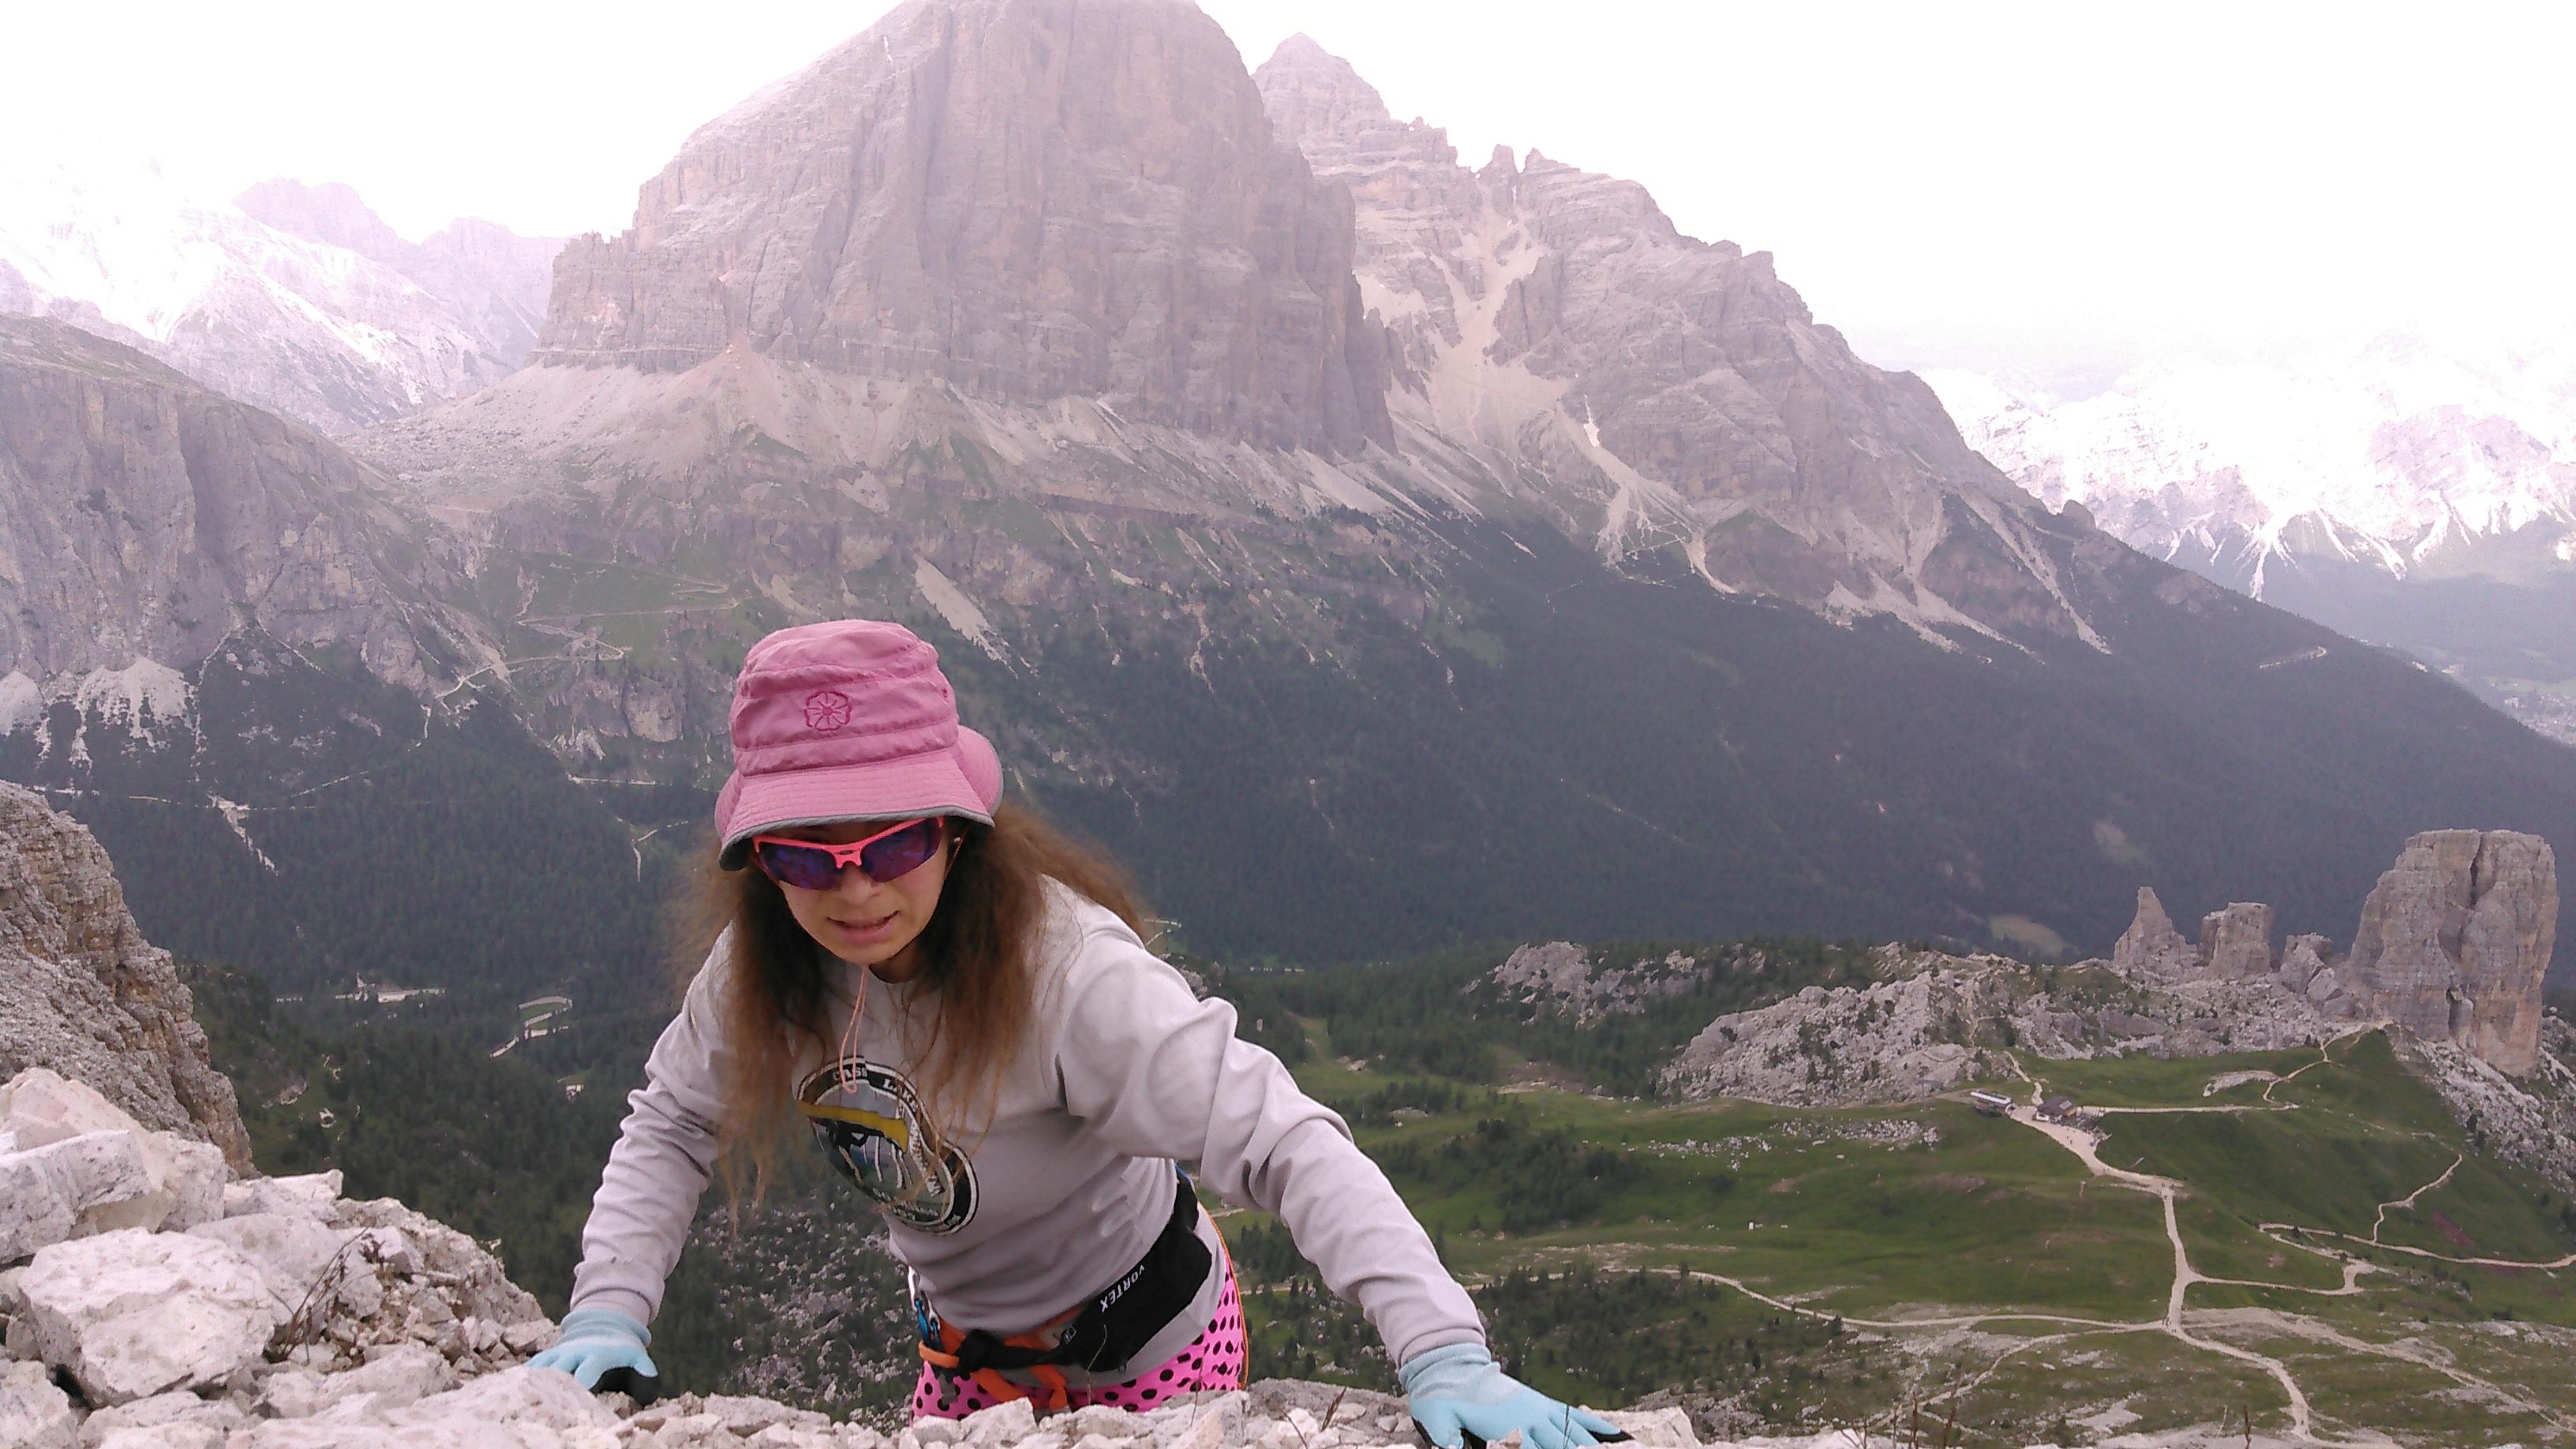
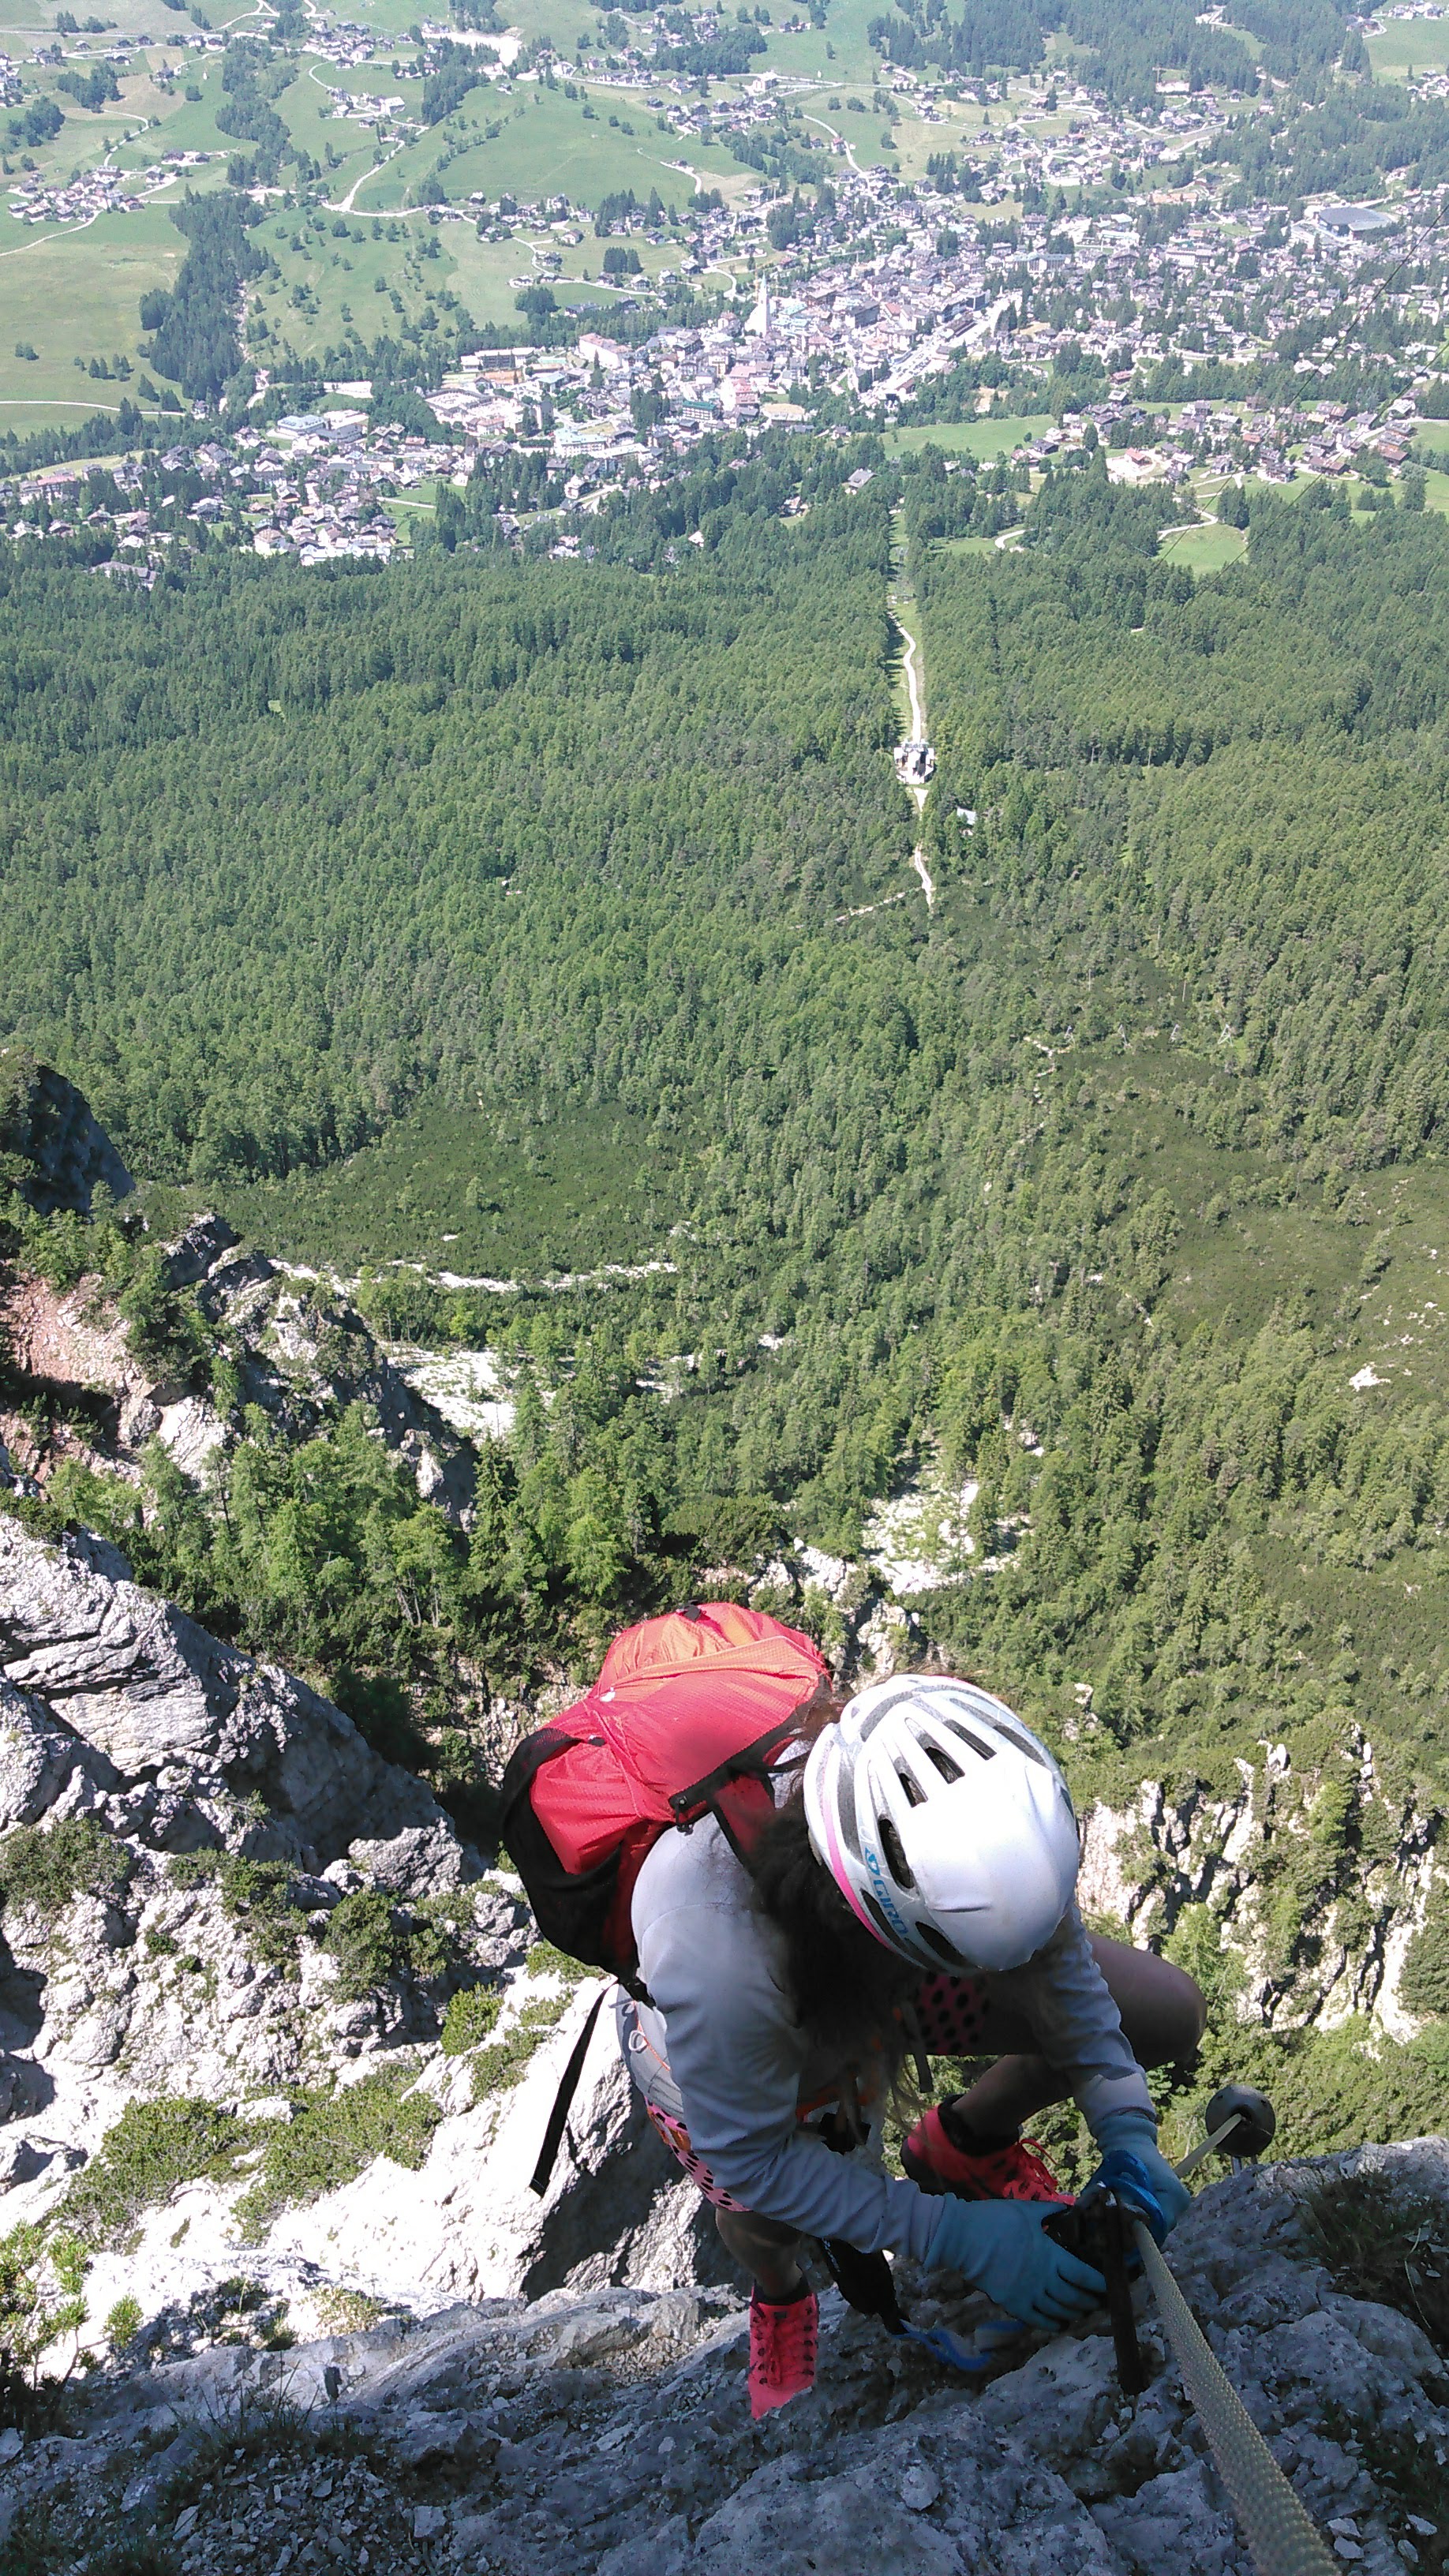
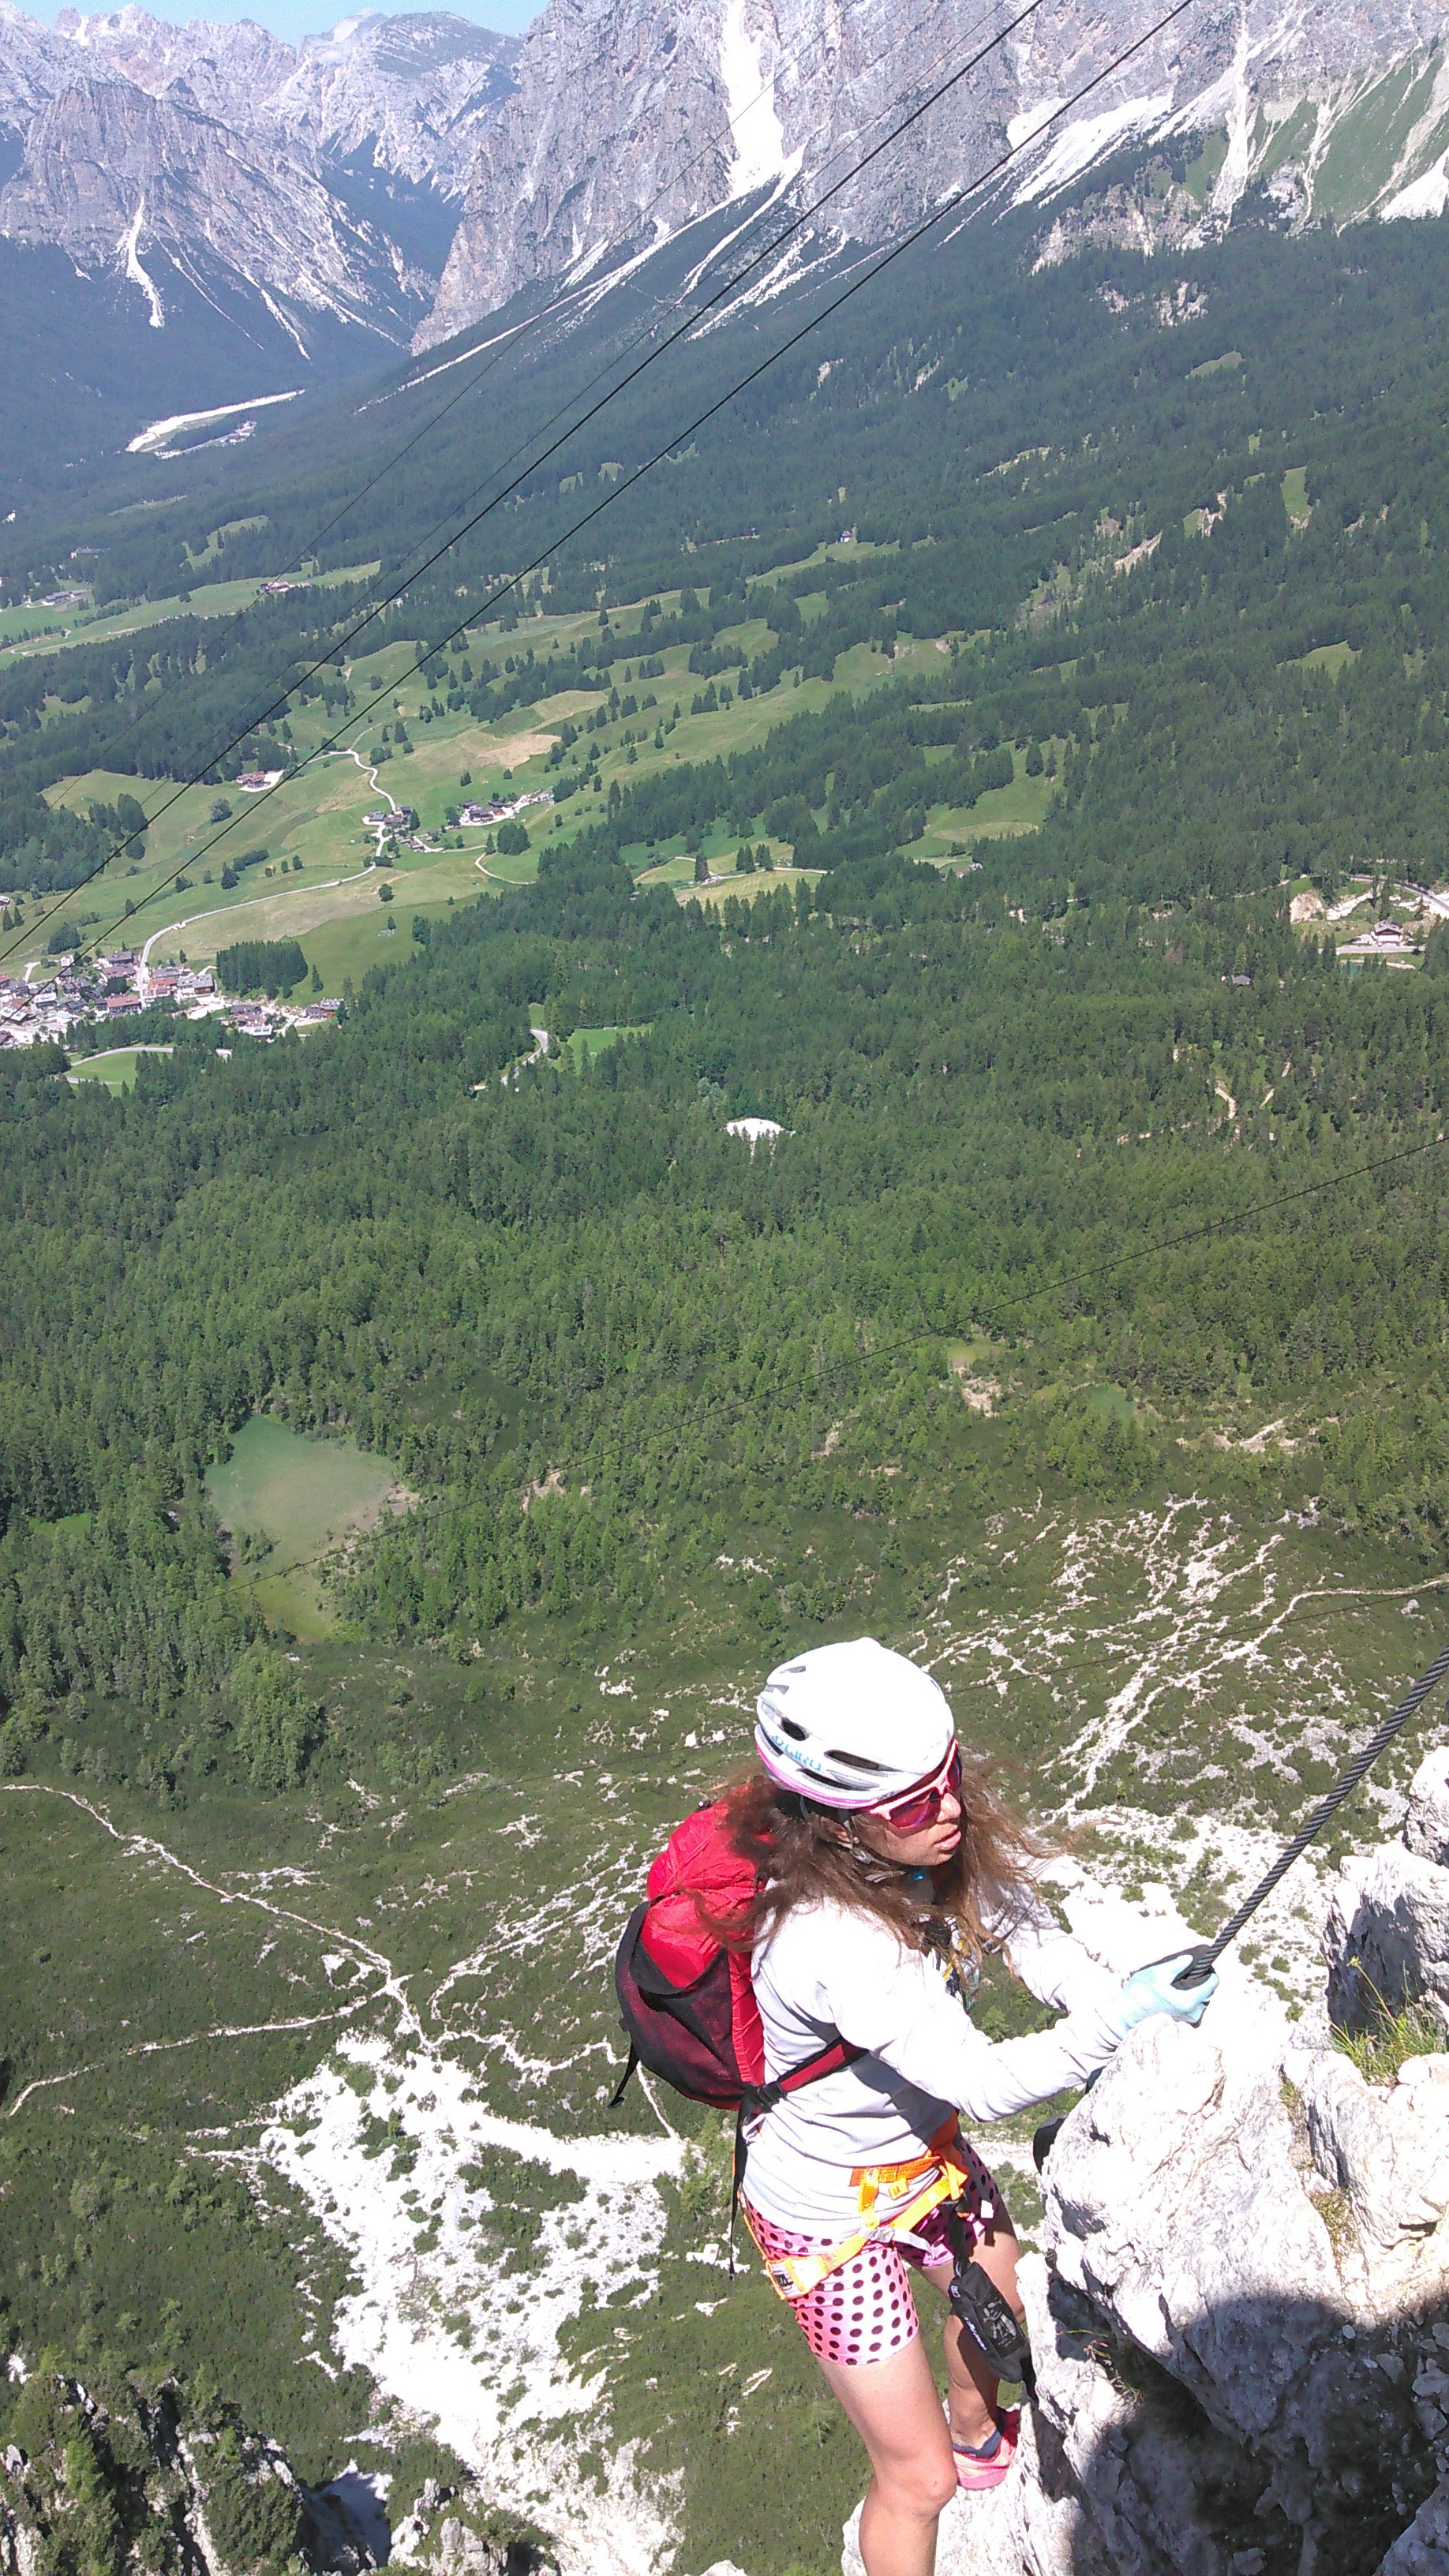
Starting this day, we began a four day hut-to-hut hike (well, not quite as you will see later). After descending to Cortina in the valley, we started hiking up the east side. All the serious elevation was gained on the Sci Club 18 (and more) that climbs a 1,000 foot wall. This was by far the most difficult ferrata we did with long stretches of vertical without break.
The above link states the ferrata is “for experts only.” This is by far the most difficult ferrata we’ve ever done! That being said, I’ve felt less comfortable on long ladder sections previously and while it was definitely exposed, it didn’t feel vastly so (as in comparison to the Tofana di Rozes).
See the corresponding post for a more complete description of this day. The Rifugio Vandelli had multiple small rooms for sleeping. Erik and I felt lucky to get a room all to ourselves on the top floor that had skylights.
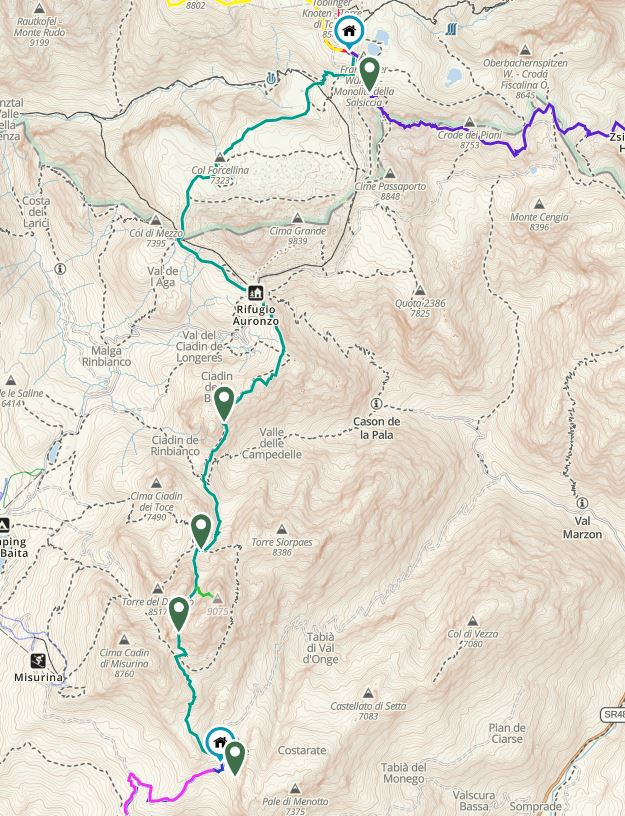
Day 6: Hike from Rifugio Vandelli to Rifugio Carpi. Ferratas Vandelli and the one that wasn’t marked on our map!!!
If anyone reading this is wondering if it’s a good idea to do difficult ferratas multiple days in a row, read my complimentary post where this day got quite the write-up. It turns out that several days in a row of difficult ferrata took their toll on me. I don’t think there is more to say so here’s the map which pretty much says it all- a short hike to the ferrata, a couple hours on the ferrata, a long descent to the valley that was a mix of easy and seemingly impossible, and then a big hike up to our rifugio.


The rifugio Citta di Carpi was our favorite of the three we stayed. It was clean, well organized, had a great view, and had the best breakfast (with yogurt and granola). The sleeping quarters were comprised of several small rooms which each slept approximately six people on bunk beds. The walls were white and bright and the beds red metal with matching red and white comforters (note, traditionally people bring a sleeping bag liner as there is no bedding).

Day 7: Hike from Rifugio Carpi to Rifugio Locatelli
As we began hiking, it was obvious that we were both tired. I was dragging miserably. I haven’t been this tired since Bush Junior was president was all I could think. This definitely reminded me of the fatigue that plagued me the summer I was 19- the summer I significantly increased my ski training volume. That was 2004.
It didn’t help that our big pass of the day was Forcella della Neve- this pass was hard, hard, hard! The route was legitimately difficult with scattered ferrata sections.
On this day, we had the option to do Ferrata Merlone up the Cima Cadin Nord-Est which was on the way. We debated a lot. OK, we debated incessantly. This ferrata is also referred to as “Heaven’s Ladder.” We both knew we were completely exhausted and I’m not a big fan of ladder routes. In the end, even though the weather looked good, we decided to skip the Ferrata Merlone.
This proved to be a good decision as thunderstorms rolled in a couple hours later AND as we did a relatively easy section of short ferrata (Bonacossa) along our route, I realized how completely mentally drained I was from doing ferrata which involves a constant risk of falling and thus vigilance. I was completely mentally and physically beat.
Once we entered into the Tre Cime area, we were nearing South Tyrol. Due to centuries-old debate about who owns this land, everything is in German and Italian which means everything has two names. This can be quite confusing. I tended to mostly use the Italian names as I have a background in French and therefore Italian makes more sense to me.

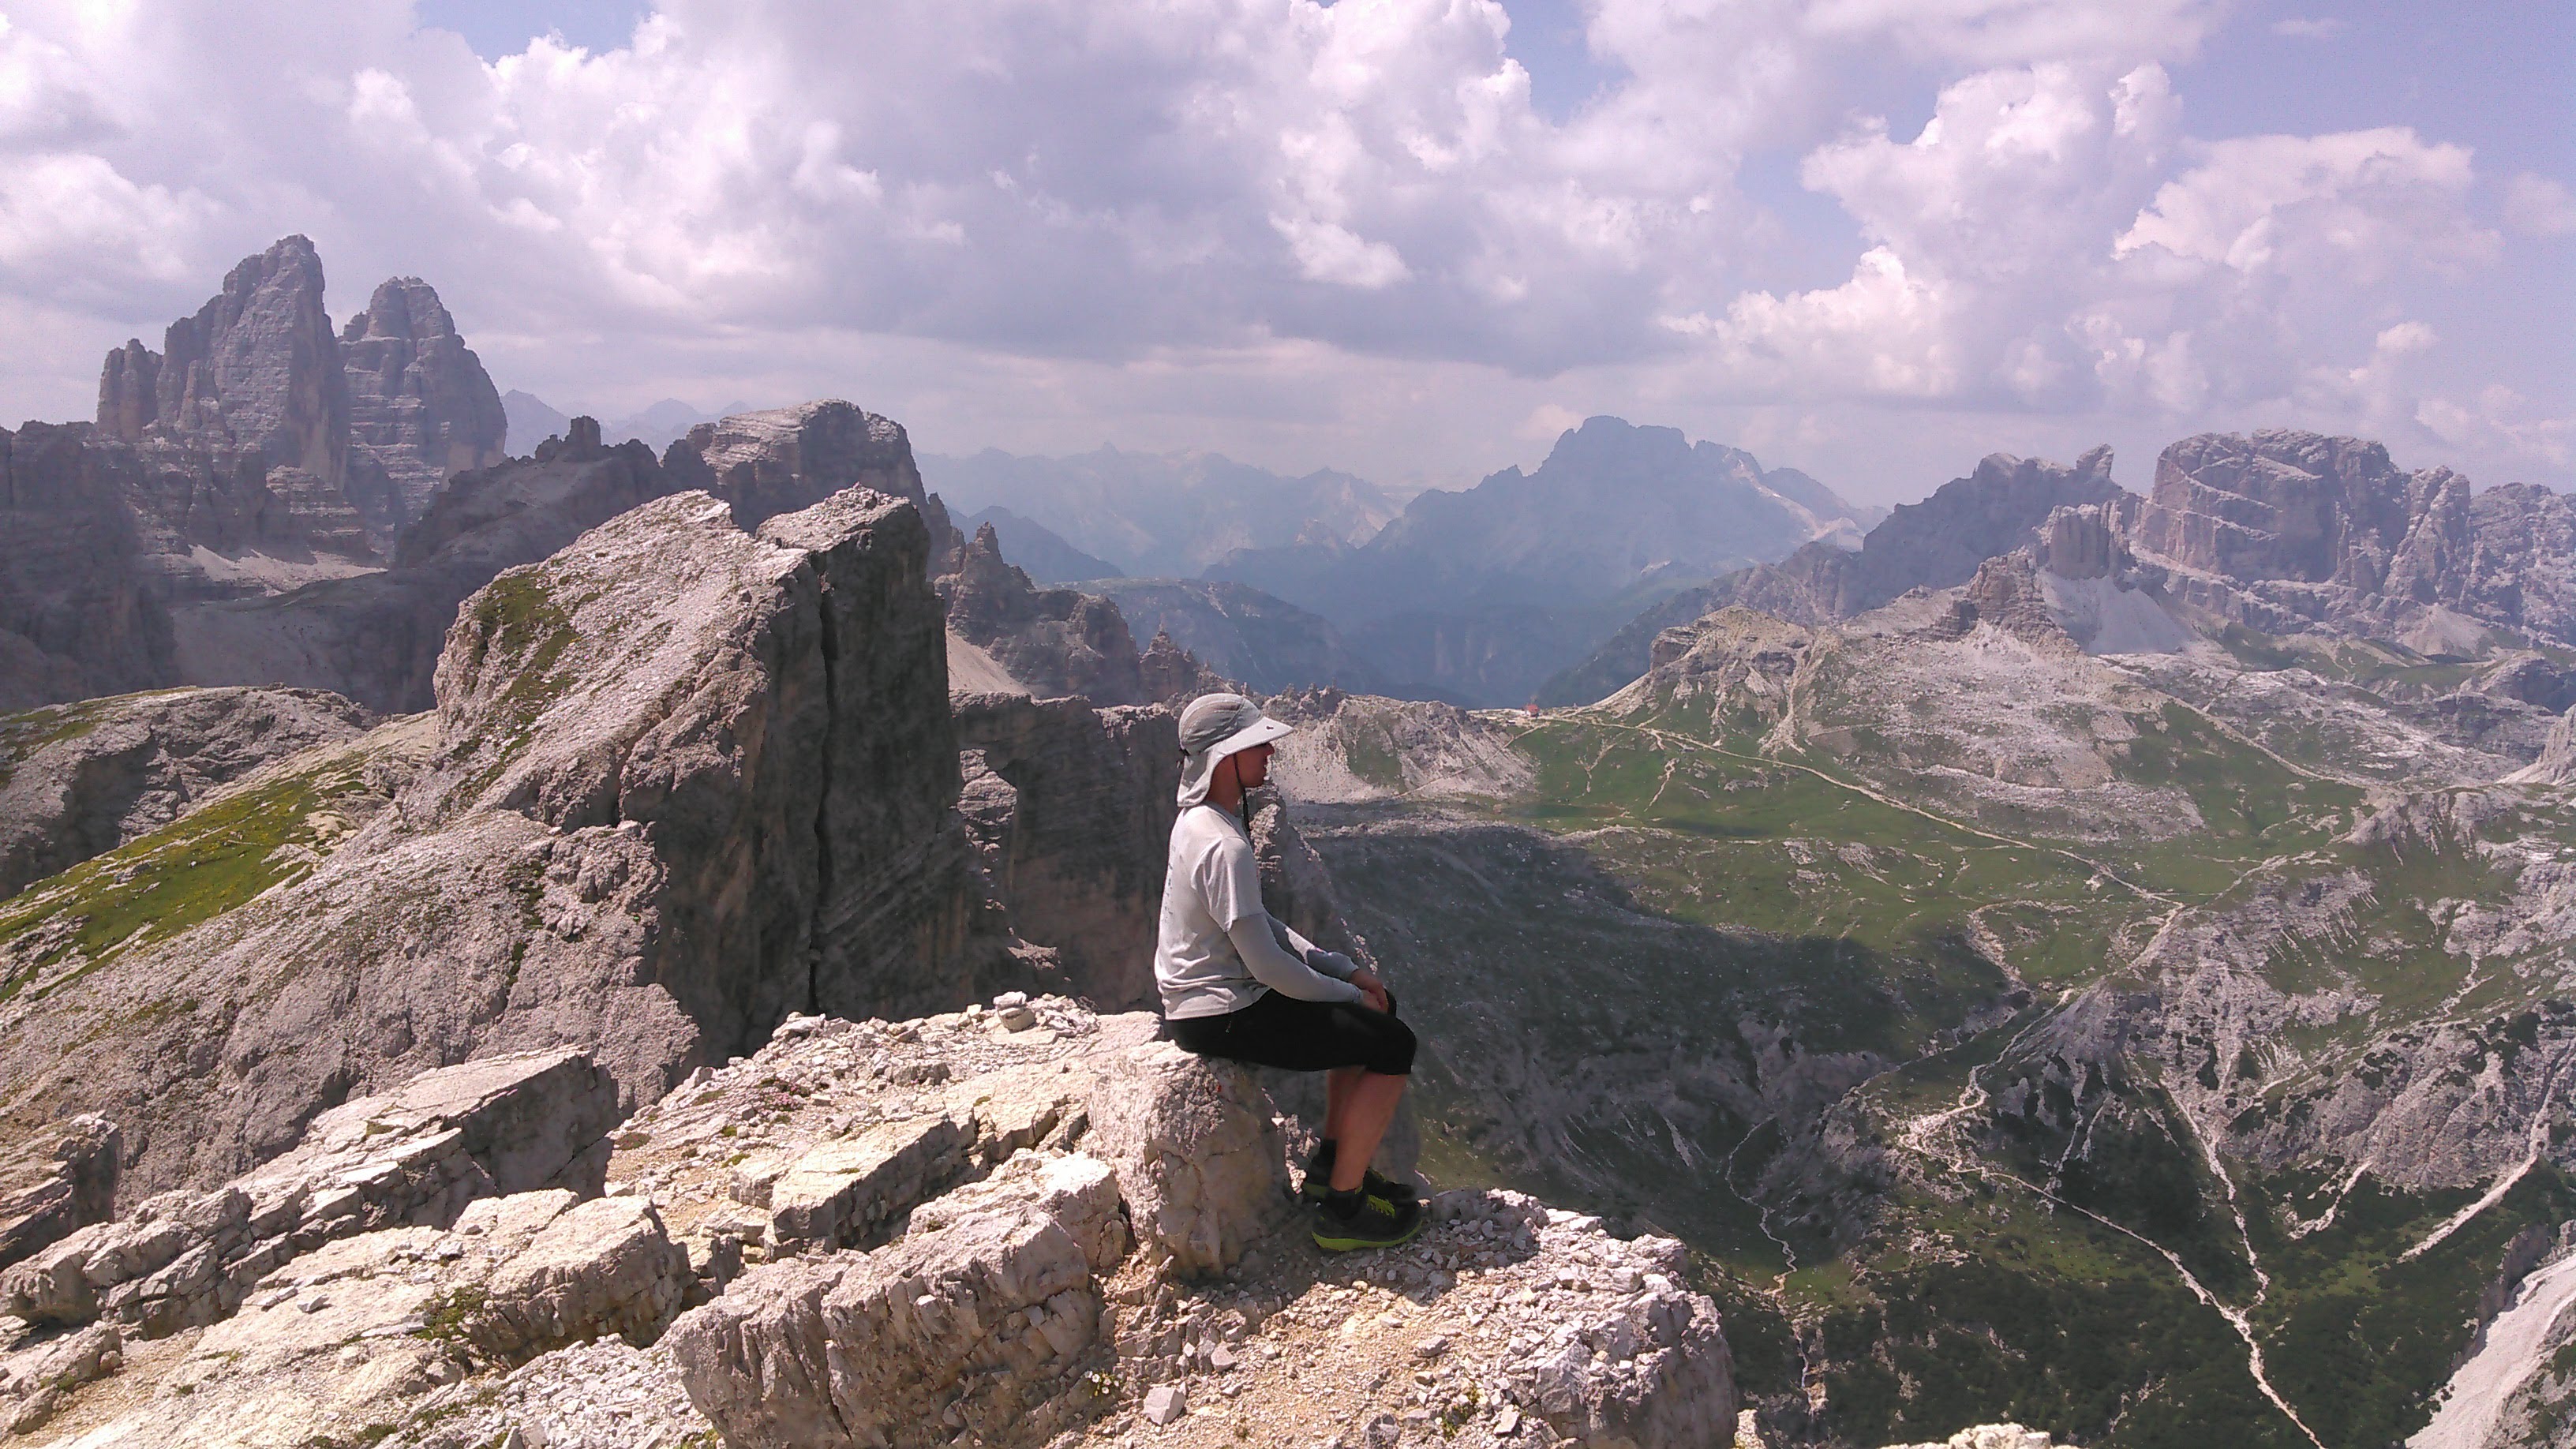
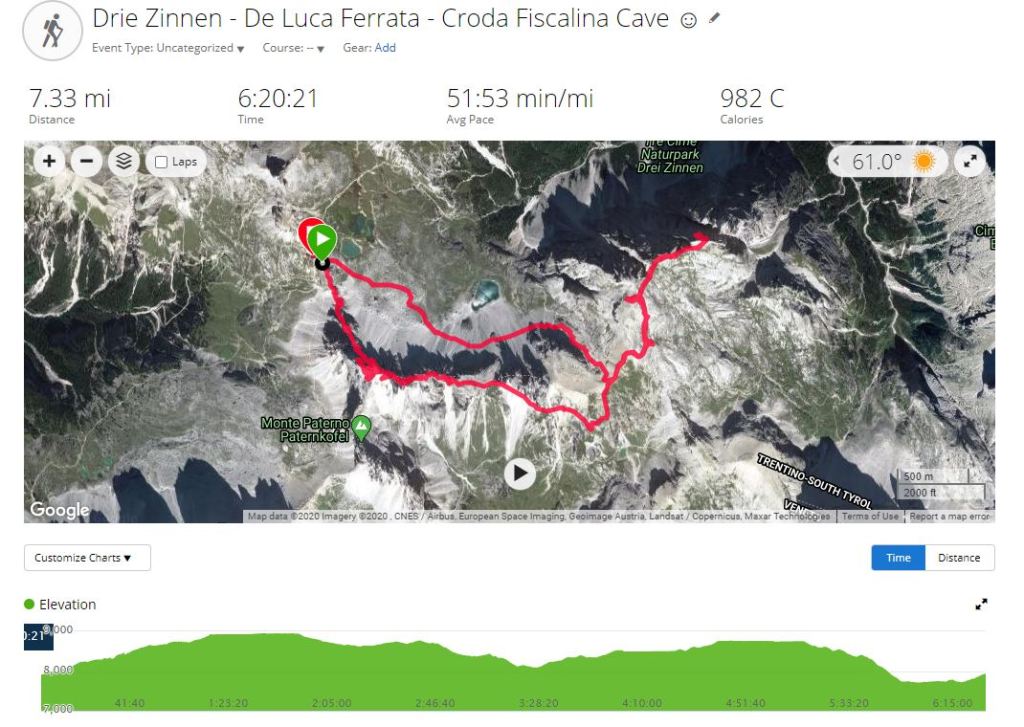
Day 8: Day hike from the Rifugio Locatelli with Ferrata de Luca

We only did one ferrata this day, but it was a good one. This ferrata was a bit confusing to me when I read about it because, of course, the ferrata has both an Italian name and a German one and the mountain it climbs also has an Italian name and a German one.
The Italian name of the ferrata is de Luca and the German name Klettersteig (this is the German word for ferrata) Innerkofler. The name of the mountain is Paterno in Italian and Paternkofel in German. Confused?
There’s ferrata on both sides of the pass (Forcella la del Camoscio) but if you approach from the north side, from Rifugio Locatelli, like we did, the ferrata goes through tunnels! Overall the ferrata was fairly short but after the pass it got confusing to follow. We kept contouring around to the west when the actual route when north (others did the same). If you get to a gully that looks difficult, back track and keep looking up. The maps are not detailed enough to show the exact route. Where we got off-route, there was a steep unprotected section (meaning no cables) where we had to do some bouldering. From there to the top was relatively easy going without any cairns marking the route. There were lots of people up there the day we did it, but if the mountain was in the clouds and visibility low, it would be difficult to find where to go back down.


We were stymied by some bad weather by mid-afternoon and so deferred the Ferrata delle Scallete up the Torre di Toblin to the next day.
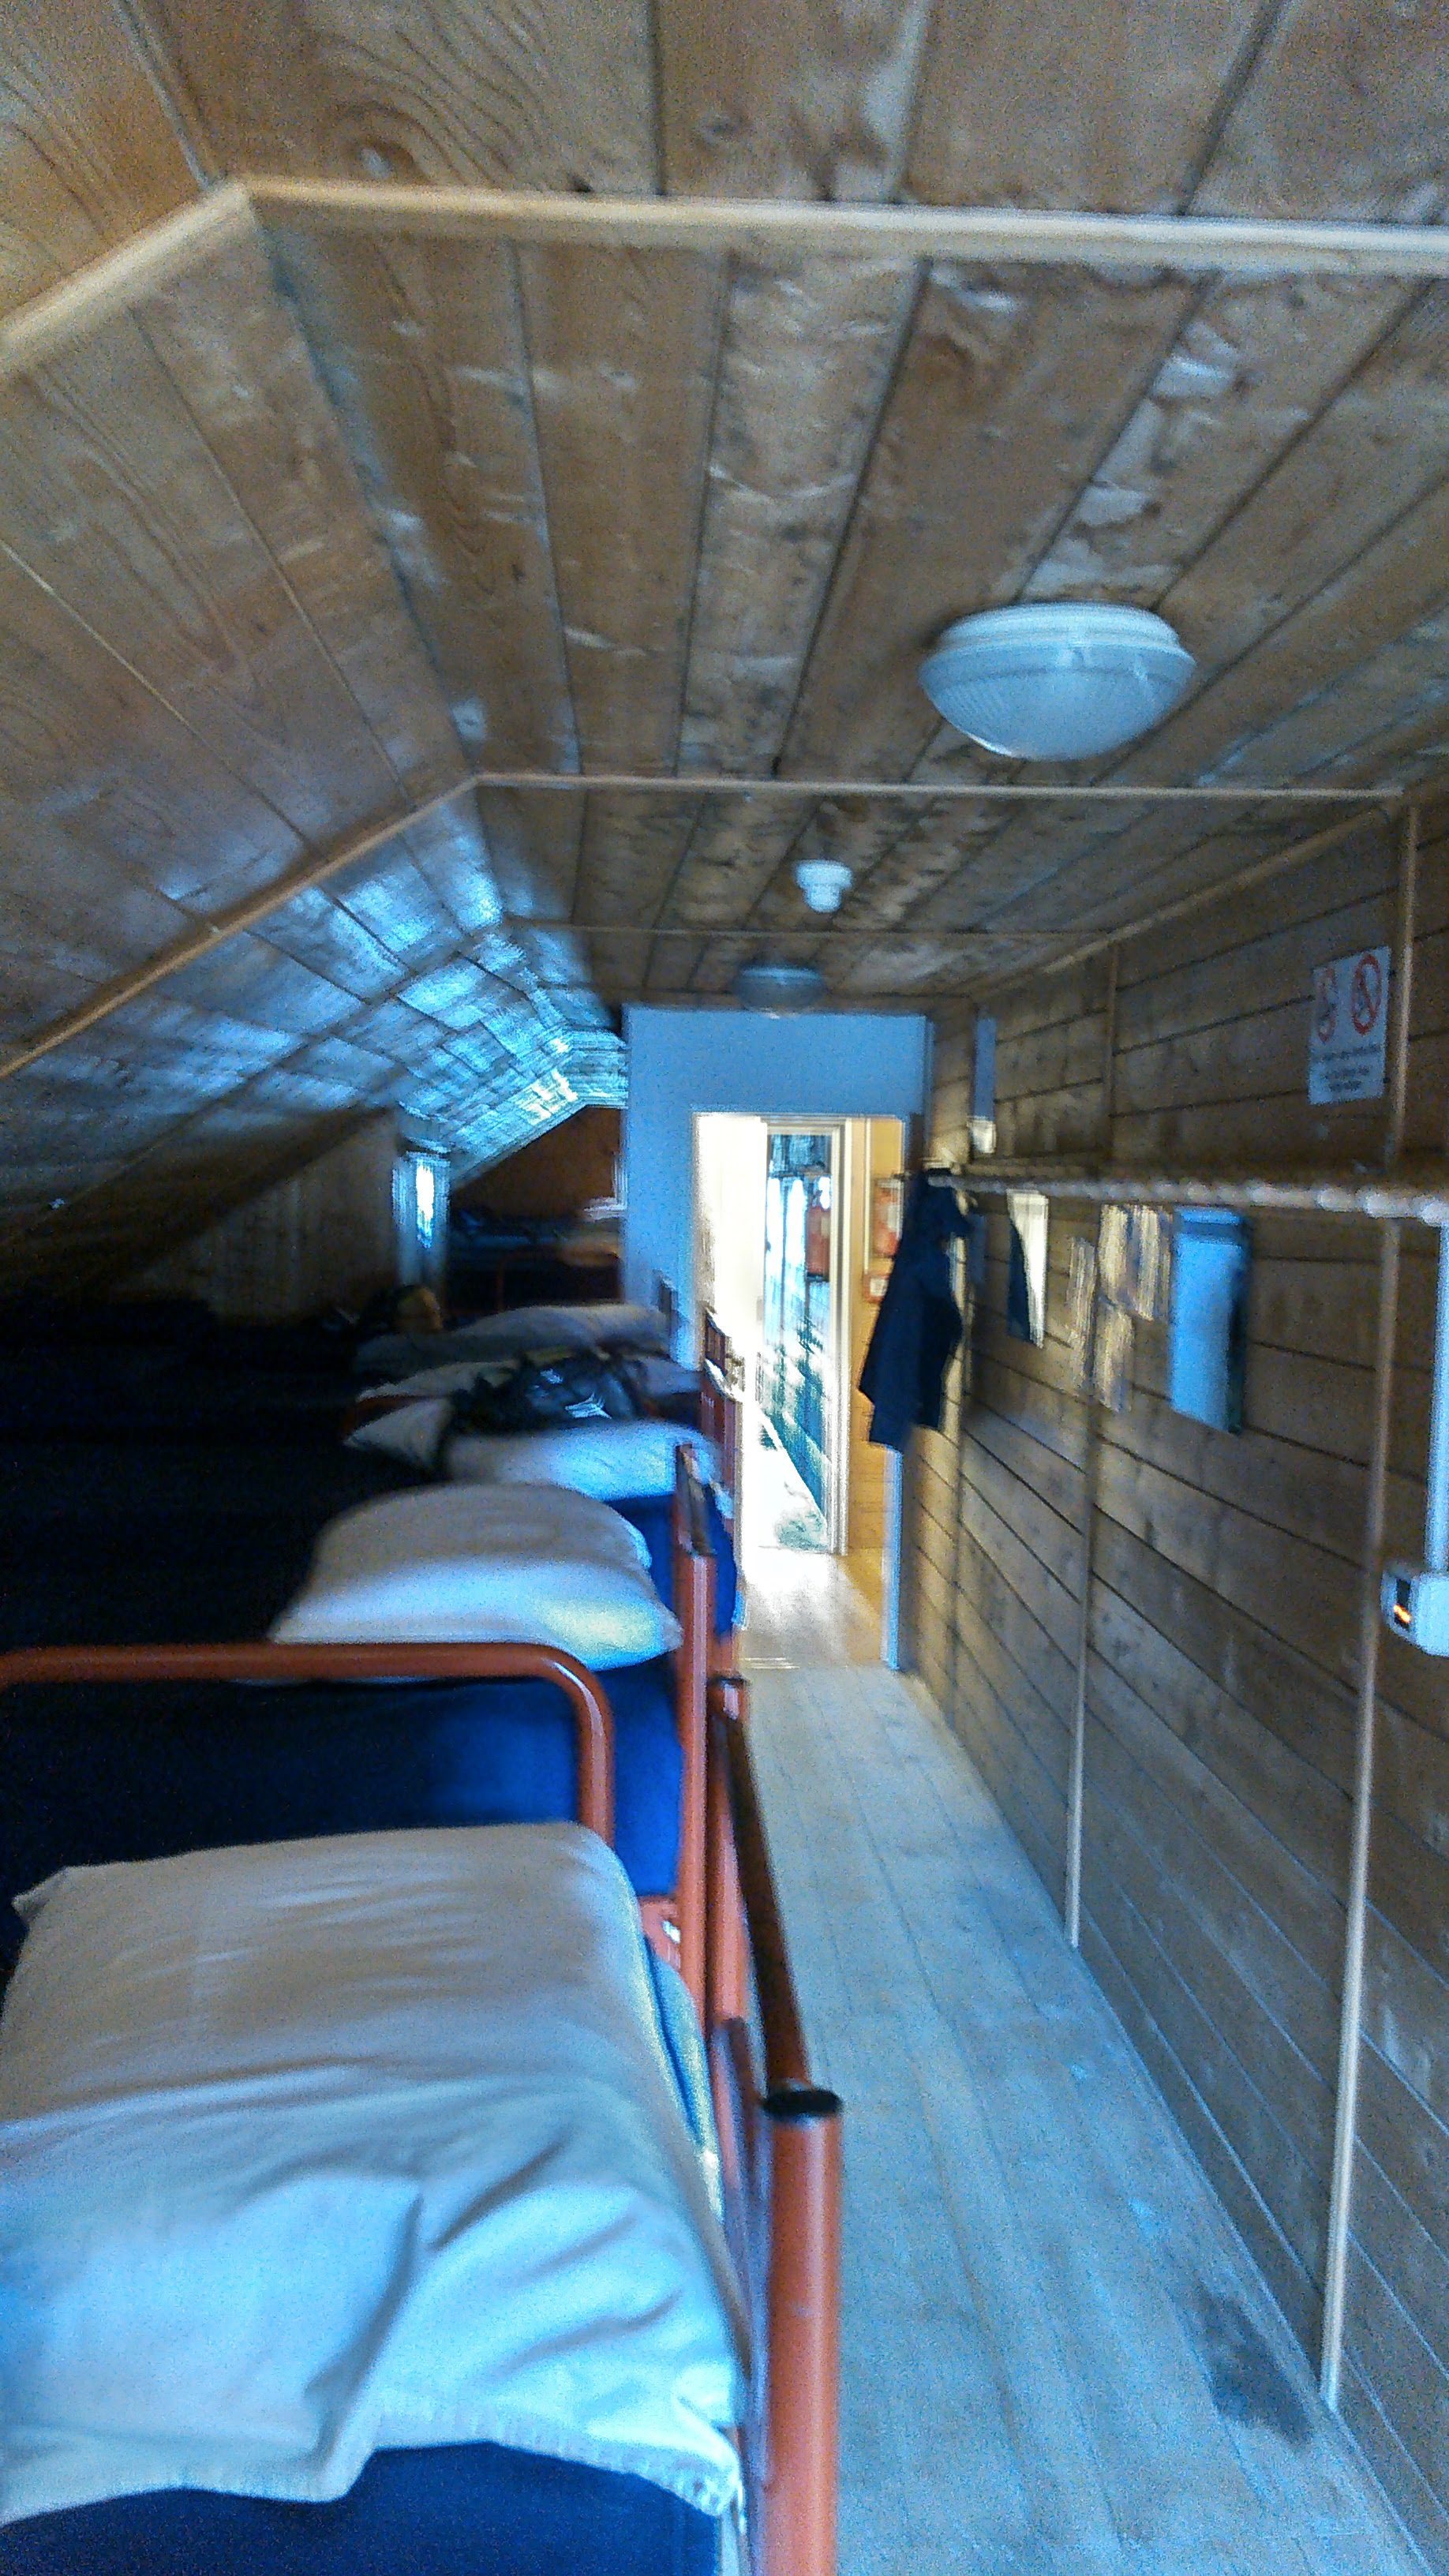
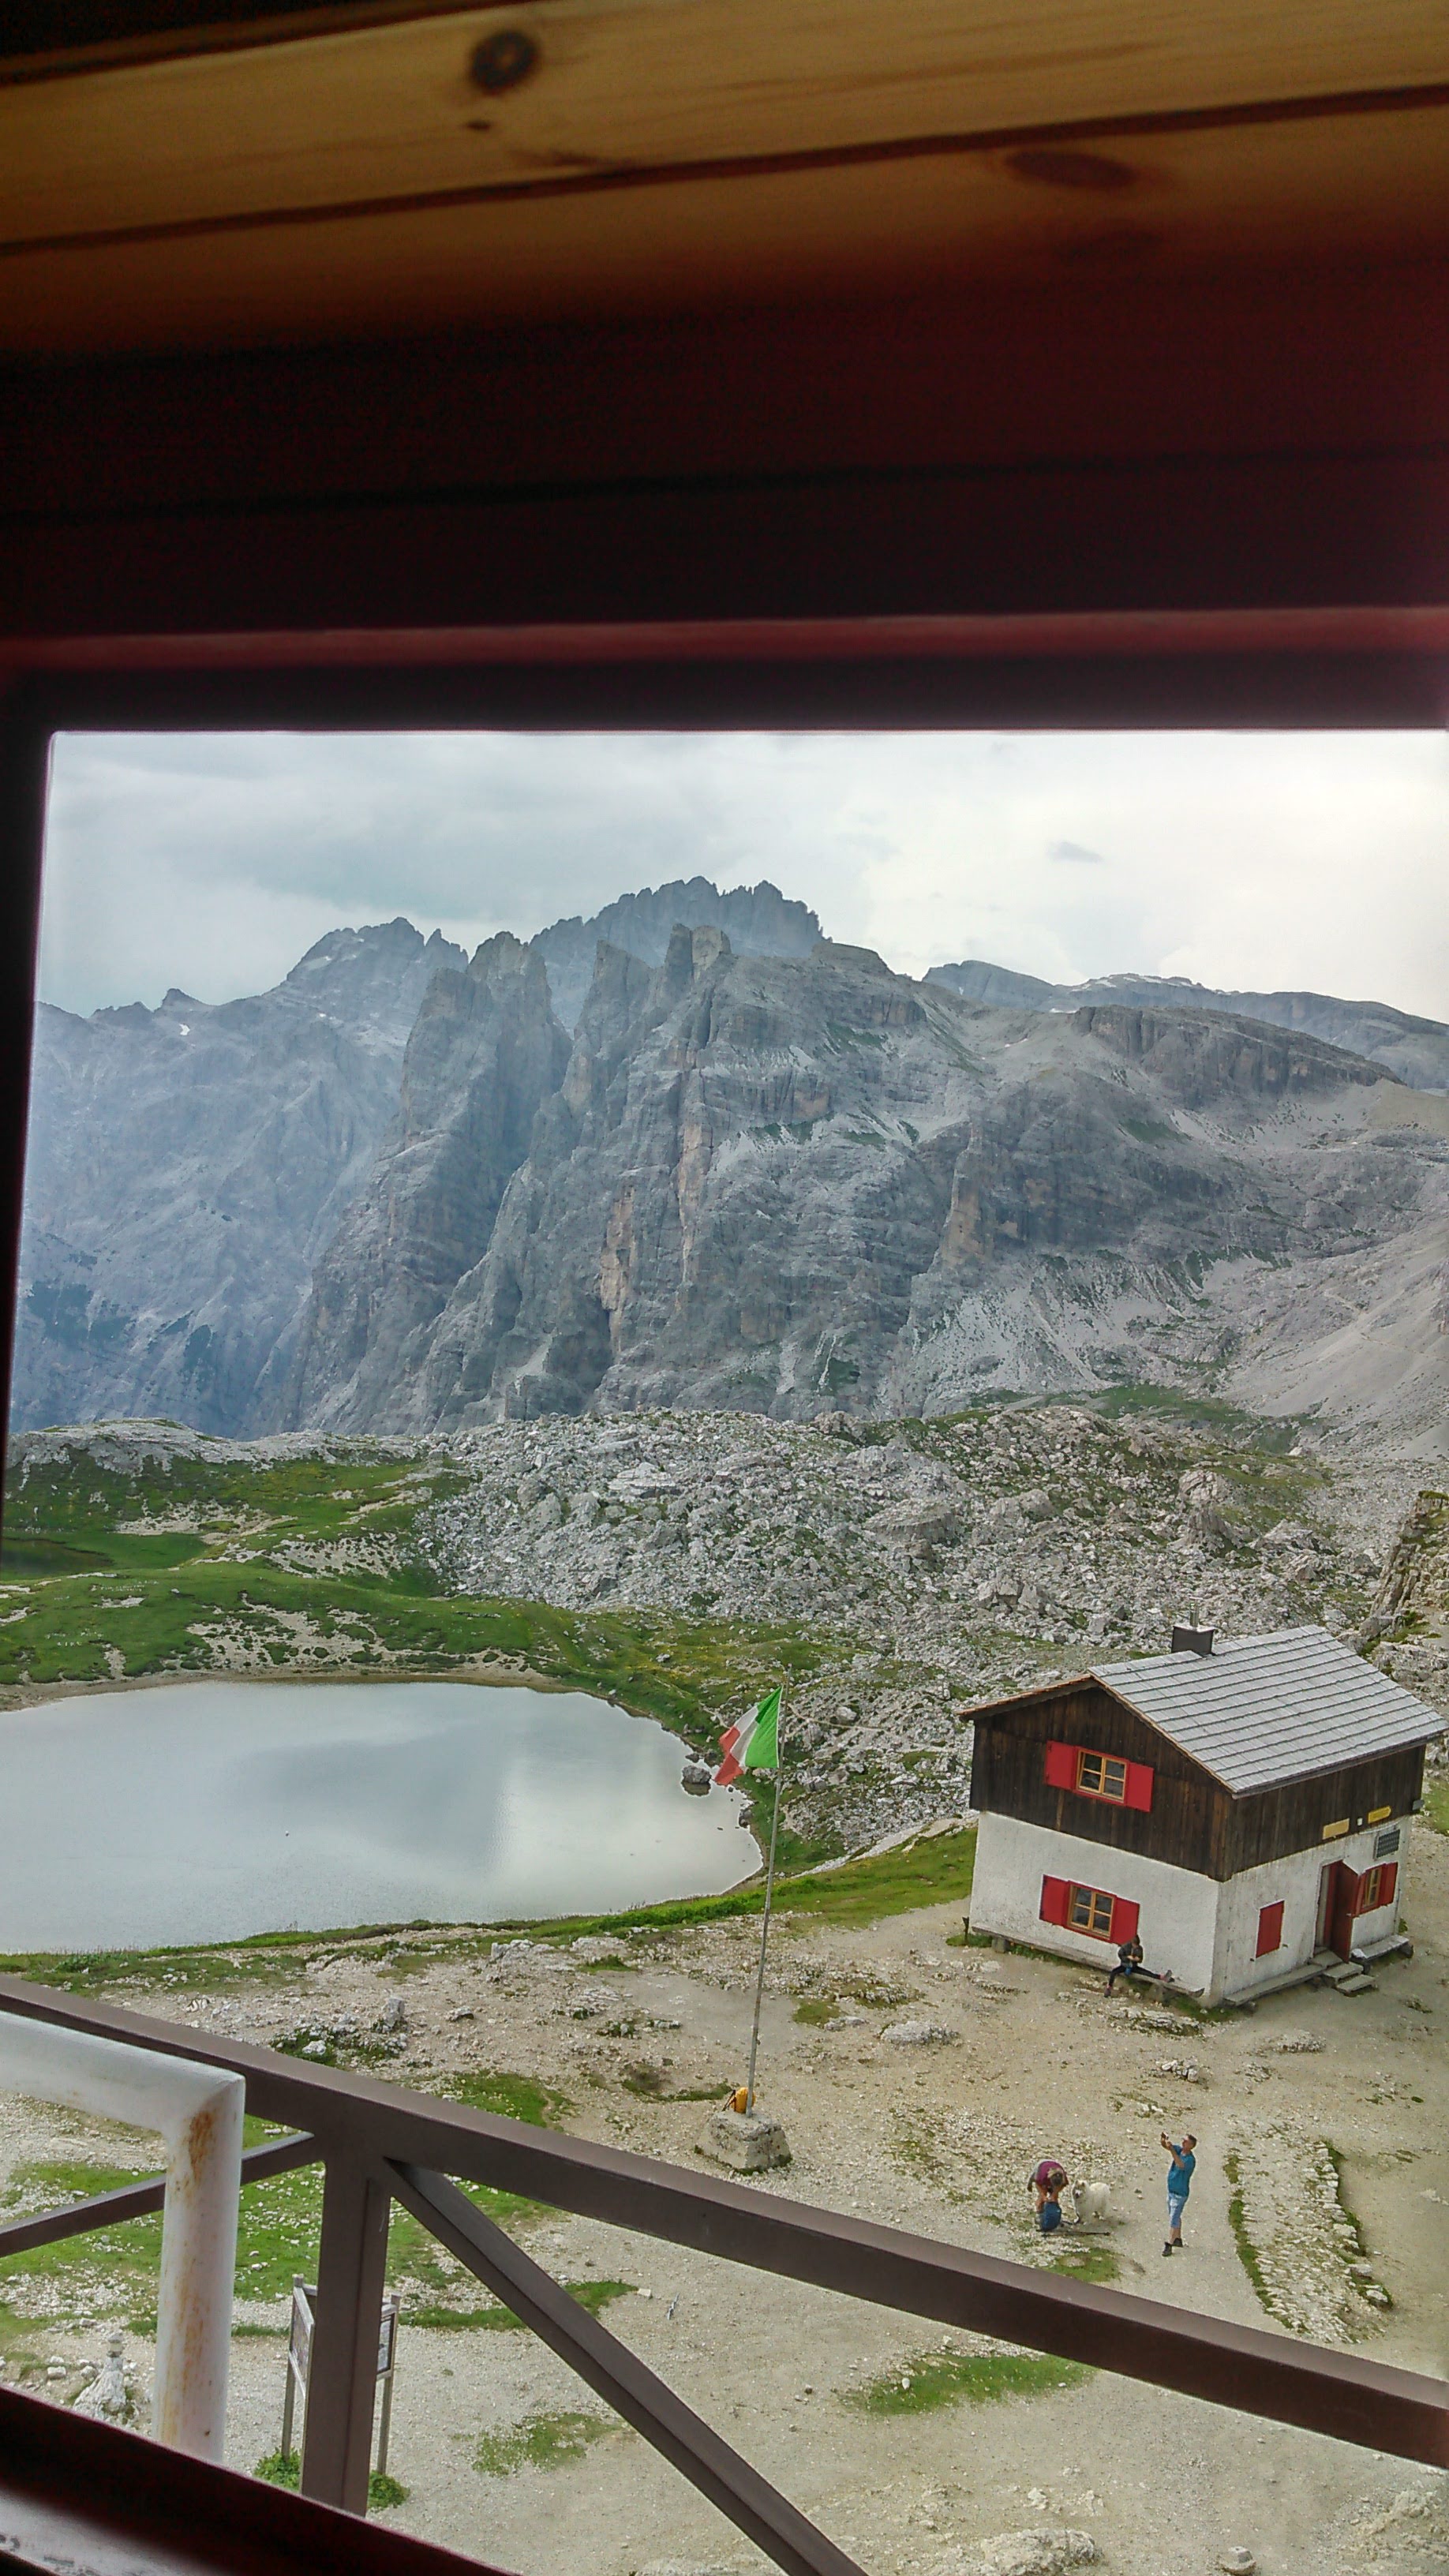
Rifugio Locatelli was huge! We slept on the top floor in one of the many dormitories. There was one small window and we felt very lucky to be next to it. The dorm on the floor below appeared to be a bit nicer. There were also smaller rooms available at a higher price.
Day 9: Hike from Rifugio Locatelli to Toblach with Ferrata delle Scallete up the Torre di Toblin before breakfast
This was our last day of ferrata in the Dolomites! And we went out with a bang. Well, not in terms of ferrata, but in terms of mileage and elevation loss.
Prior to breakfast at our hut, we climbed the Torre di Toblin (also called Torre Toblino). I was anxious to get going and headed out before Erik. We didn’t quite agree on our route though (there are trails everywhere in the Dolomites) and we ended up getting separated. Finally, we independently decided to climb the peak by ourselves. As I neared the top of a series of ladders on the ferrata, I heard some noise and called to Erik. I had been calling him several times previous to this, but now he answered! He had just started heading down and he climbed back up so we could enjoy a brief bit on the summit together.


After a breakfast of bread, jam, and hot chocolate (this seemed to be the typical fare at the huts), we hiked off towards Toblach. We had many miles to go, a bit of climbing, and 7,000 feet of elevation loss. We had a train to catch and therefore we kept up a swift pace. As we descended to the Passo Grande dei Rondoi, we encountered a group of what looked like a high school cross-country ski team. There was a bit of ferrata in this section. It was well protected in a wet, shallow gully, and we didn’t don our ferrata kit. Then we hiked back up over the Forcella del Lago pass before beginning our big descent into Toblach. Once we got down to the road, we had to walk along it for a bit, but eventually we were able to hike on paths through the woods. Owing to some clouds, Lake Toblach wasn’t quite as stunning as had it been a sunny day.

Soon we were in Toblach proper, ready to board our train for more European adventures, but no more ferrata in the Dolomites!

If we had to do this trip again: While this trip was far from perfect, it was challenging both mentally and physically and hence ended up being a really great adventure.
Best decisions: Our first day hike of ferratas- Ray Gusela, Novolau, Averau with an absolutely unprecedented view from Averau; doing the ferrata Lipelli and climbing Tofana di Rozes on Day 4 when the weather was best; not doing the extra ferrata on Day 7 when we were so tired and a storm came in; staying two nights at Rifugio Locatelli so we could enjoy a “leisurely” day hike and the area.
Next time: I would definitely go back to Italy. There were some ferratas in the Cortina area we missed out on- most notably the Cesco Tomaselli and finishing the Punta Anna. I might be more inclined to head to Bolzano though. I figure if I’m in Italy, I might as well enjoy the architecture. We were able to do this on our previous trip in the area around Riva del Garda but the Cortina architecture was pretty bland. So perhaps we could do a hike from Cortina to Bolzano! One of the things we’ve found is that it can be nice to stay in the same place for a few days in a row to spread out our stuff and make it feel like home.