
This post is all about geeking out on calorie to weight ratios. The goal is to pack as many calories into as light and dense an area as possible. I’ll start with food accessories and then go to the actual food we bring backpacking- both intended for two people out for seven days without re-supply.
Food Accessories
We bring the bare minimum and use accessories for multiple purposes (i.e. bowl serves for breakfast, dinner, and as a cup). Once we’ve figured out the bare minimum, then we decide on products based on quality, weight, size, durability, function, etc, and not necessarily in that order.
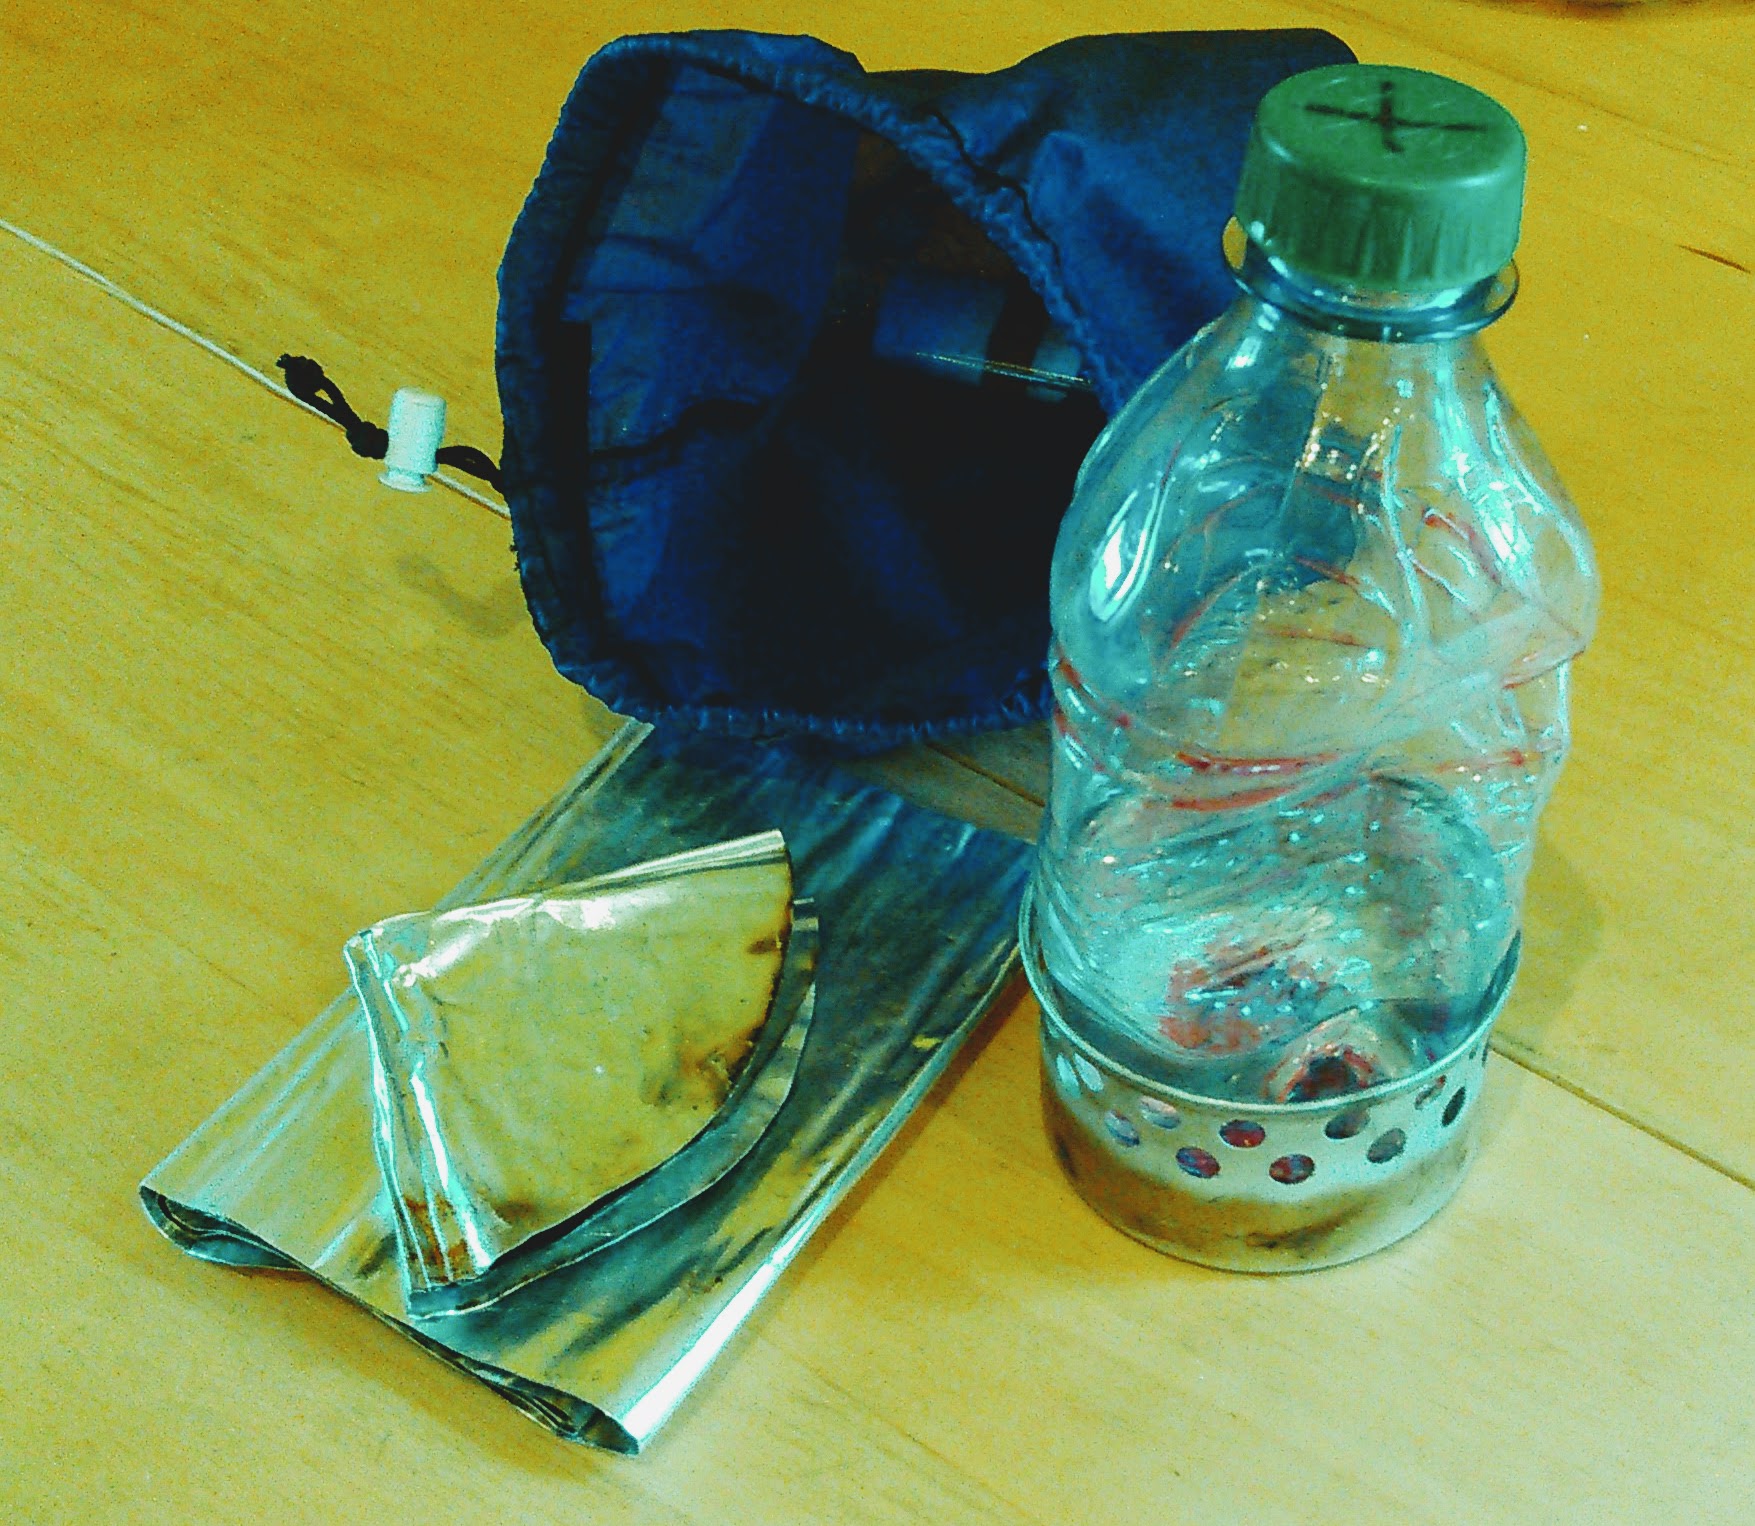
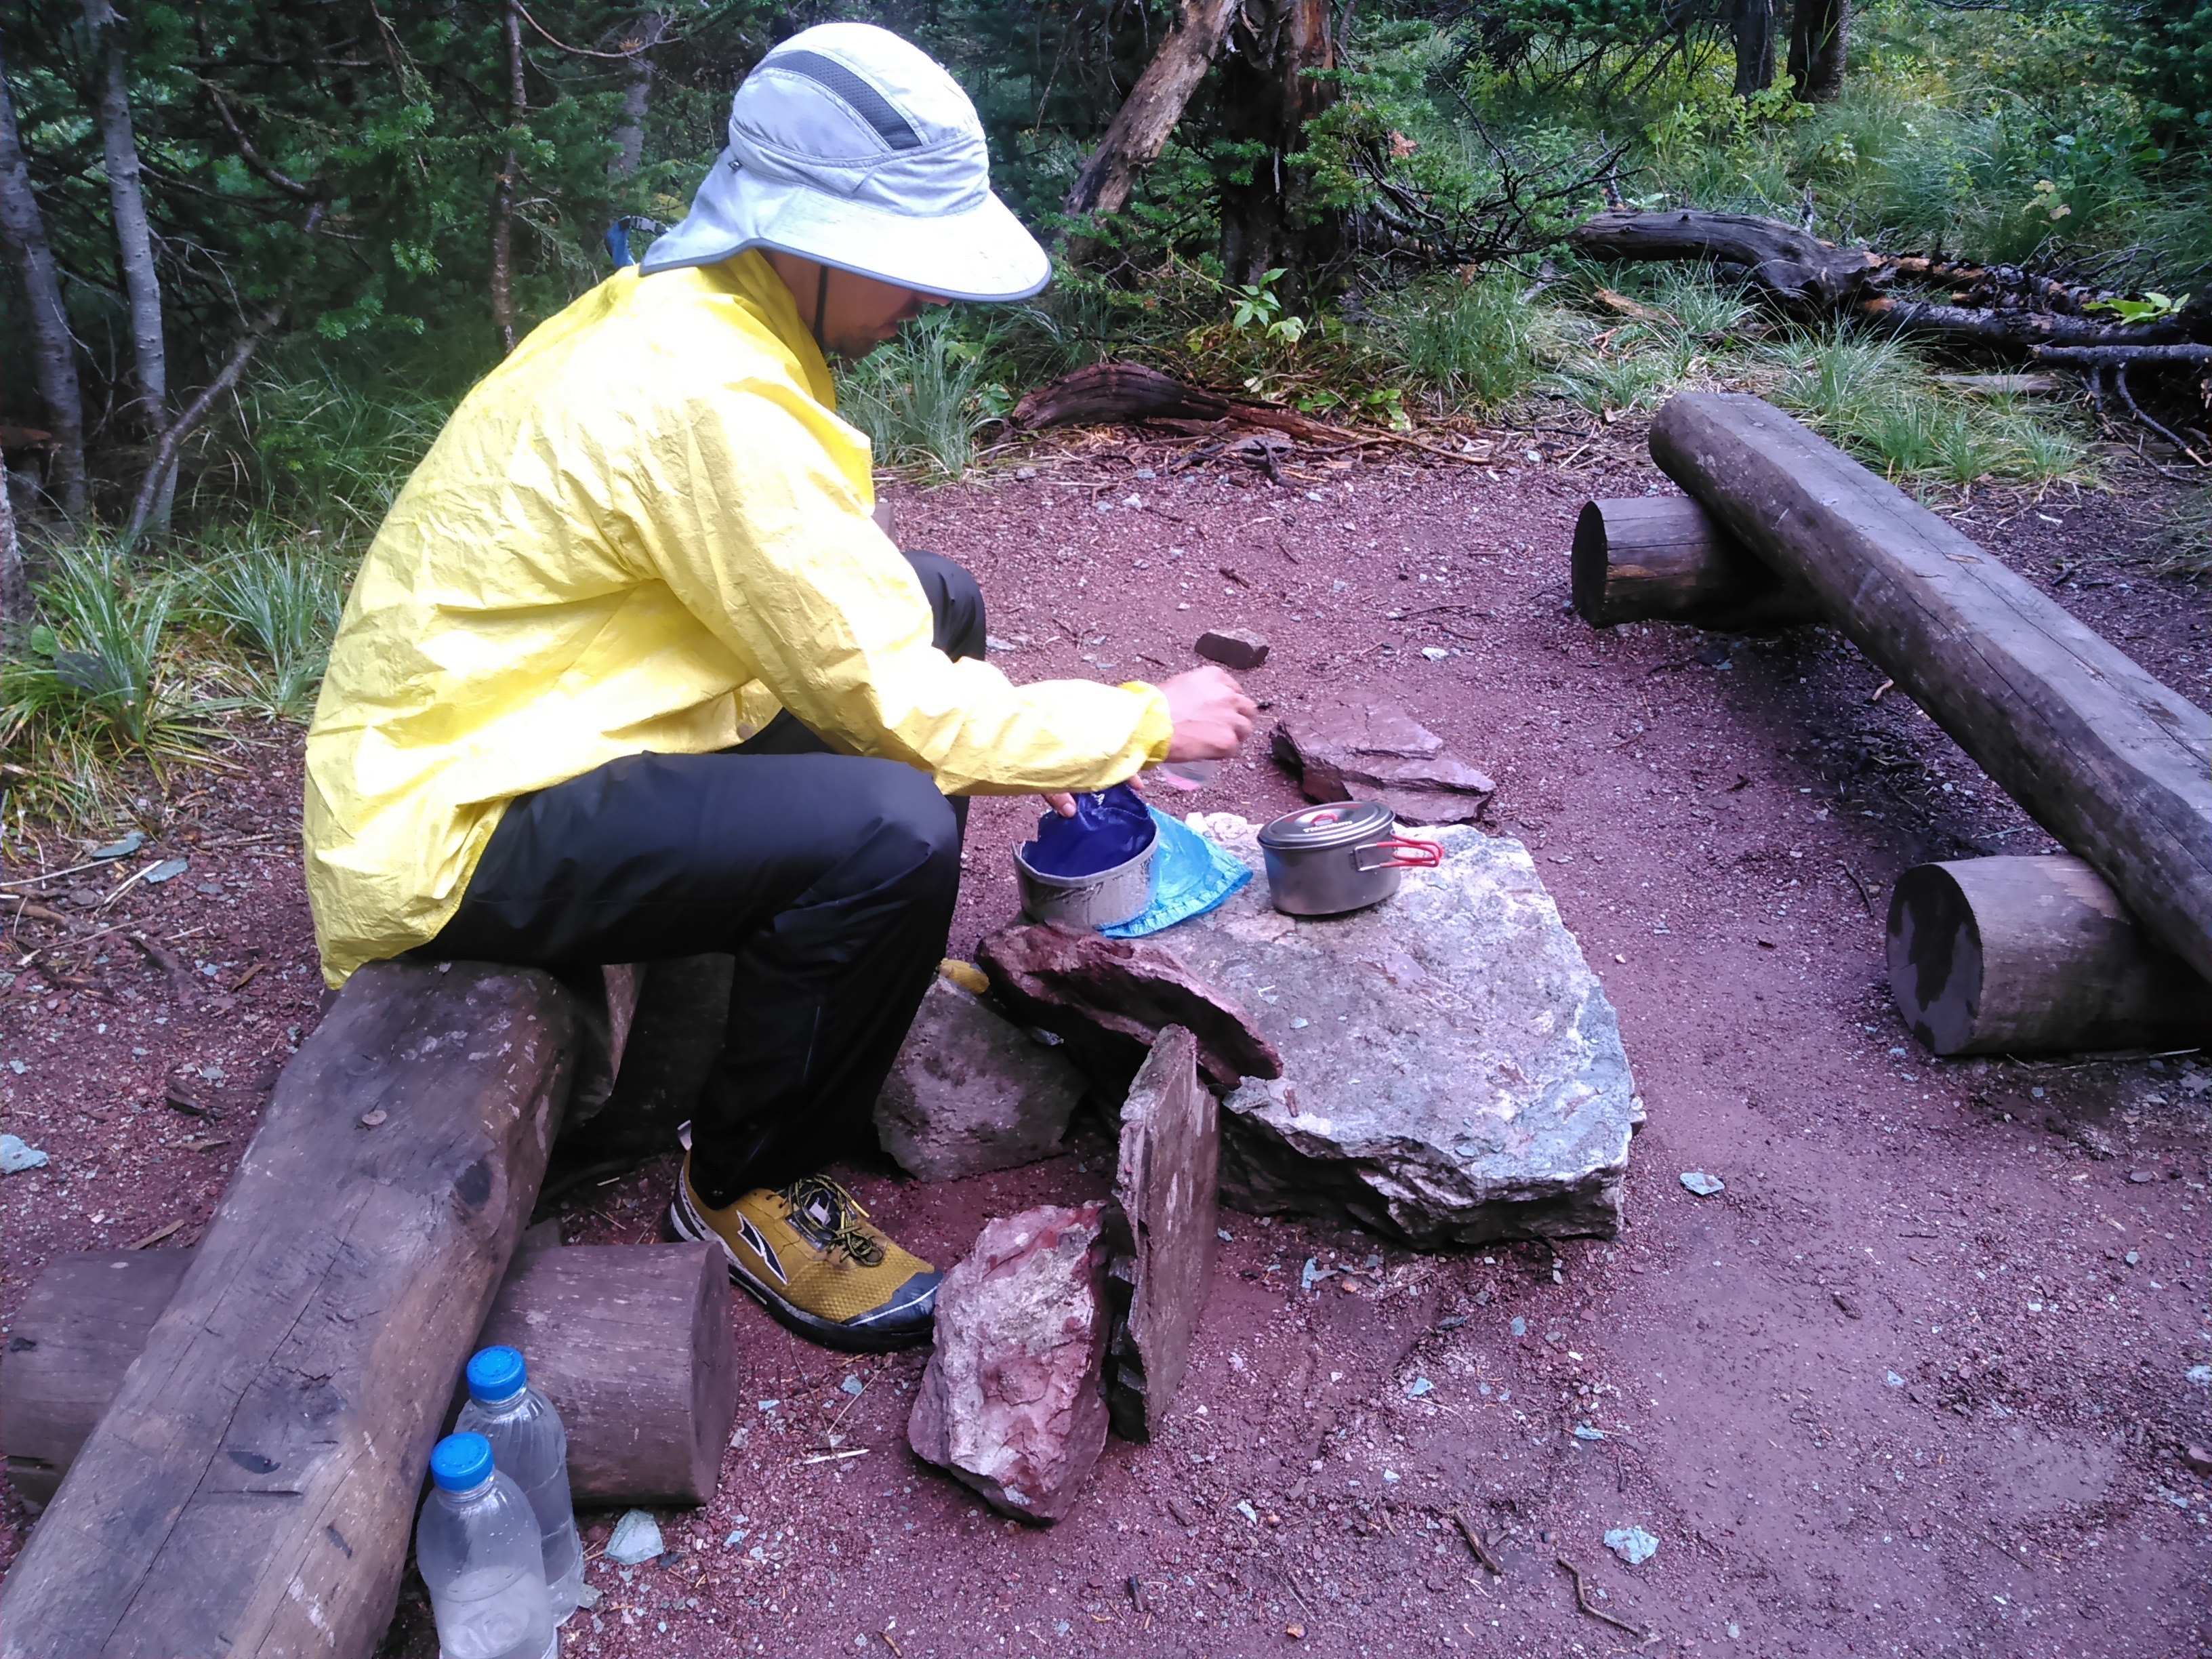
Stove
Back in 2010-2011 Erik got into ultra-light backpacking. With this in mind, he made the switch to the cat food can stove. This stove can be made from a cat food can or a potted meat can but must be aluminum. Everything more delectable, like tuna, comes in steel cans which are no good because they are heavy, rusty, and harder to cut. This is also why we’ve had a stack of potted meat cans in our cupboard for years.

Initially Erik played around with a few different styles of the cat food can stove but found that the Supercat is the best model. (Link also discusses how to use). These also make incredibly cheap but utilitarian gifts:)

Note, this stove does not do well in the wind and so a windscreen, made from aluminum is essential.
Fuel
If using the cat food can stove, you must use denatured alcohol. This comes in a few different varieties- a yellow HEET bottle (gas-line antifreeze and water remover; the RED BOTTLE DOES NOT WORK) from gas stations or auto parts stores, a gallon container of denatured alcohol from a hardware store, methylated spirits in the paint aisle at the hardware store (had to do this in Banff), and in a pinch, Everclear from your local liquor store (most expensive and least toxic option).
Pot
Our pot is the Ti Ultra Light Pot #3 by Evernew. It’s made from lightweight titanium and we got the 1.3 liter model. It has a lid and handles that fold out for cooking. Erik made a pot cozy from Reflectix Double Bubble insulation that helps cook the food after turning off the stove (to conserve on fuel) and that allows us to hold a comfortably warm dinner on cold nights. We bought a Cooking Pot Stuff Sack from Zpacks for 0.14 oz and $19 to stow the pot. Inside the pot we store the stove, fuel, wind screen, and lighter inside another bag.
Spoons
We only bring spoons which we use to eat our granola for breakfast, spread peanut butter on our tortillas at lunch, for stirring dinner, and eating dinner. Yes, we do have angel hair pasta for dinner and while it might seem forks would be in order, we cut our angel hair before we go (see below) and usually it ends up pretty thick once we put in sauce and so spoons work just fine. We aren’t a big fan of sporks as food gets caught more easily between the tines and they can be pokey. We aren’t particular on the spoons we bring, but sometimes we will only bring one to save weight. Usually at least one of our spoons is more heavy duty. Recently we’ve been using Morsel spoons which Erik has cut down and smoothed out to perfectly fit into our pot. Yes, they are a big heavy, but this makes them stronger for spreading peanut butter from large containers:) If we bring a second spoon (so we could both eat breakfast at the same time), we might bring the very light clear plastic GSI Outdoor spoon (no longer available). This spoon would be too delicate for cooking dinner or spreading peanut butter.


Bowls
We use clear plastic 12 oz deli bowls that we got for free by asking for them at a deli at the grocery store. These are lightweight, durable, stack-able, and include lids. Usually we only use these for breakfast (as we share our dinner out of the pot) but if we go on a trip with others and want to be more civil, then we use them for dinner, too. Rarely, since they include a lid, we have stored leftovers in them and occasionally we have made up our breakfast the night before and then made sure they stay upright in our food storage container. Often we debate leaving the lids at home and frequently we do. Sometimes we write on these with sharpie marker so we know to whom each bowl belongs.

Usually for Erik and I we’ll bring two bowls but we often don’t eat breakfast together (since we try to get out of camp quickly, I’ll pack up the sleeping bag and sleeping pads while Erik has breakfast and then I’ll have breakfast while Erik packs up the tent), we might only bring along one bowl. Since they stack together so nice and only weigh 0.25 ounces, we’ll often bring two.
Food storage
Over the past several years we have used three different styles of food storage.
First and most often, we have stored our food in cuben fiber bags from Z-packs (the Large Food Bag) which weigh 1.5 oz and cost $39 and then used the 50 feet 2.0 mm Z-line Slick Cord as the bear rope to hang out food. Note, Erik previously tried the 1.2 mm cord but found it hurt his hands when our foods bags were bursting at the seams. The food bag and bear rope also come as a kit. In the rare occasions we were unable to hang our food and hard sided containers were not required, we have slept with our food in the tent (Superstition Wilderness in Arizona). The cuben fiber bags are waterproof, pliable, and lightweight. Each large size bag holds 3-4 days worth of food for two people.
Second include three varieties of hard containers. Initially we had bought the Garcia Bear-Resistant Container for the Adirondacks but found these heavy and hard to fit food into. For the John Muir Trail, we were able to borrow The Expedition Wild Ideas carbon fiber bear canister from Erik’s “uncle.” Erik added a bunch of padding to the cylindrical container so it would be more comfortable to carry. In Gates of the Arctic National Park we used a 60 L Canoe Barrel. While it was nice to have all our food in one container, it was ridiculously heavy.

Third, we purchased the Ursack Major XL last year and promptly put it to use. I was a bigger proponent of the Ursack than Erik, arguing that it is good for our escapades above tree-line. While the Ursack is certainly much heavier than our Z-packs system, it doesn’t depend on trees, and is significantly lighter/easier to carry than a hard-sided bear canister. We’ve only used our Ursack on two trips so far. It’s relatively easy to use (just tie it to a tree) and it’s nice to not have to do a bear hang. We have the Major XL which is just about the right size for seven days for two people. Thus far we have used two odor barrier bags inside our Ursack Major XL.


Food
Alright, now onto the yummy, or perhaps not so yummy, food. Our menu tends to be a bit monotonous and although Erik is quite sick of flour tortillas, we have yet to find a suitable alternative for our lunches. The vast majority of our food comes from ALDI, our favorite grocery store. We joke that we could be sponsored by ALDI:)
Breakfast
Breakfast consists of granola with added nuts, dried fruits, and whole powdered milk (we use Nido– find it in the Hispanic foods section of a large grocery store- not at Aldi). For denser packing, we pulse this concoction in the blender. Note, Erik likes it pulsed, not pulverized:) Our deli bowls (above) are 12 oz and hence we bring just under 12 oz of our granola mix for our breakfasts. In the morning we pour granola mix into the bowls and add water. Typically we eat our breakfasts cold but sometimes if we have extra fuel we eat our breakfasts warm. Typically, depending on the length of our trip, we’ll bring 2-3 flavors of granola so breakfast doesn’t get too boring.
Instead of adding nuts, another option is to add peanut butter powder (both plain and chocolate peanut butter) for protein. Another substitution would be hot chocolate mix for Nido.
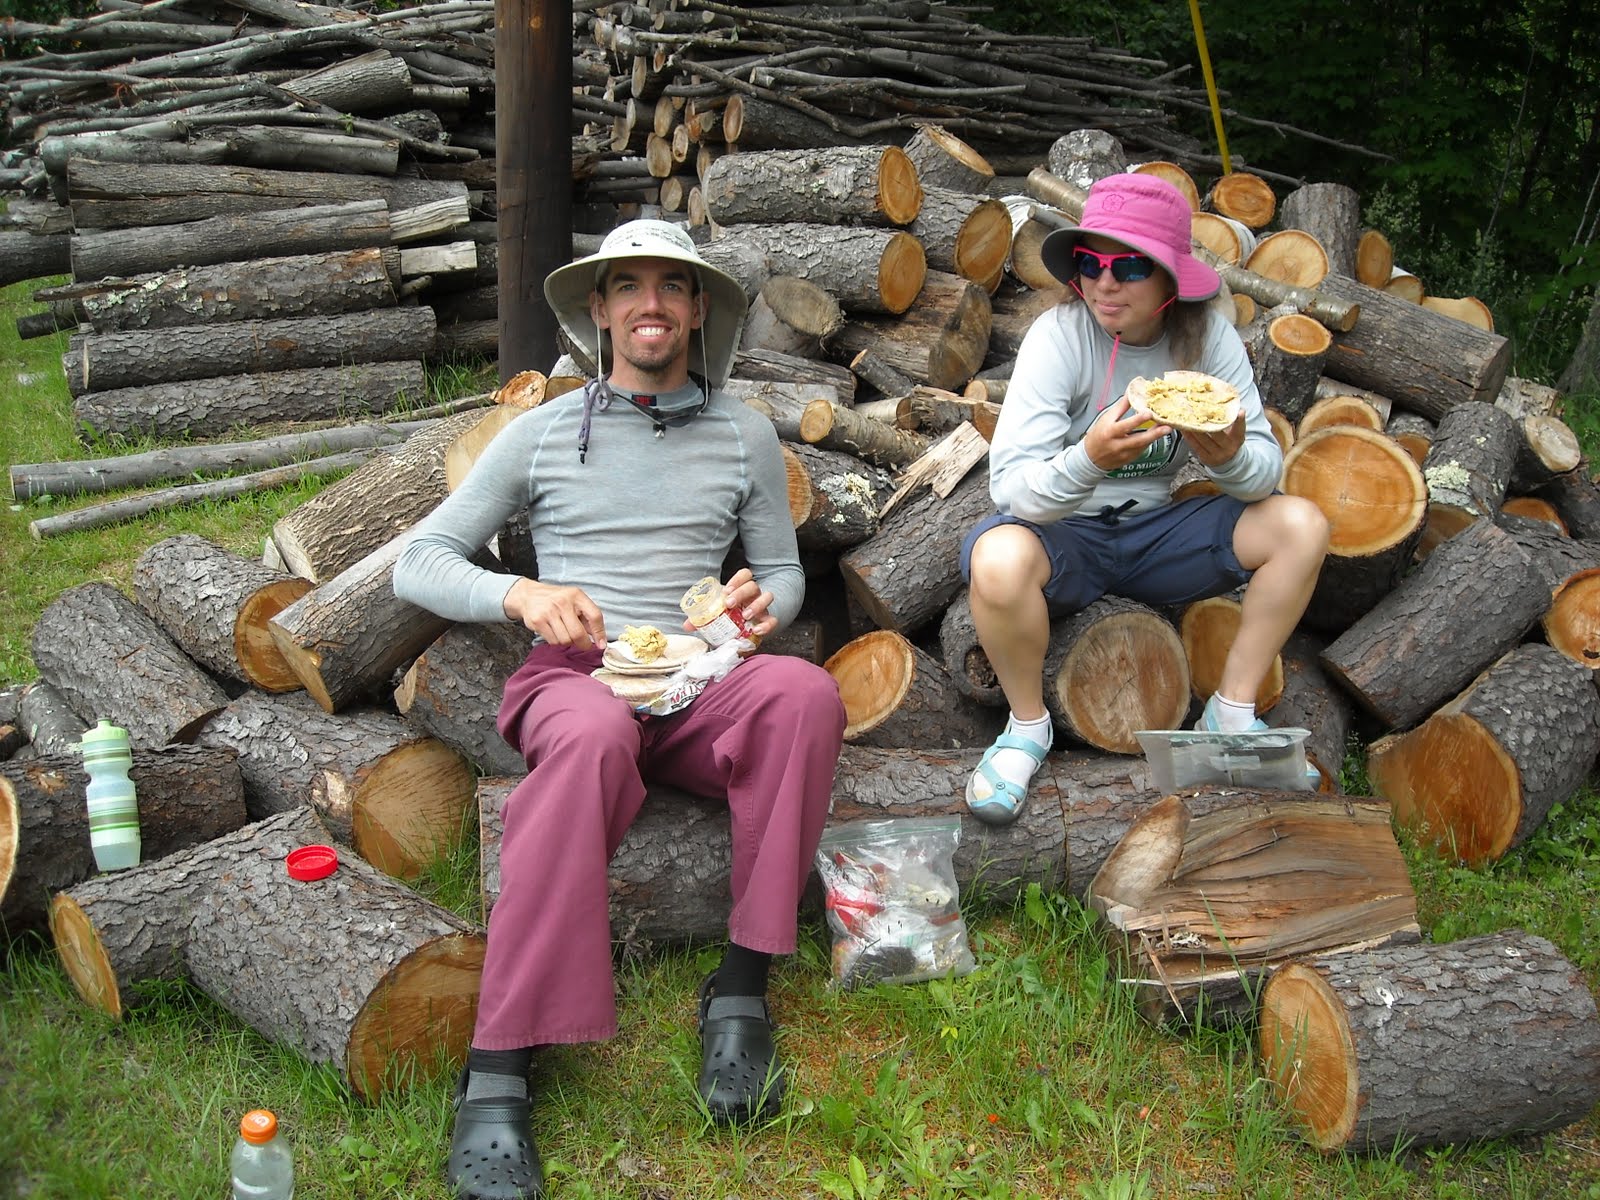
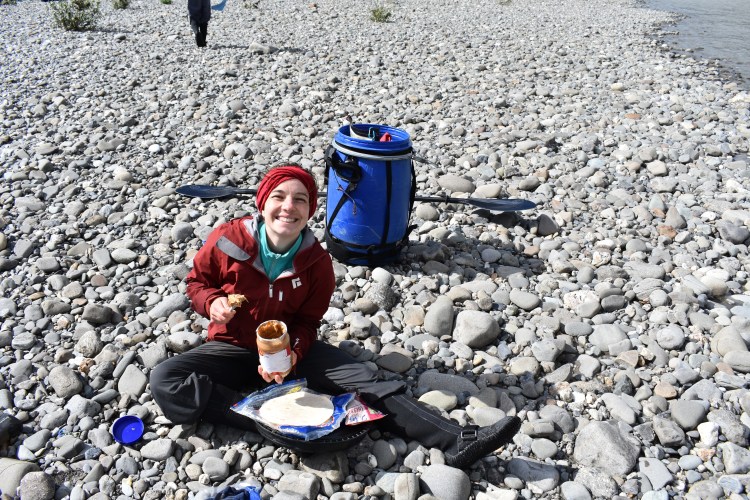
Lunch and Snacks
For lunch we each get two flour tortillas with peanut butter and dried fruit. Flour tortillas are the most durable and dense “sandwich bread” we’ve found. Bread, pitas, and whole wheat tortillas too often turn into crumbs. Although once we tried ciabatta rolls. These were durable but took up a boatload of space. Over the years we’ve learned that jelly/jam is simply too messy. Hence, we use dried fruit, usually bringing a few different kinds for variety throughout the week. On some trips, especially long trips, we might substitute Nutella for peanut butter, but this has much less protein than peanut butter. We have also used Yumbutter from time to time, available in squeeze packages which have their perks and drawbacks. These are expensive, sometimes hard to mix (so either won’t spread or initially comes out as a bunch of oil), and results in lots of packaging. Each tortilla gets one serving of peanut butter (2 Tbsp) and one serving of dried fruit (1/4 cup). We have used hummus instead of peanut butter in the remote past (if 2012 counts as remote past) but on those trips we mixed olive oil with hummus powder in an empty peanut butter jar, making a powdery explosion. Getting the right ratio of hummus powder, olive oil, and water was difficult so we gave up on hummus.
Snacks include one serving of nuts and a Clif bar per person or an equivalent bar. We’ve done a fair amount of research on nuts and macadamia nuts have the highest calorie to weight ratio. They also aren’t terribly appetizing, so after a few trips of bringing with way too many macadamia nuts, we tend to bring almonds, cashews, or mixed nuts on our trips now. Not all Clif bar flavors are equal in terms of their weight to calorie ratios. Again, white chocolate macadamia nut packs 260 calories into a bar as does peanut butter banana and some other flavors. Overall Clif bars are our favorite but we sometimes substitute for knock-off ALDI bars (fewer flavors available but also 260 calories per bar), LARA bars (moist, lots of flavors available, not as durable, around 220 calories per day), and most recently we’ve been bringing some PROBAR MEAL which pack 400 calories into 3 oz, making them the best weight to calorie ratio of all time. (For comparison, Clif bars have 260 calories in 2.4 oz.) Since these have almost twice the calories of two Clif bars, Erik and I will share one for the day. They aren’t sold at Aldi and are a bit expensive (we like to spend less than $1/bar, hence we don’t bring them as often).

Typically we go hobbit-style in terms of eating our lunch…i.e. first lunch is tortilla #1 on the day, second lunch is tortilla #2, and third lunch might be nuts and a Clif bar.
Dinner
Our basic dinner staples include angel hair pasta and olive oil. Why angel hair pasta? Because it cooks super quick in our cat food can stove (admittedly not the most reliable stove on the planet, although perhaps the lightest) AND it packs down super dense. Back when we did the John Muir Trail, Erik discovered that by taking 2 lbs of angel hair pasta and placing a few rubber bands around the long pasta, he can then cut the pasta into smaller groupings. Not only does this allow for more dense packing, it also makes it so the pasta fits in the pot better and can be eaten with a spoon. It has the best calorie to weight ratio of any carb (believe me, in 2012 we crunched the numbers on every shape of pasta, quinoa, couscous, rice, oatmeal, etc).


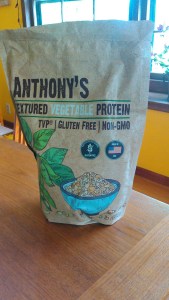
From here we decide on our sauce. Our absolute favorite is the taco meal we make with dried refried beans as our protein, taco seasoning, and dried salsa. This meal is so good we will usually have it twice when we’re out for a week. Our other go-to is traditional Mac-N-Cheese sauce (really powder). For these meals we’ll use textured vegetable protein (TVP) as our protein base with Mac-N-Cheese powder that we’ve taken from a package (but left the macaroni noodles at home because obviously they have way too much air), and some whole milk powder. Erik will open the powder packet and add the milk powder, and sometimes some cayenne pepper as well. Our third go-to meal is marinara sauce. Again, we use TVP and dehydrated marinara sauce and some parmesan cheese, although the cheese isn’t terribly dense or great for calorie to weight ratio. We’ve had varying levels of yumminess with our marinara sauce over the years. It seems a sweeter sauce works better as some sauces can end up bitter.


Otherwise I have tried experimenting with a good number of sauces. Sometimes I use a salad seasoning mix and parmesan cheese, or another boxed meal. If we are canoeing or out for a shorter period of time, we may mix things up with some mashed potatoes or couscous when weight and density don’t matter as much.

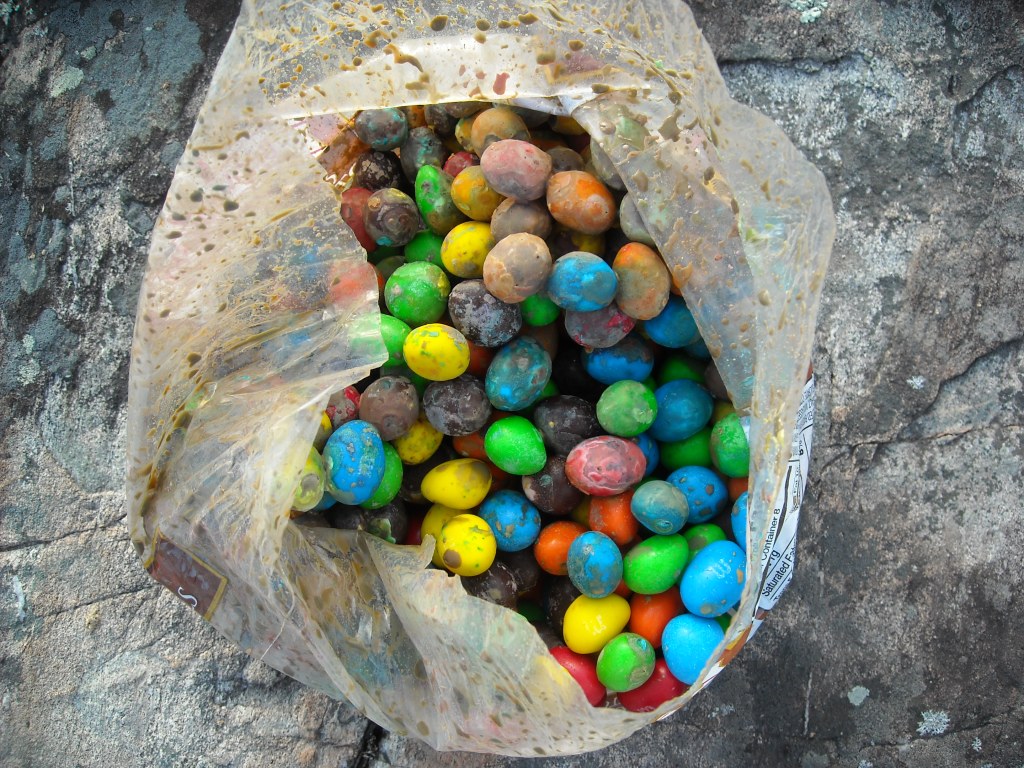
Dessert is peanut M&Ms. Always. One serving per person. They don’t melt when it’s super hot and they still tasted good after we accidentally soaked them in the bilge water for a day on Lake of the Woods. They also provide a bit of extra protein.
| Back Country Camping Food | Amount | Amount (grams) | Serving Size | Calories |
| (Per person, per day) | ||||
| Breakfast | ||||
| granola from store before milk powder | 1 cup | 70 | 3 | 350 |
| powdered milk | 1/4 cup | 30 | 1 | 150 |
| almonds | 1/4 cup | 30 | 1 | 180 |
| dried fruit | 1/3 cup | 50 | 1 | 150 |
| Lunch | ||||
| Tortilla | 2 | 140 | 2 | 400 |
| Peanut butter | 4 Tbsp | 64 | 2 | 400 |
| dried fruit | 1/2 cup | 80 | 2 | 260 |
| nuts | 1 oz | 28 | 1 | 170 |
| energy bar | 1 | 68 | 1 | 260 |
| Dinner | ||||
| pasta | 5 oz (1/3 cup) | 140 | 2.5 | 500 |
| sauce (powdered milk and cheese dry)* | 1/2 cup | 60 | 320 | |
| TVP/protein | 1/4 cup | 24 | 1 | 80 |
| olive oil | 1 Tbsp (15 mL) | 15 | 1 | 120 |
| peanut M&Ms | 1.5 oz (1/4 cup) | 42 | 1 | 220 |
| Total | 841 | 3560 |

3 thoughts on “Ultra-light Backcountry Camping Gear: Food”